
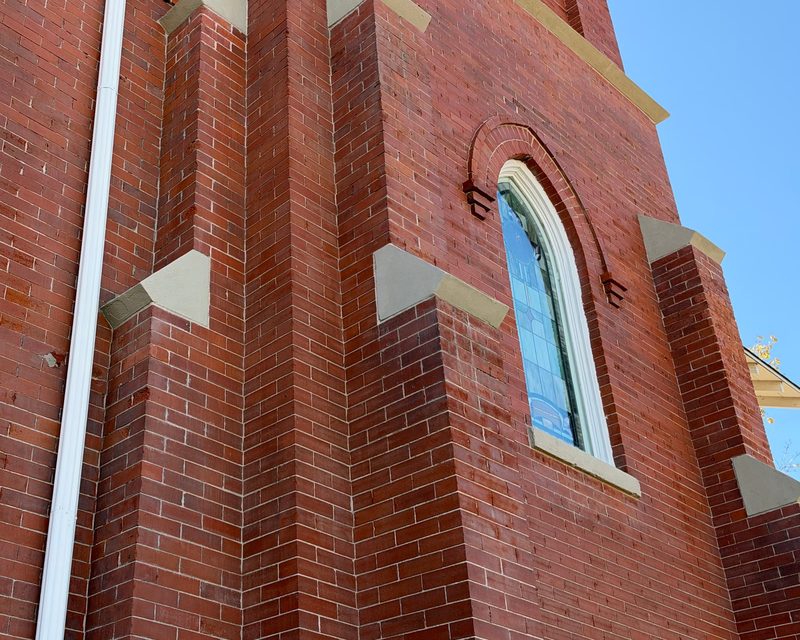
The Church of the Advent in Villa Park was built in 1913 as the Seventh Avenue Congregational Church and was designated a Denver Landmark in 1998. In 2025, Brick Repair Denver restored its brick and cast stone under a Colorado State Historical Fund grant from History Colorado. Our assessment shaped the grant, and we carried the project through every deliverable: conservation cleaning, comprehensive and selective repointing by hand in a lab-matched lime putty mortar, cast stone repair in place of a full rebuild, deep restoration of the bell tower cast stone band, and brick repairs in select areas.
01 · Existing conditions
What We Found: Staining, Failed Repairs and Open Joints
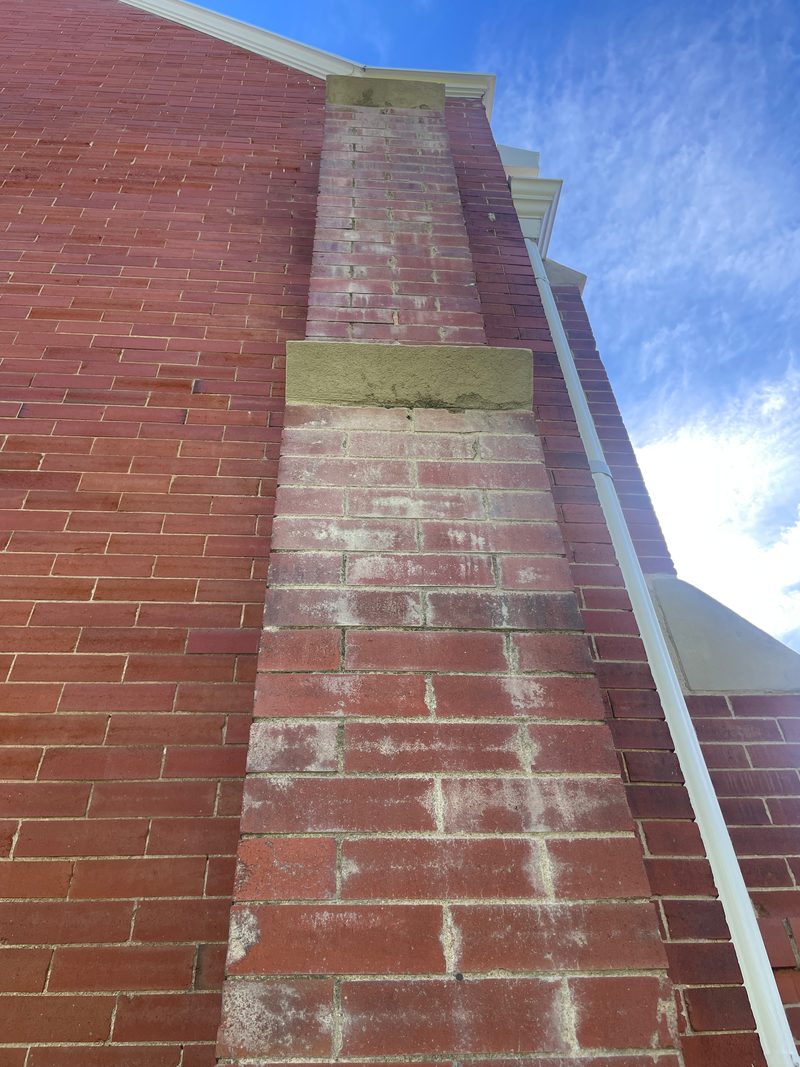
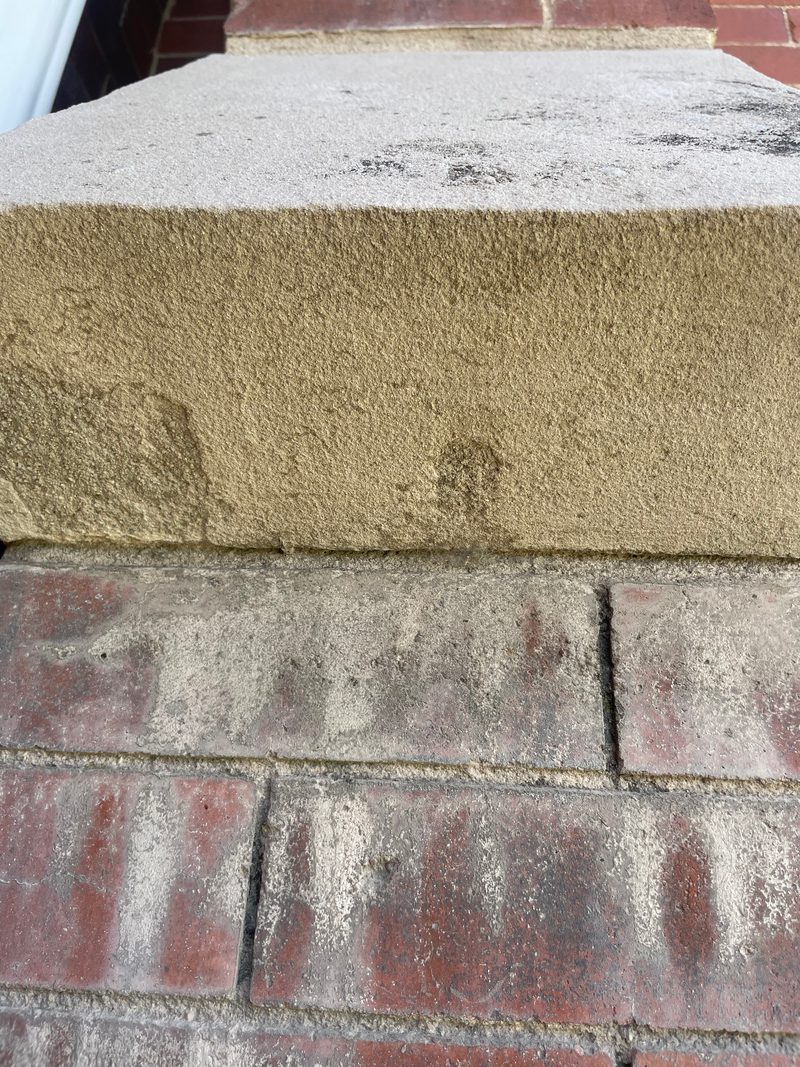
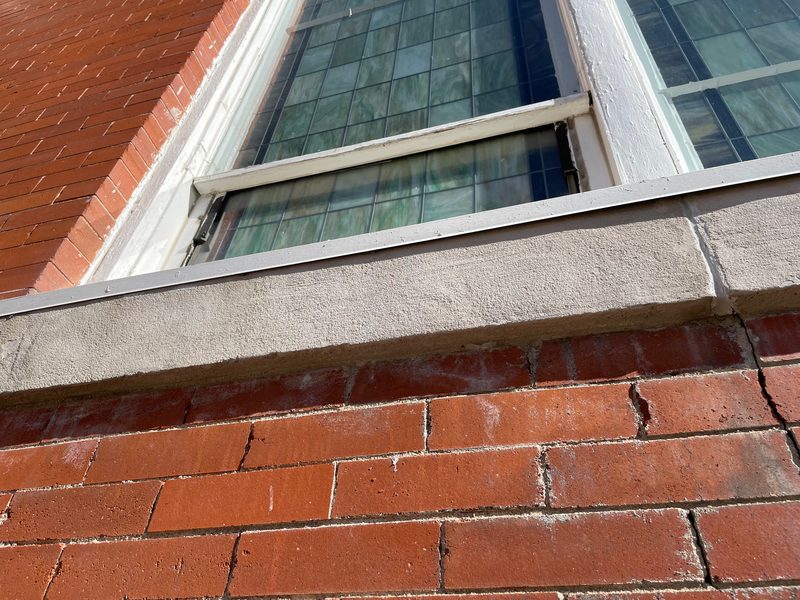
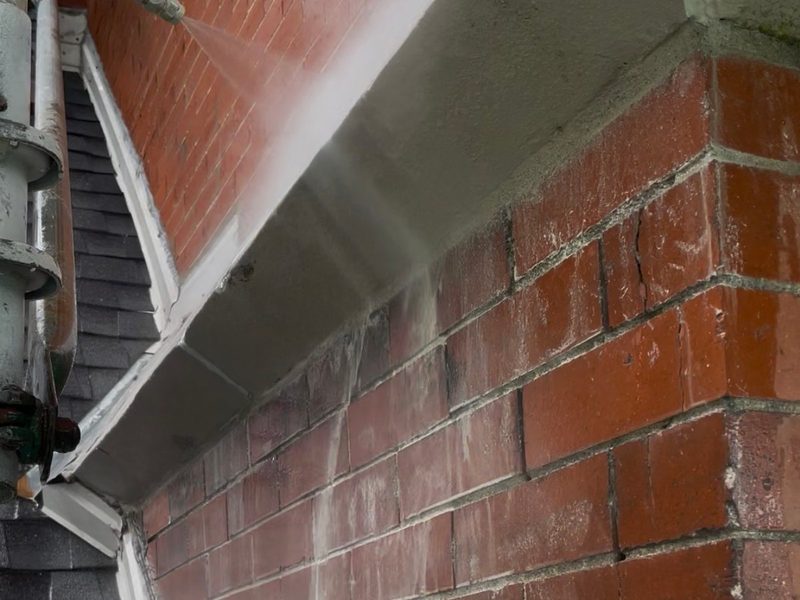
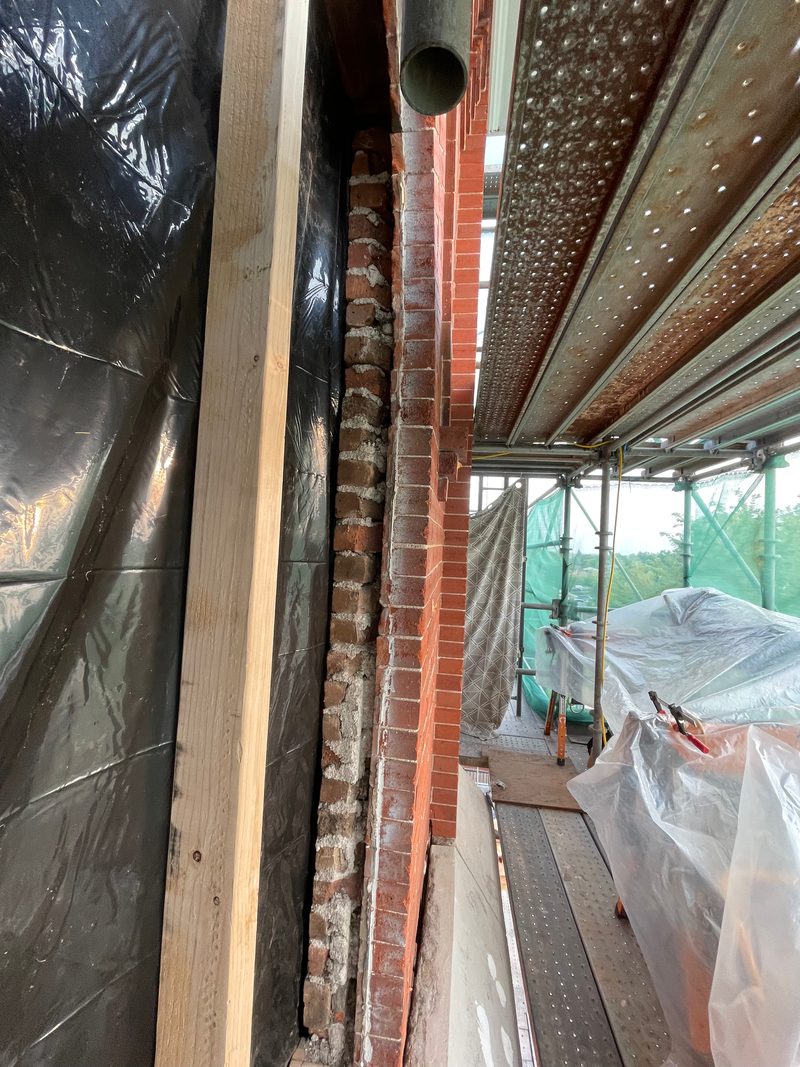
The church had likely not been cleaned in more than 20 years. Heavy atmospheric and water staining darkened the brick. Algae, moss and other biological growth had worked deep into joints that had lost their mortar, worst on the north elevations of the bell tower. Joints were open, bricks were cracked in places, and earlier repairs on the cast stone were failing.
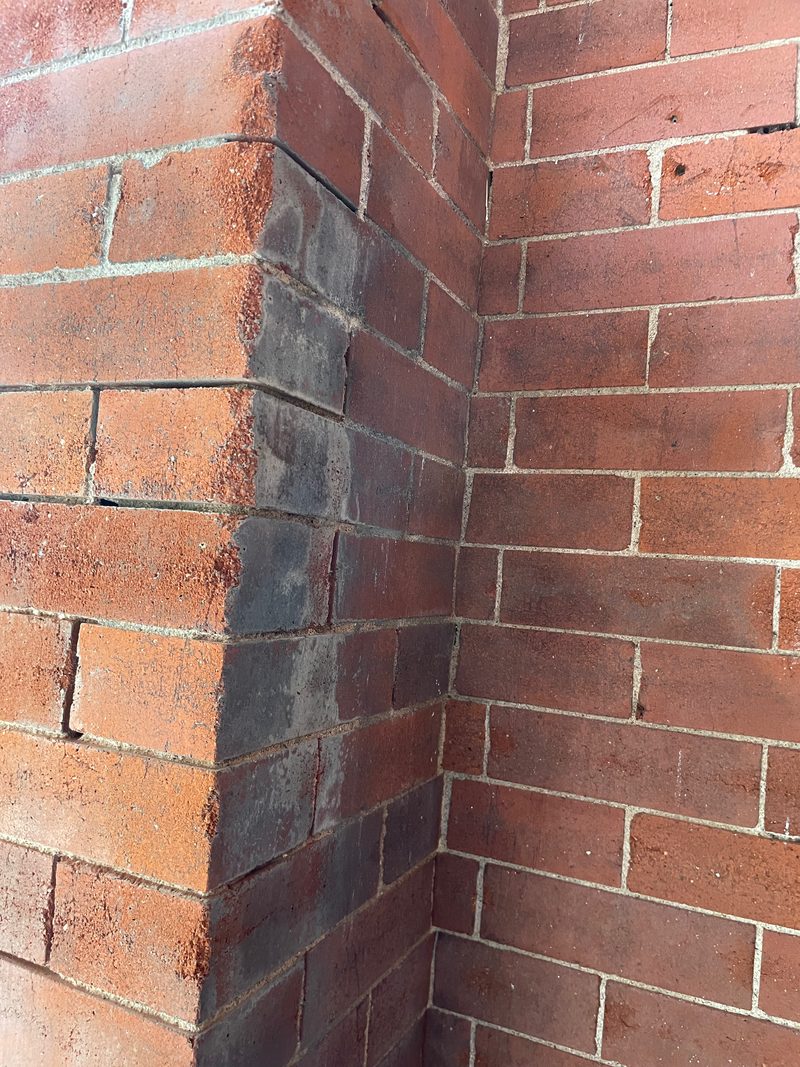
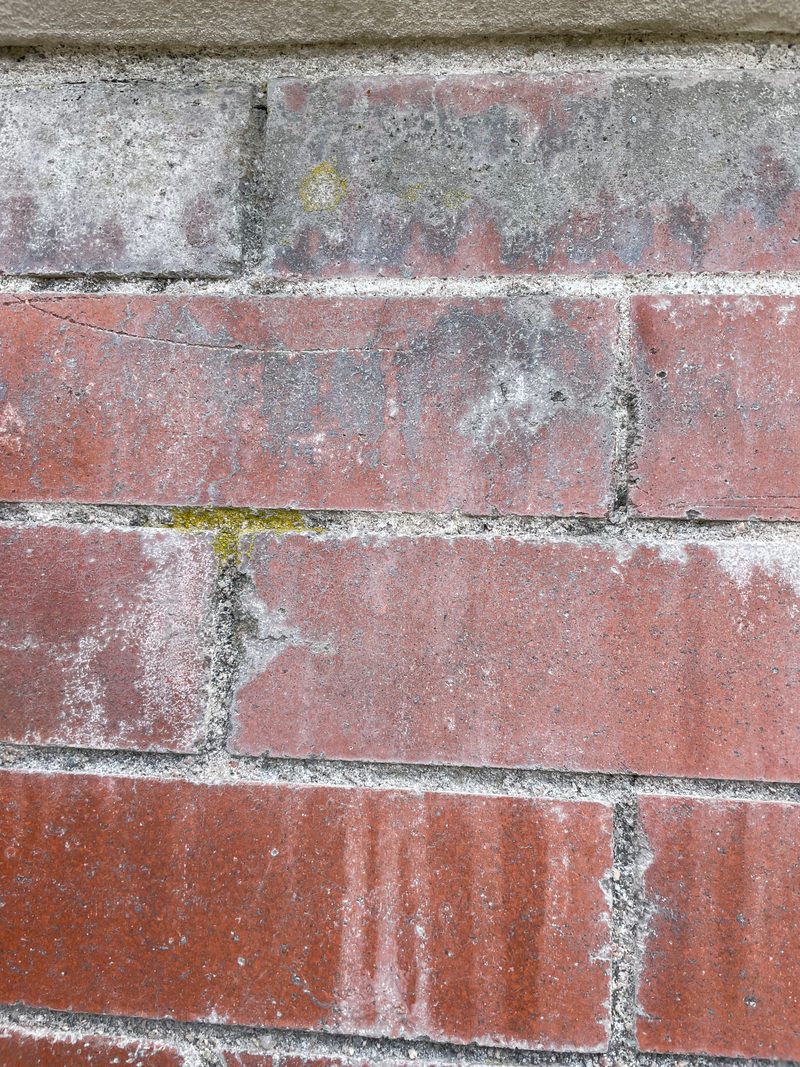
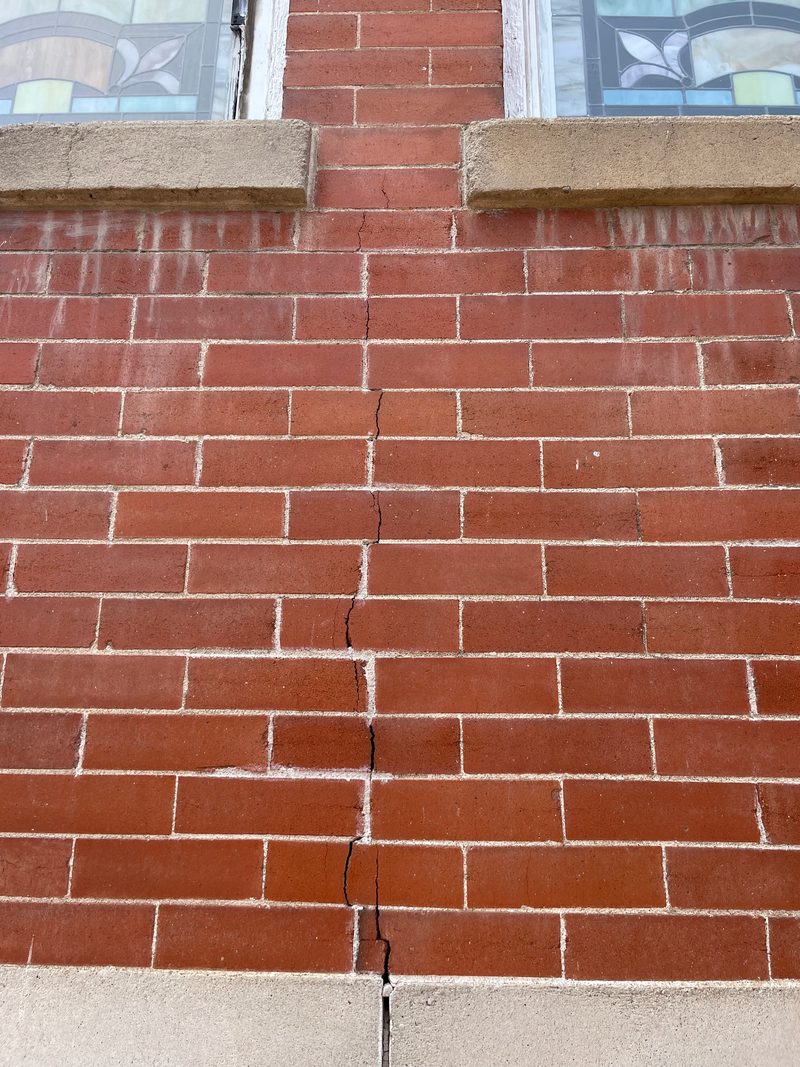
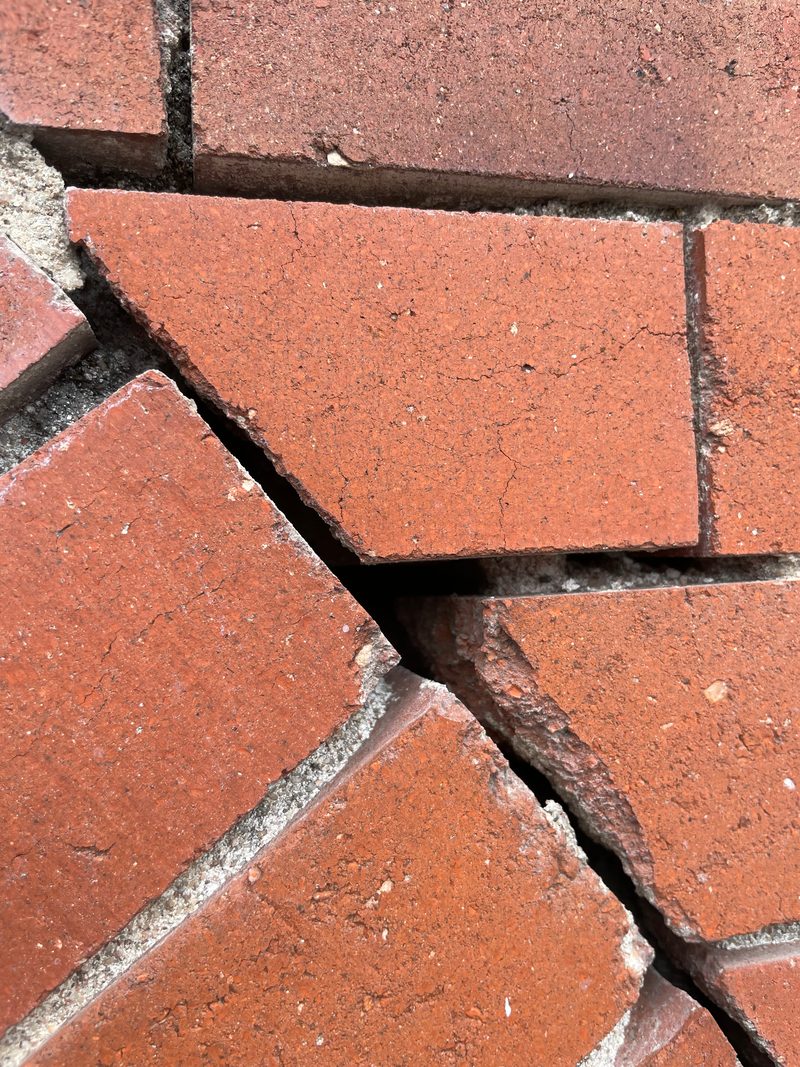
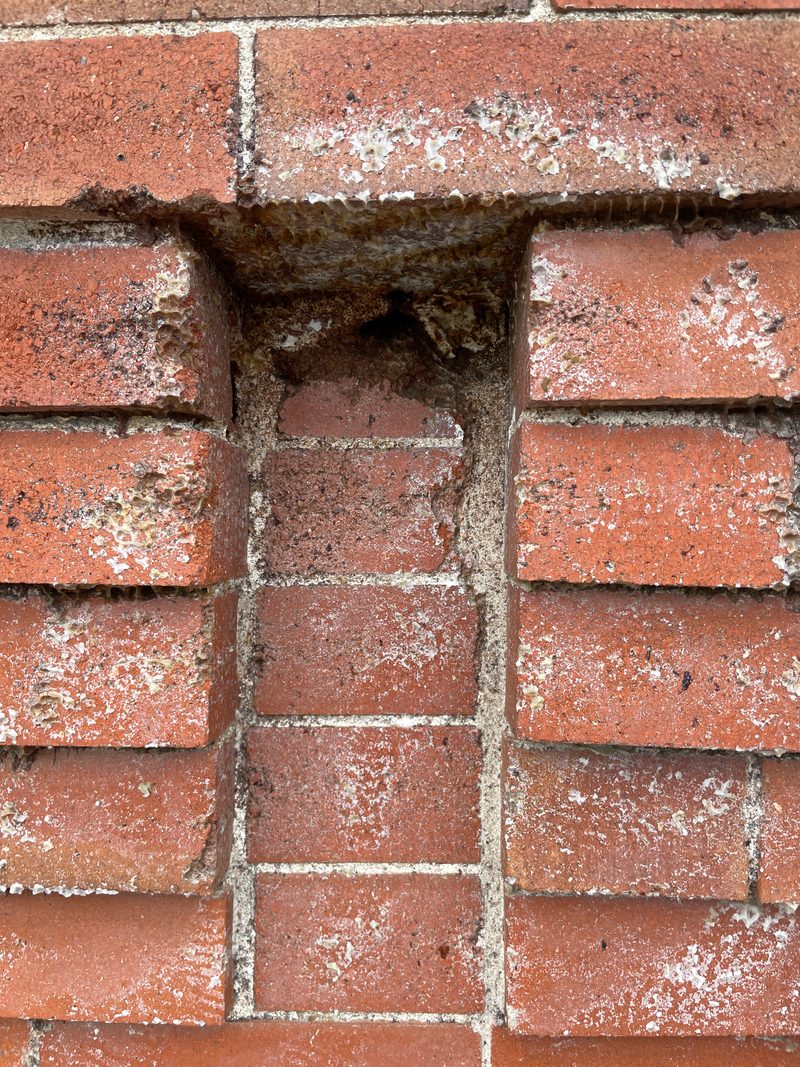
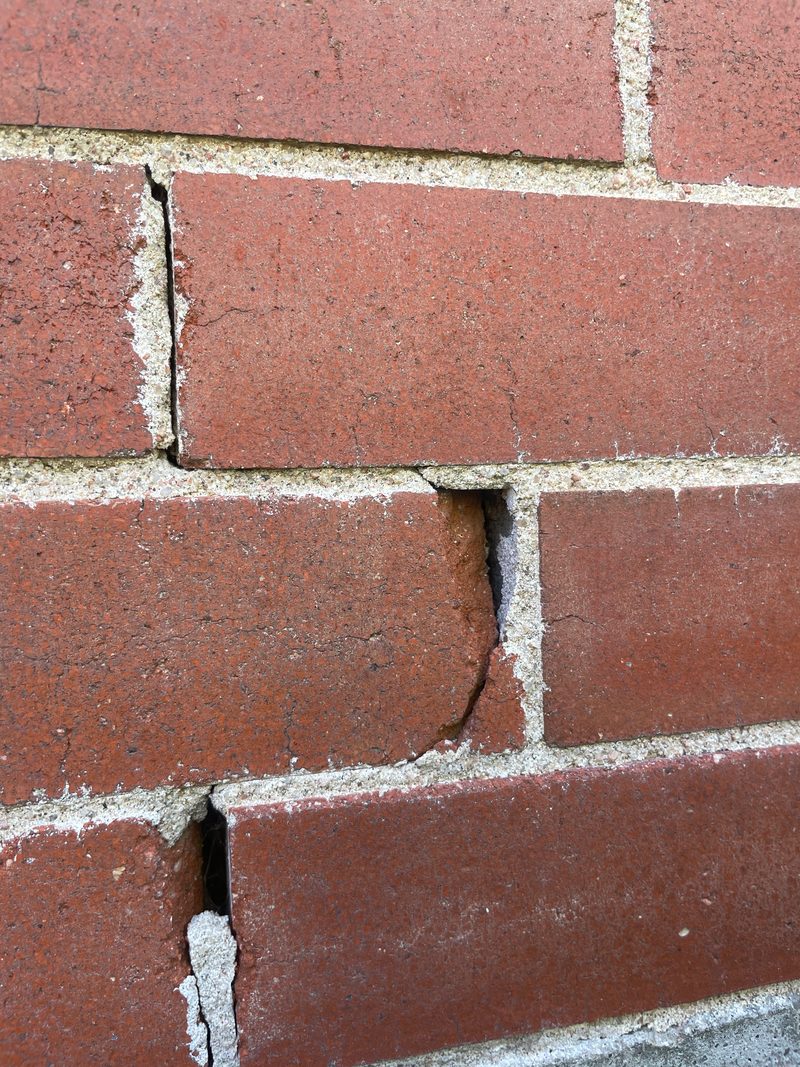
Featured condition
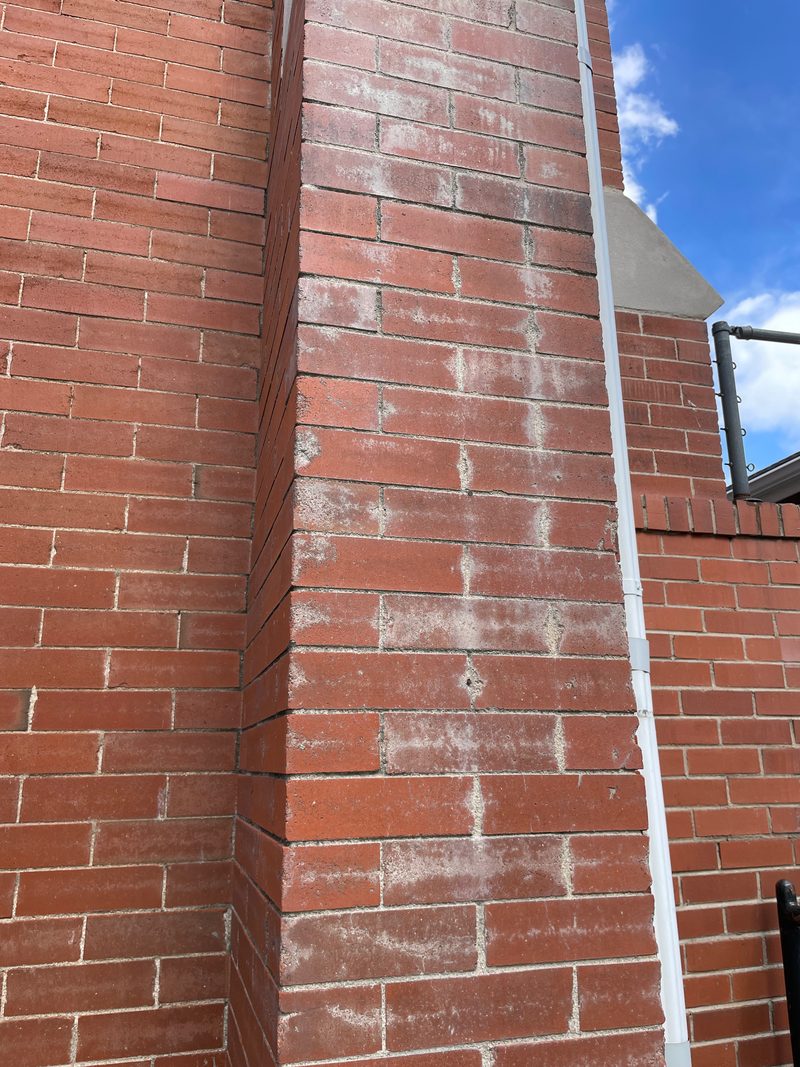
The White Staining Was Not the Mortar
The church had been told the white staining on its brick came from the mortar. Our assessment traced it to something else: failing, powdering cast stone repairs made in the early 2000s.
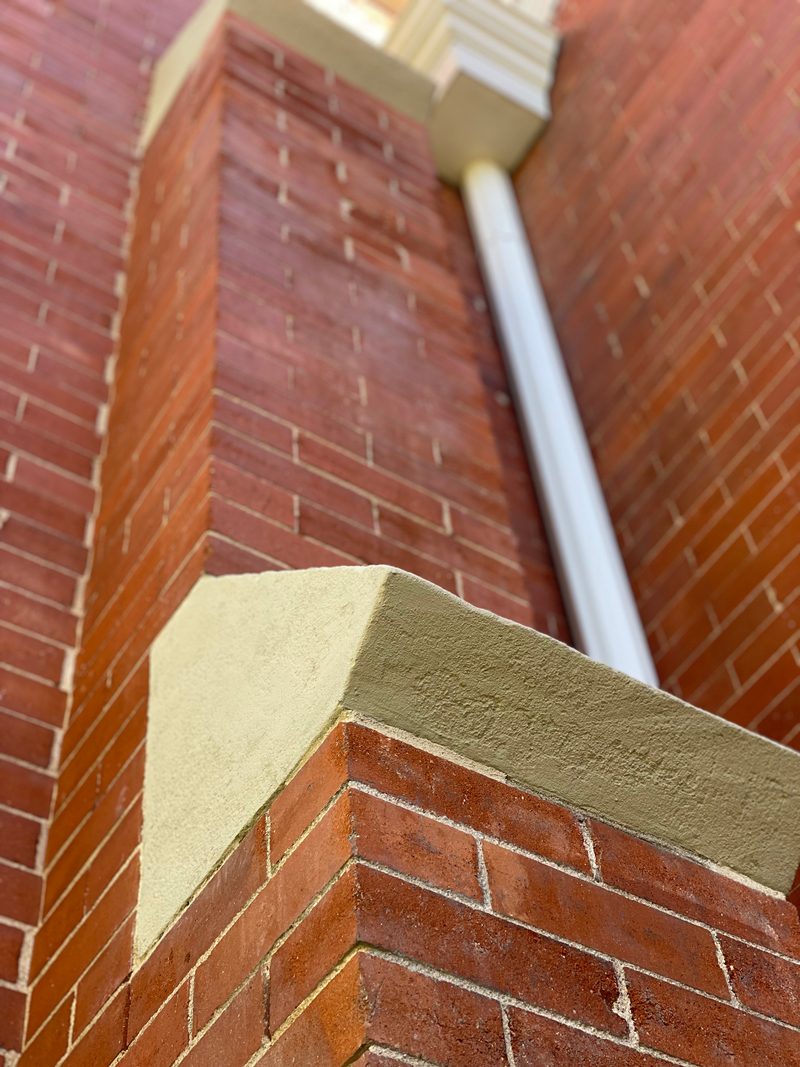
The white runoff sat directly below the cast stone, under the buttress caps, the cast stone windowsills and the cast stone band on the bell tower. Fixing the mortar alone would not have stopped it.
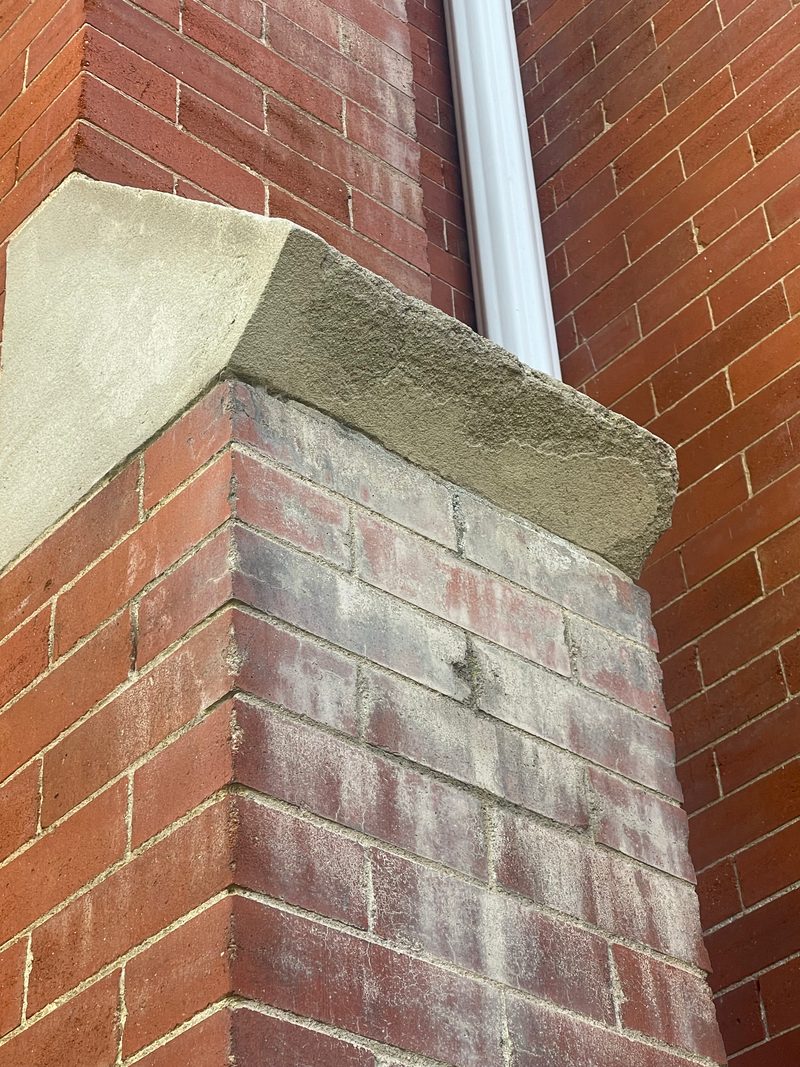
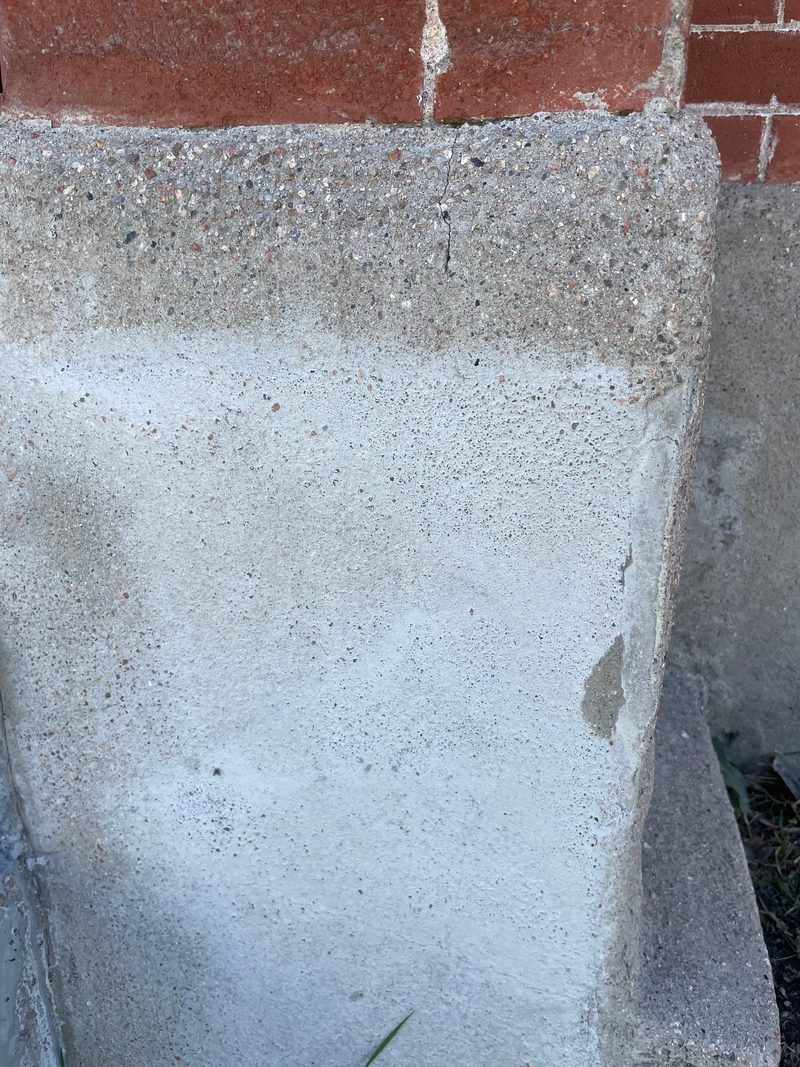
02 · Assessment
A Masonry Assessment That Won the Grant
The church contacted us on August 23, 2024 for a project assessment. Earlier grant applications, built on other assessments, had been turned down.
Our assessment documented what needed repair, why, and which methods to use, written in the approach the Colorado State Historical Fund looks for. In 2025, History Colorado awarded the church a State Historical Fund grant, one of the higher award amounts, based on our assessment. The grant funded most of the project, and church members raised the rest. We stayed with the project through every grant deliverable.
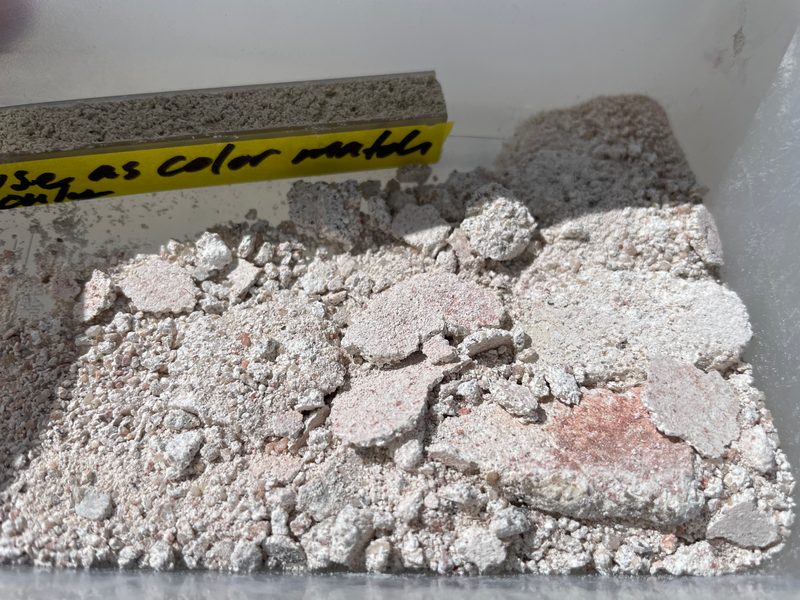
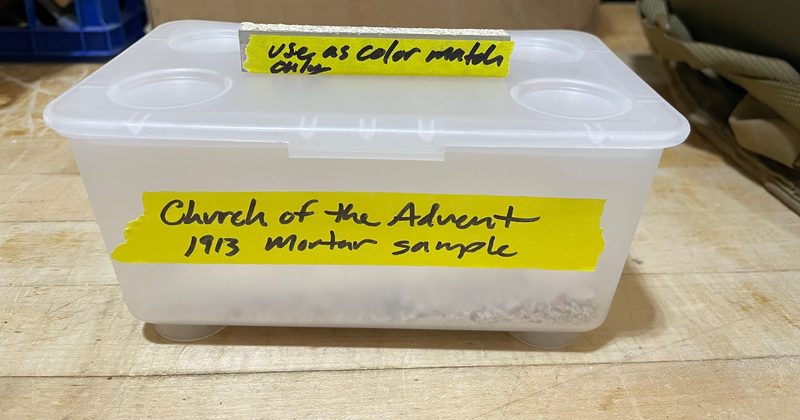
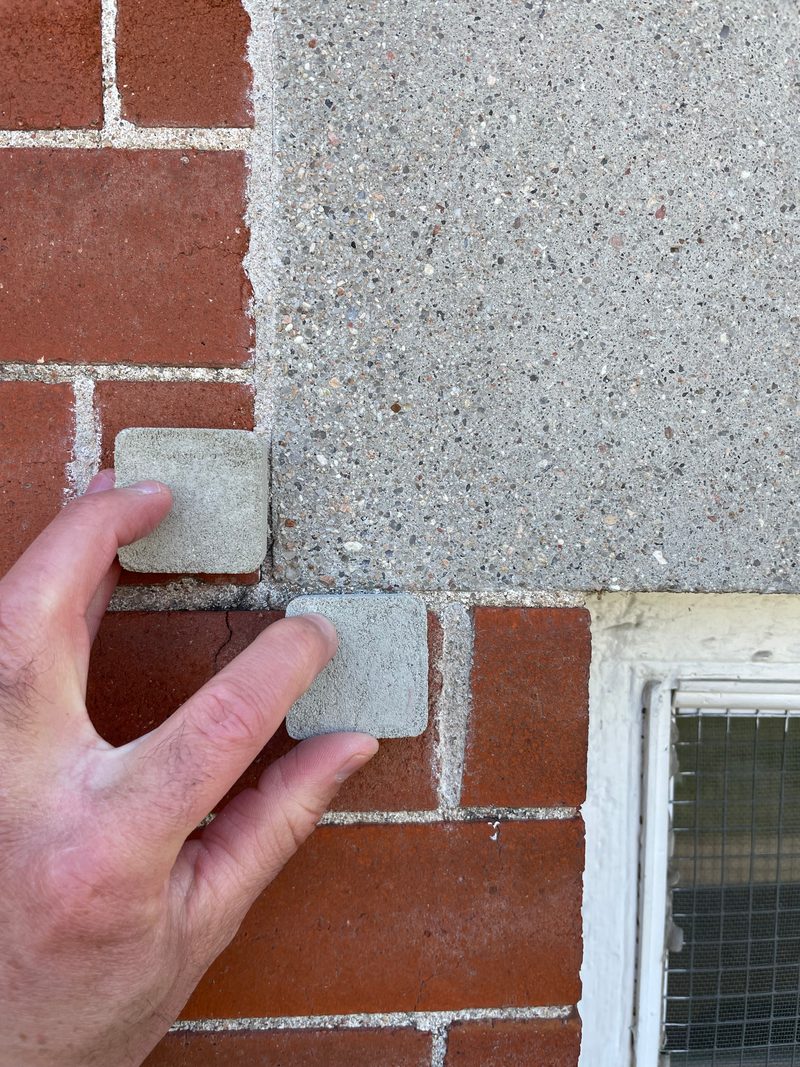
The State Historical Fund approved each method before the work began. We ran cleaning test panels, sent original mortar for lab analysis of its composition, built mortar mockup test panels, and walked each method through on-site reviews.
03 · Scope
Scope of Repairs
- Conservation cleaning of the brick and cast stone.
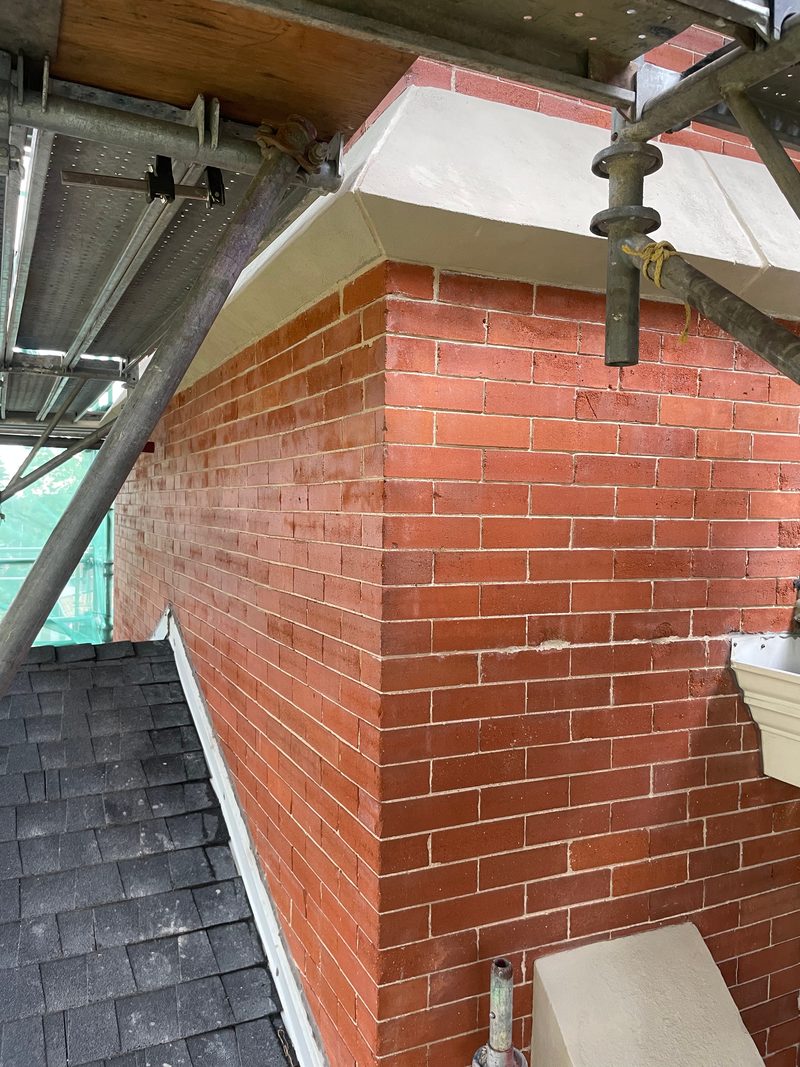
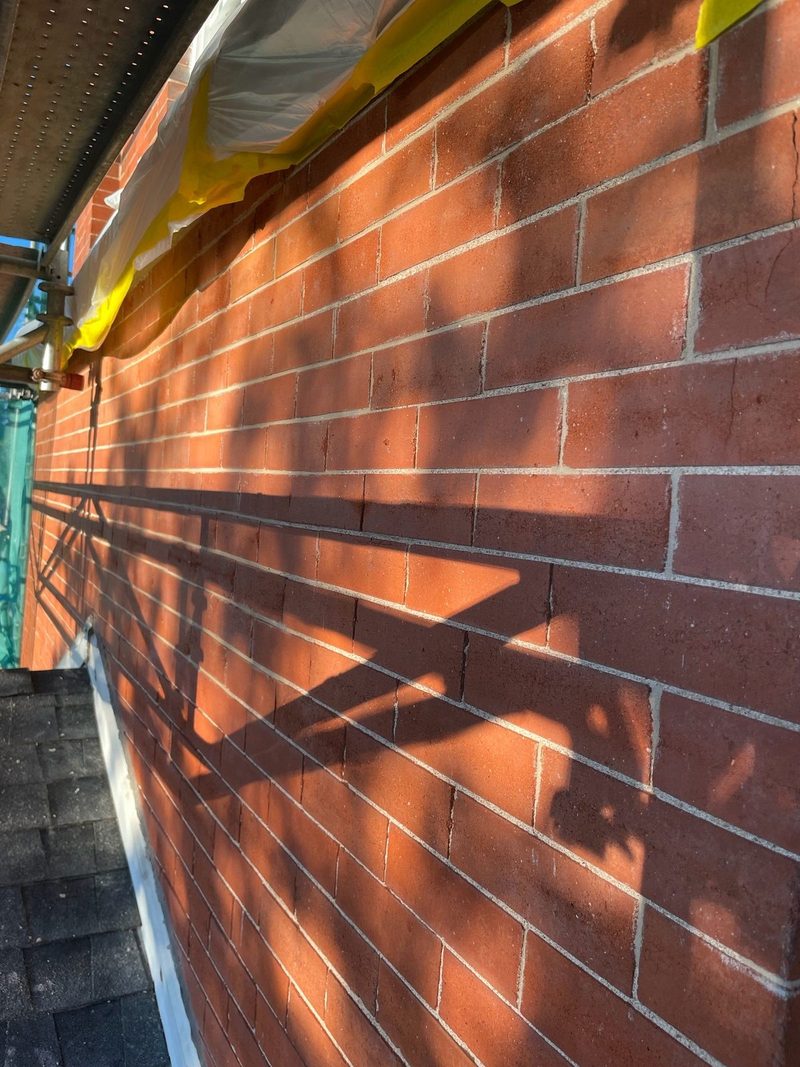
- Comprehensive repointing on all elevations, plus selective repointing, in lab-matched lime putty mortar.
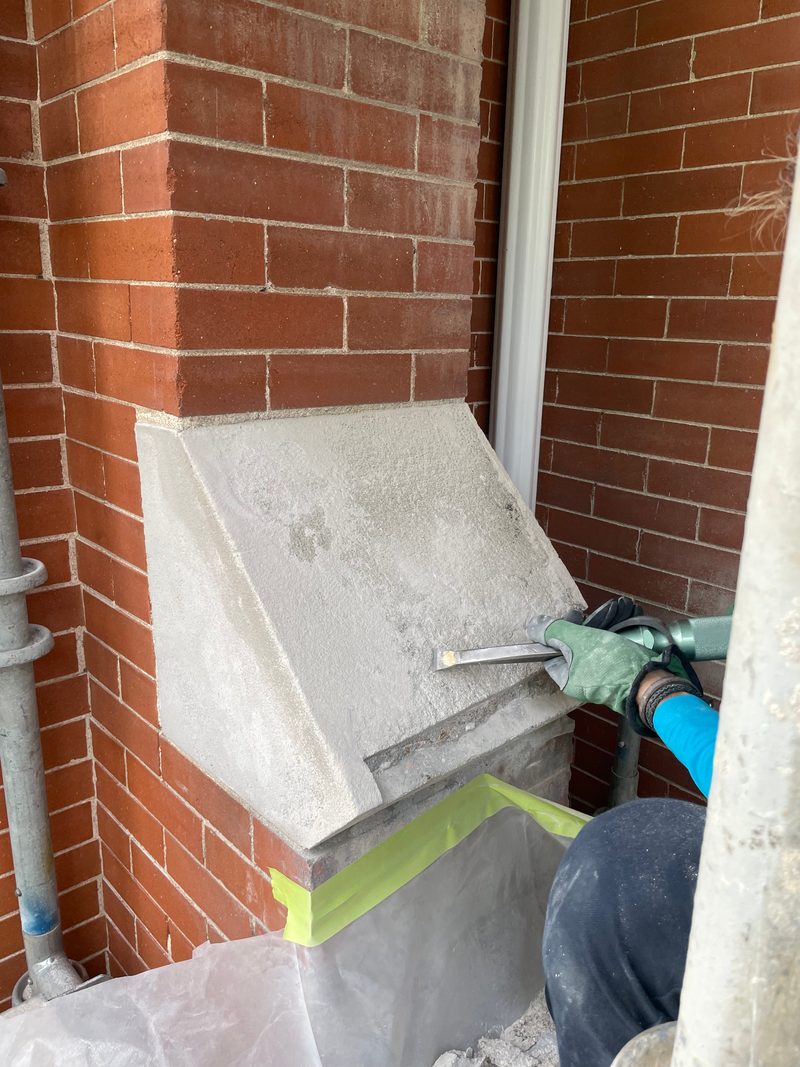
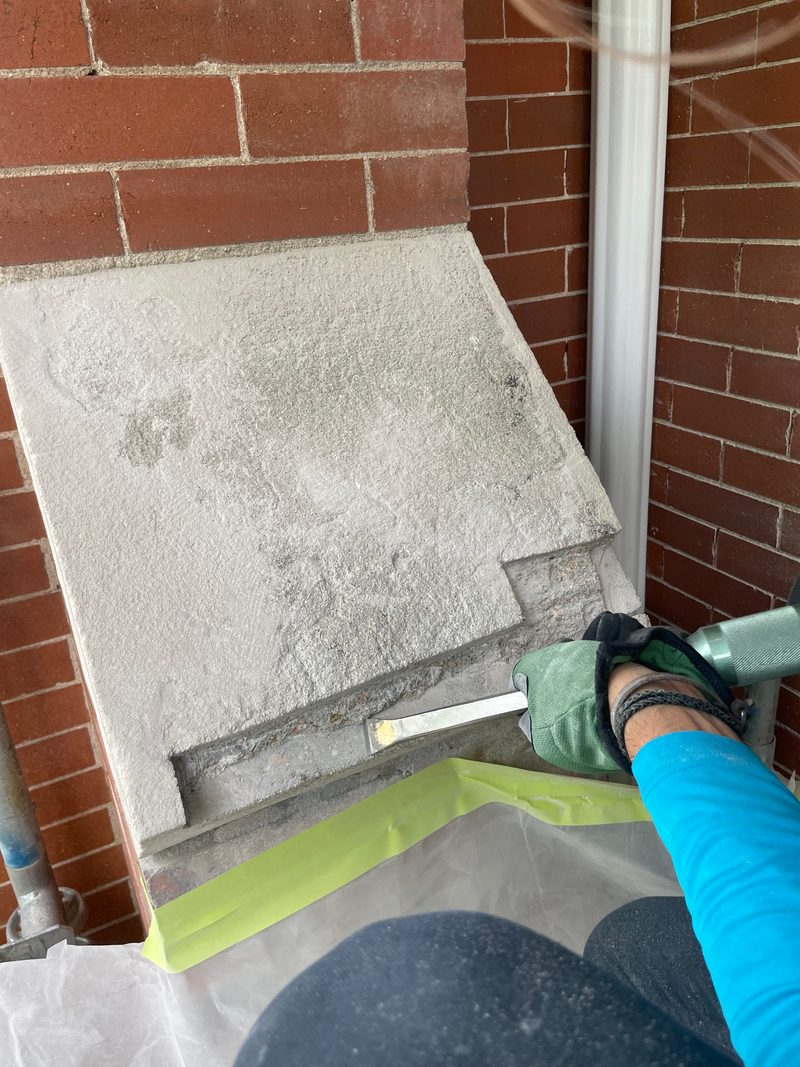
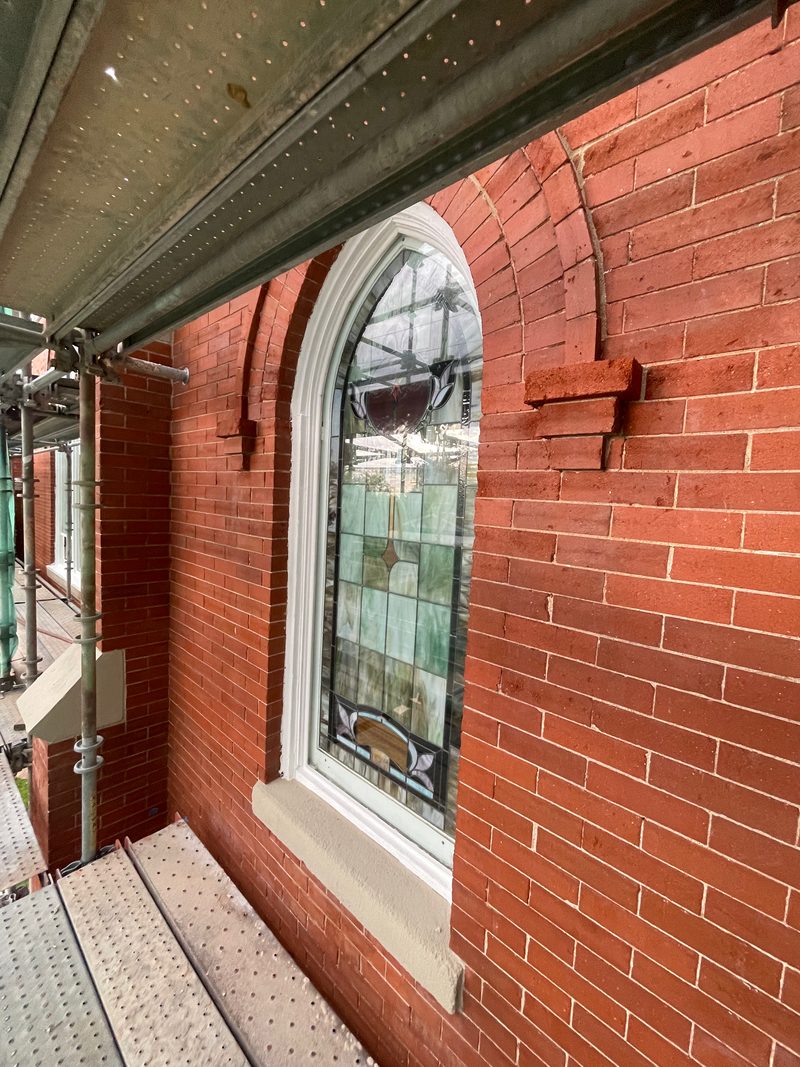
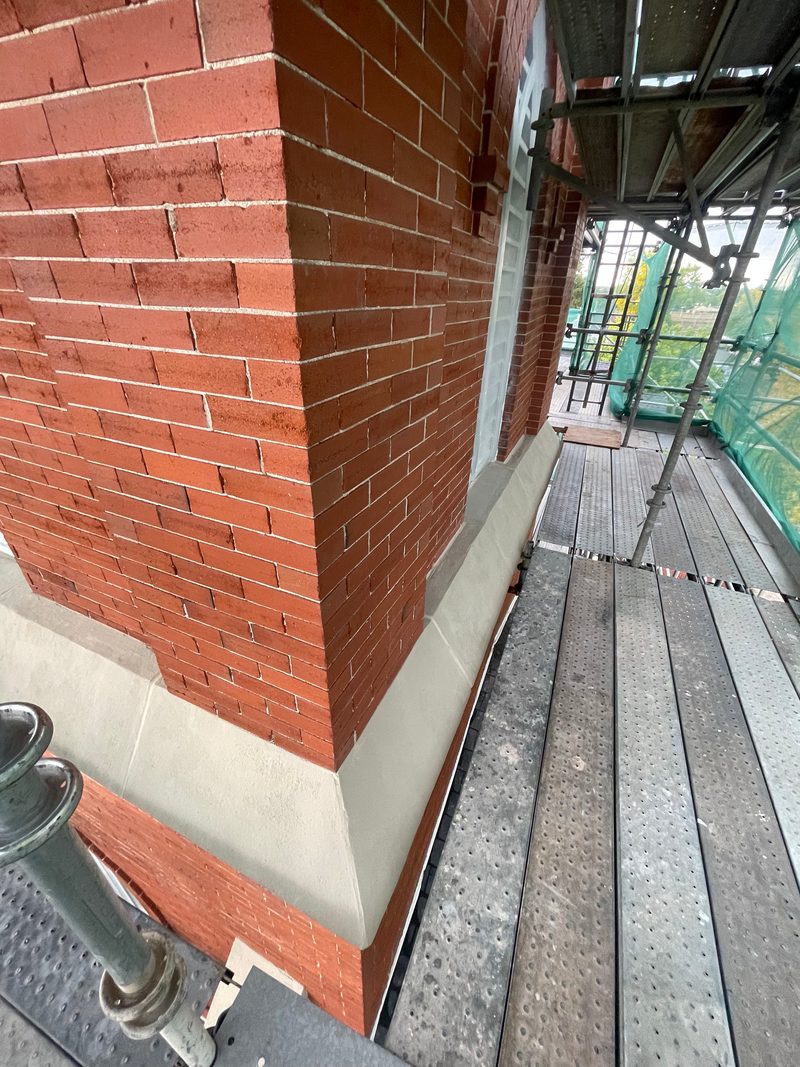
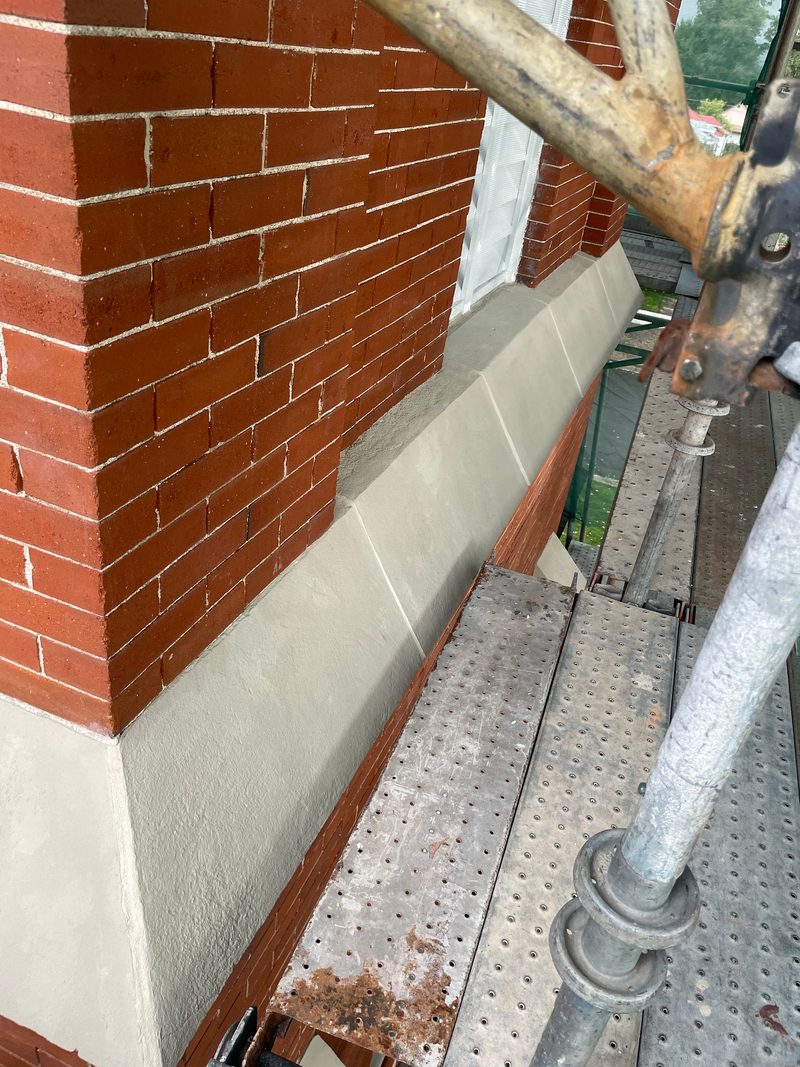
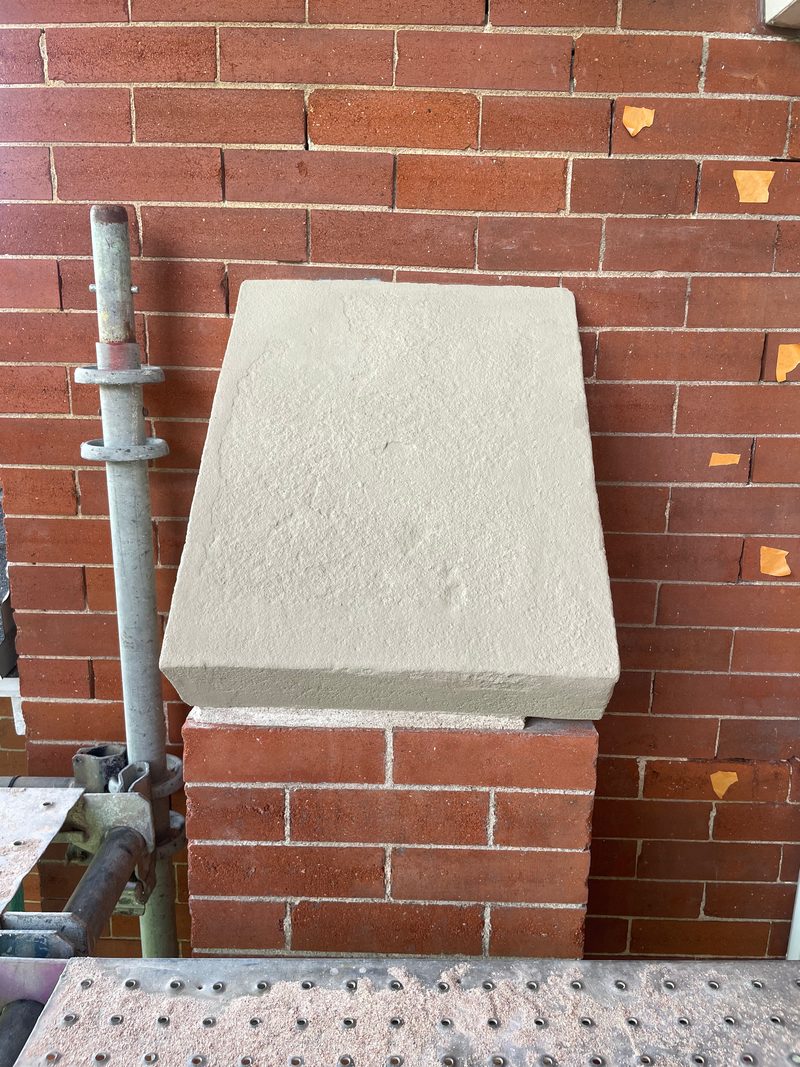
- Cast stone repair on the buttress caps and windowsills: failed early-2000s repairs removed, patched and re-profiled.
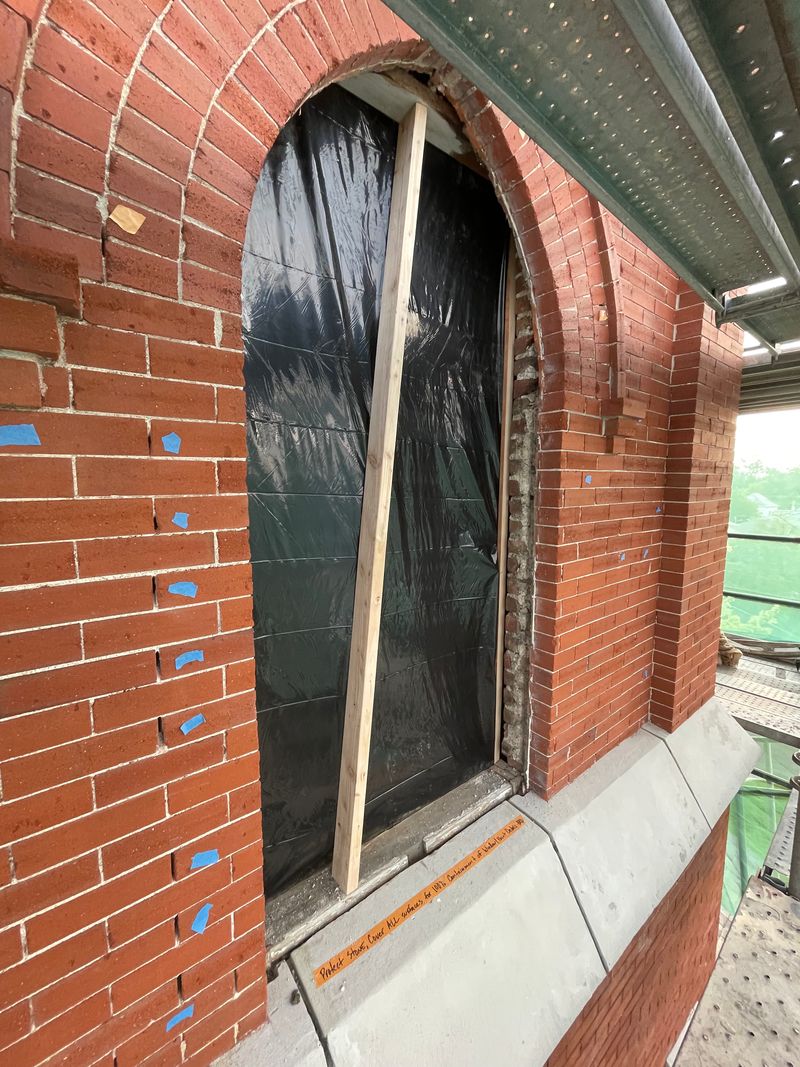
- Bell tower cast stone band: deep restoration, stone-to-stone joints re-established, and the band reshaped where it meets the brick so water sheds.
- Brick repairs in select areas: crack stitching, patching and in-kind brick replacement.
04 · Methods
Conservation Cleaning, Hand Repointing and Cast Stone Repair
Conservation cleaning
A specialized conservation cleaning approved by History Colorado, following conservation methods, with no harsh chemicals and nothing toxic. It brought back the brick's natural color and removed the algae, moss and growth embedded in the open joints, especially on the north side of the bell tower. It also stabilized the powdering cast stone surfaces.
Repointing by hand
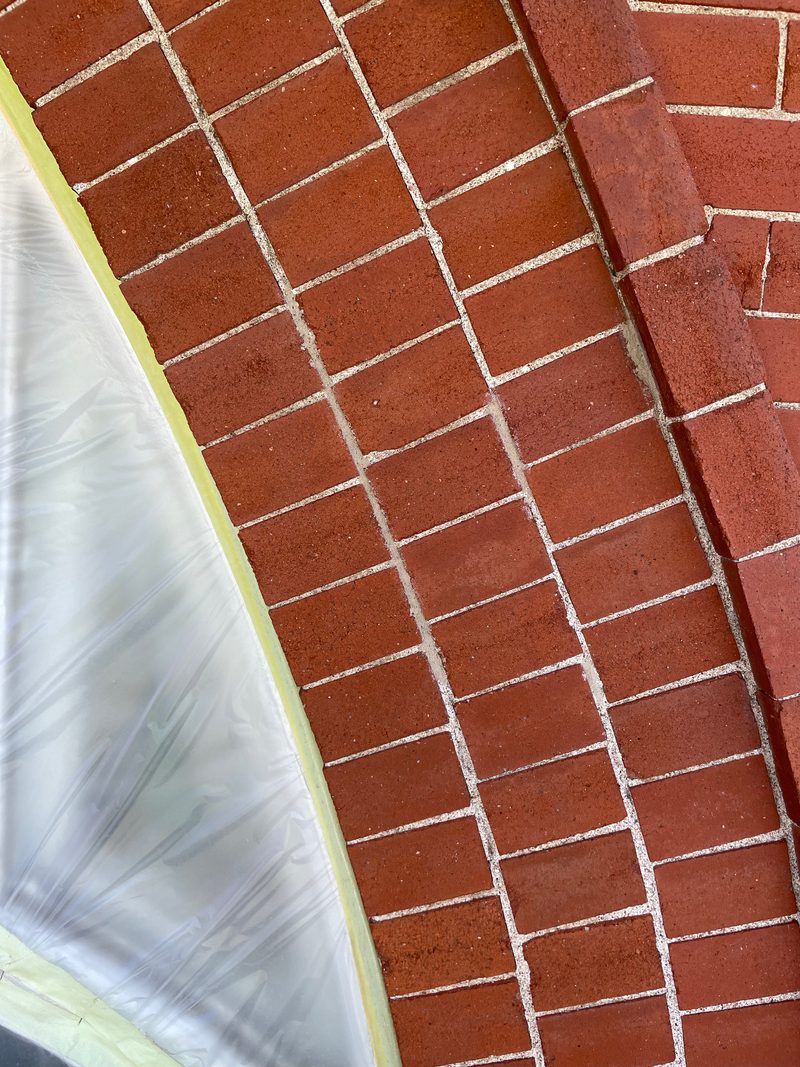
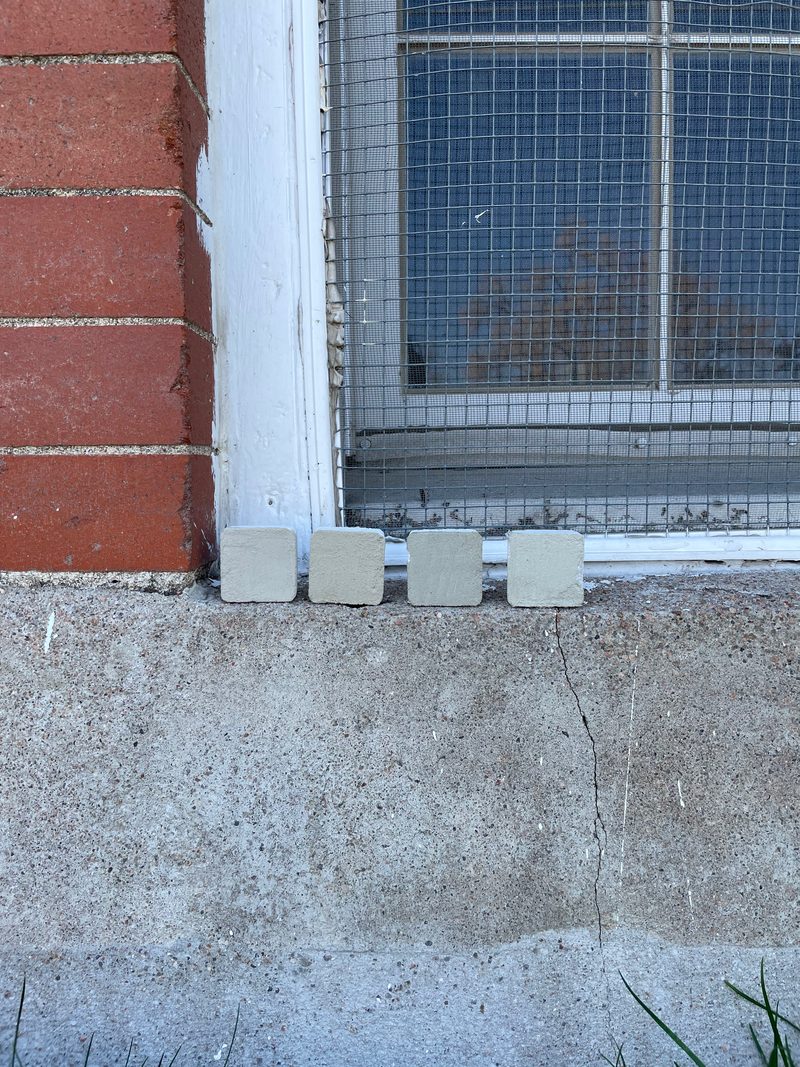
Lime putty mortar matched to the original by lab analysis. Six mortar mockup colors let us blend the brick's varied coloring, including the north side, which gets less sun. Joints were prepared the traditional way and repointed entirely by hand as fine, thin buttered joints, with no grout bags, to National Park Service Preservation Brief 2.
Cast stone repair
Rather than a full rebuild, we designed a budget-conscious repair method the State Historical Fund approved. Failed earlier repairs came off with stone conservation methods, without going deep into sound original stone. We patched with a cast stone patching material matched to the original's properties and re-profiled each piece.
Brick repairs
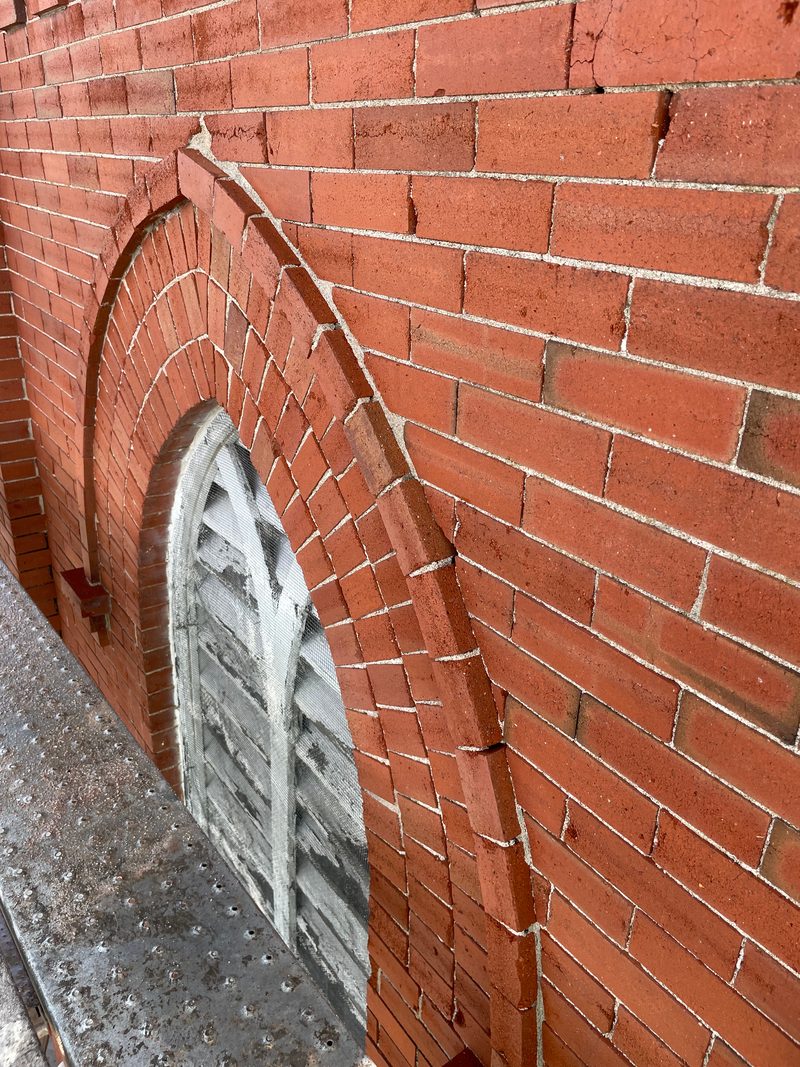
In select areas we stitched vertical cracks, patched damaged brick and replaced damaged units with brick in kind.
05 · Conservation record
What We Kept and What We Repaired or Replaced
The goal was to keep as much of the original material on the building as possible. The cast stone was repaired in place instead of rebuilt, and brick was replaced only where units were too damaged to keep.
Kept and conserved
- The original brick, cleaned back to its natural color
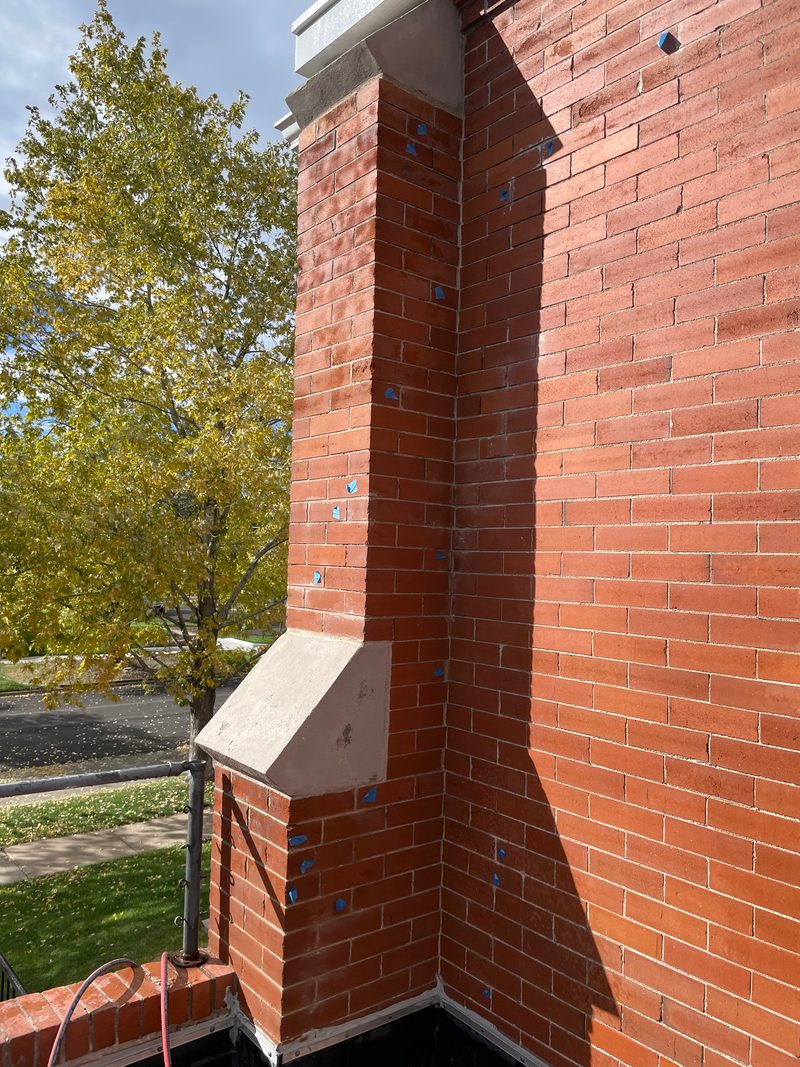
- The original cast stone buttress caps and windowsills, stabilized, patched and re-profiled
- The bell tower cast stone band, restored with its stone-to-stone joints re-established
Repaired or replaced
- Failed early-2000s cast stone repairs, removed down to sound stone
- Failed and open mortar joints, repointed in lime putty mortar
- Cracked brick, stitched and patched; damaged units replaced in kind in select areas
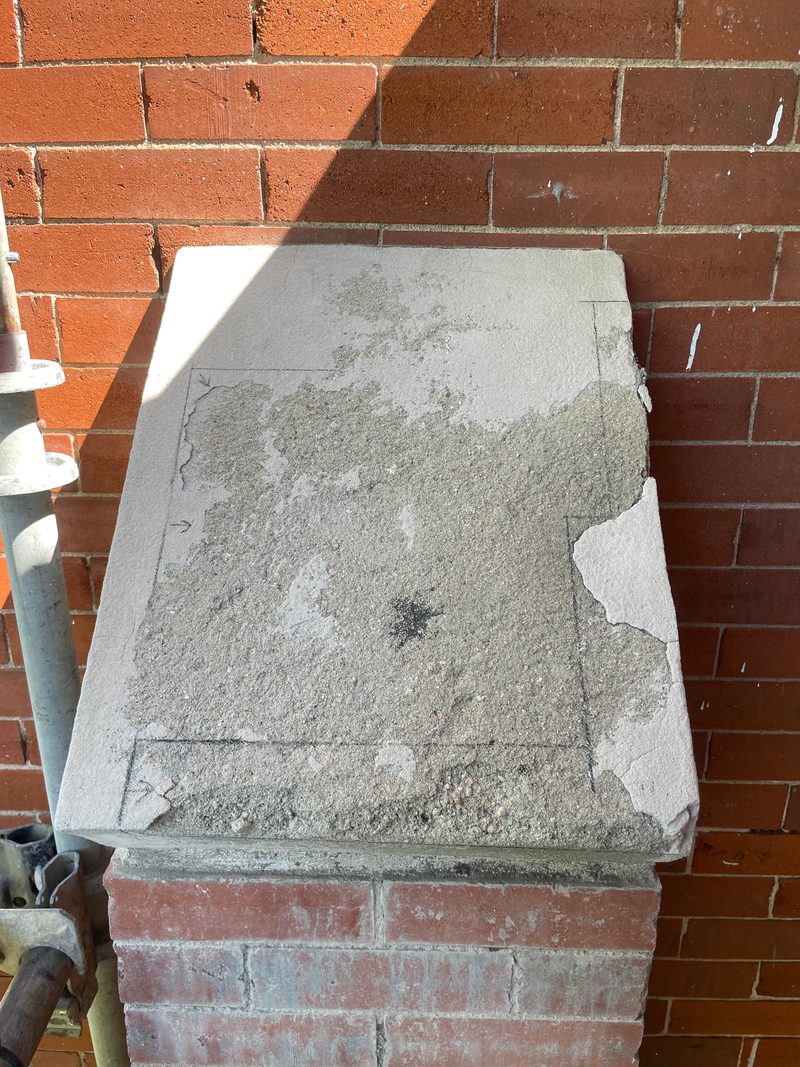
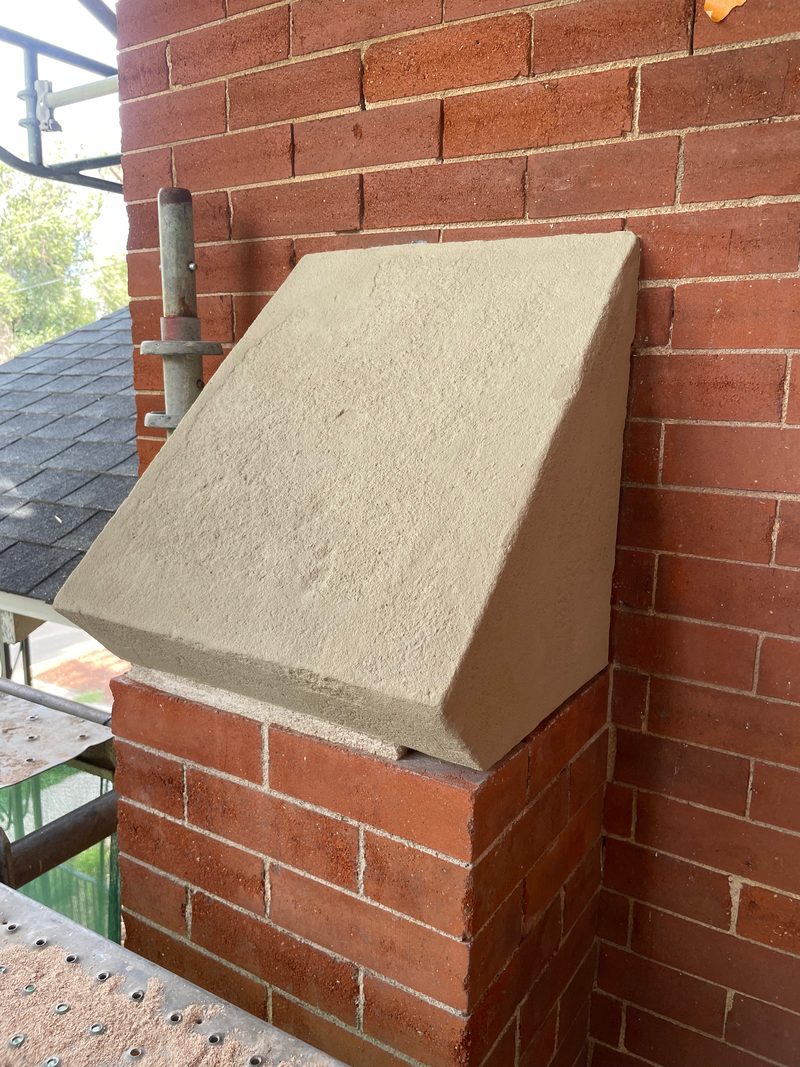
Buttress caps. Steps 1 and 3 show the same cap; step 2 shows a typical cap at the removal stage.
06 · Cast stone detail
Bell Tower Cast Stone Band and Corner Restoration
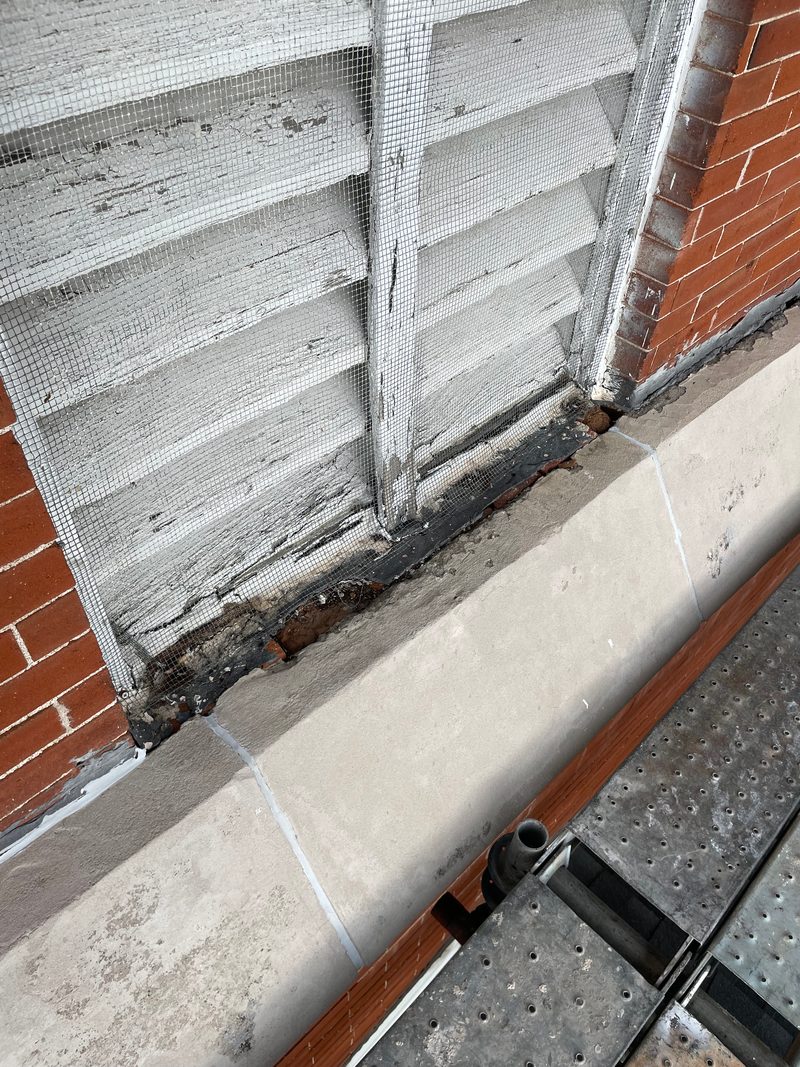
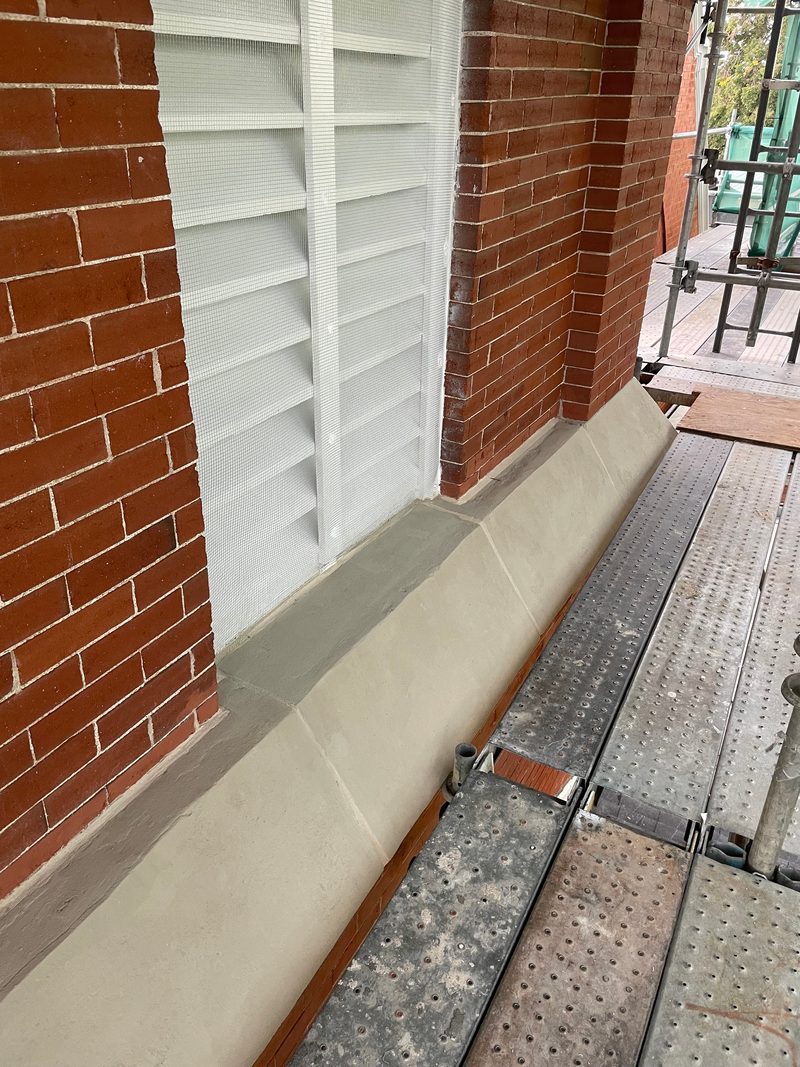
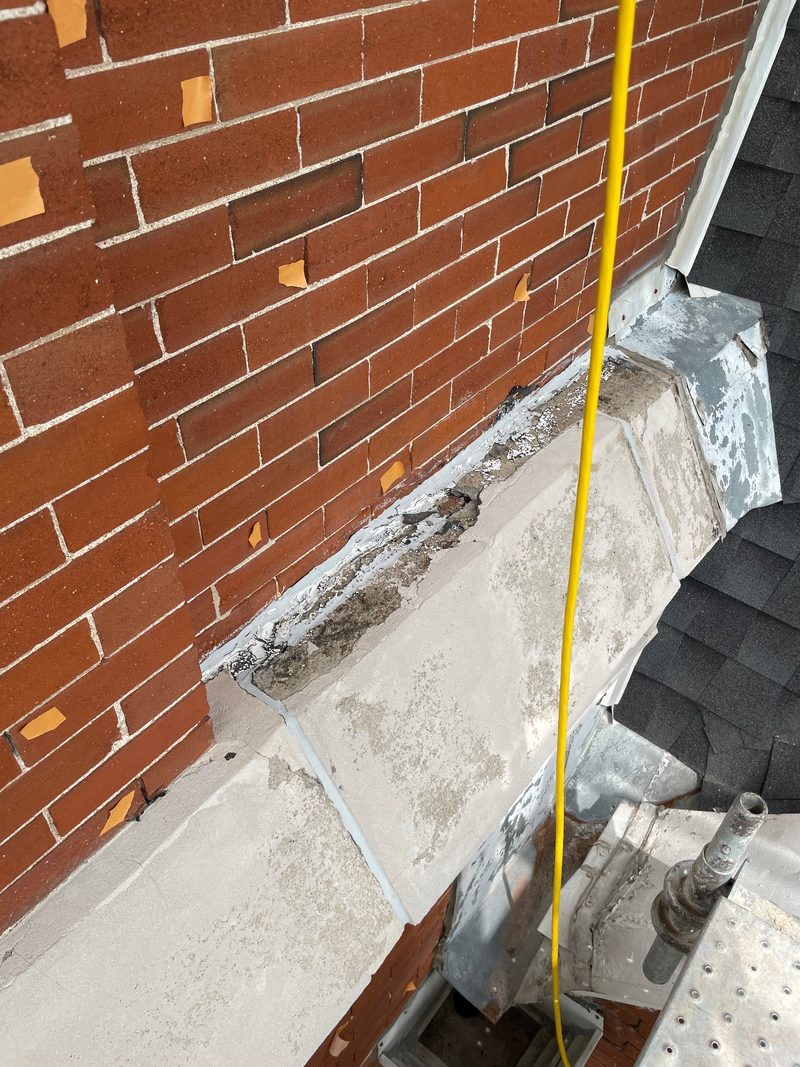
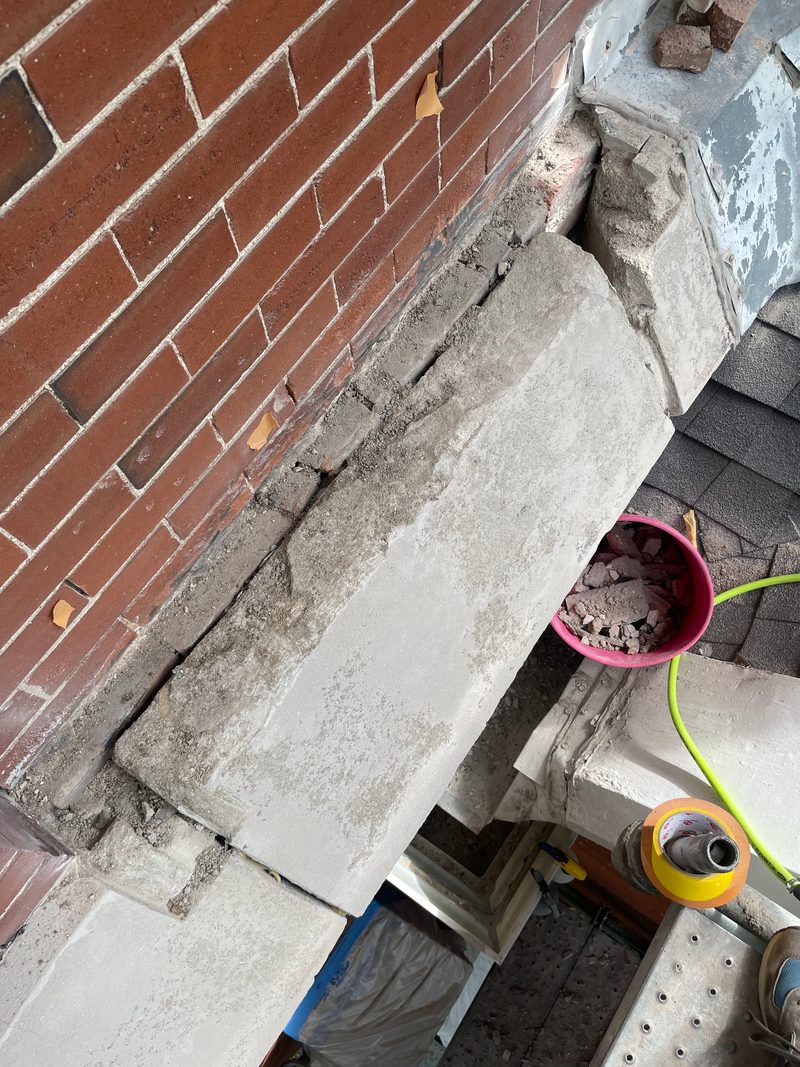
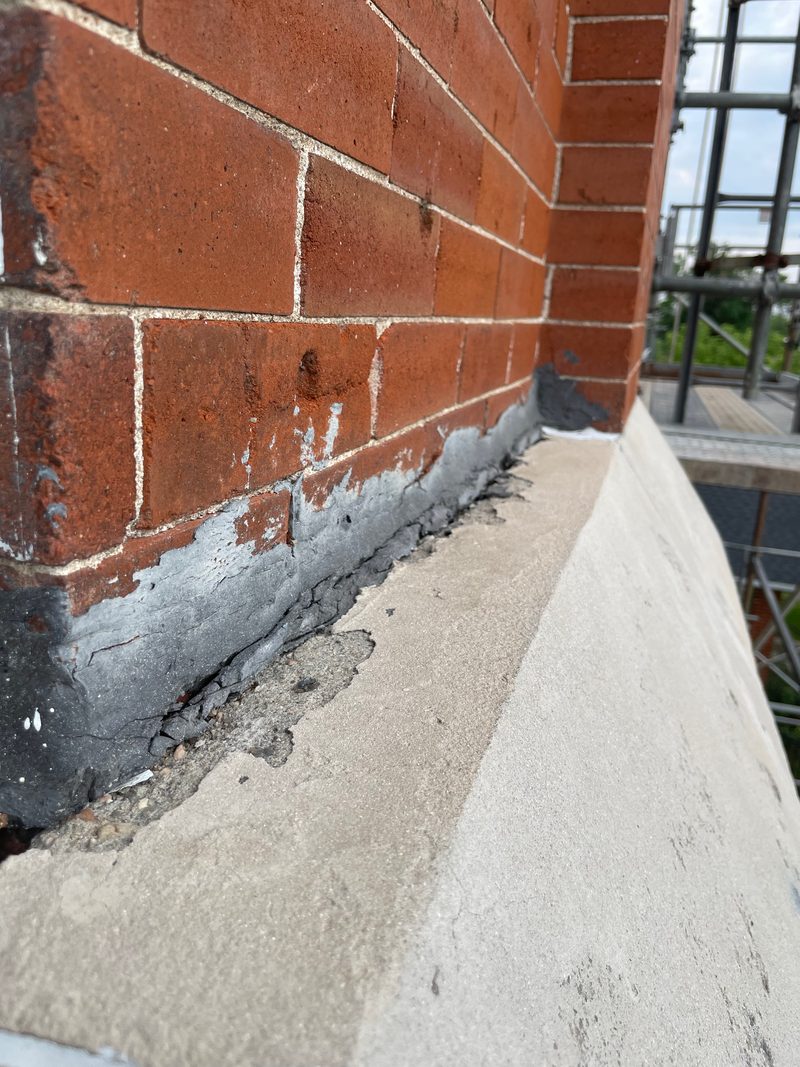
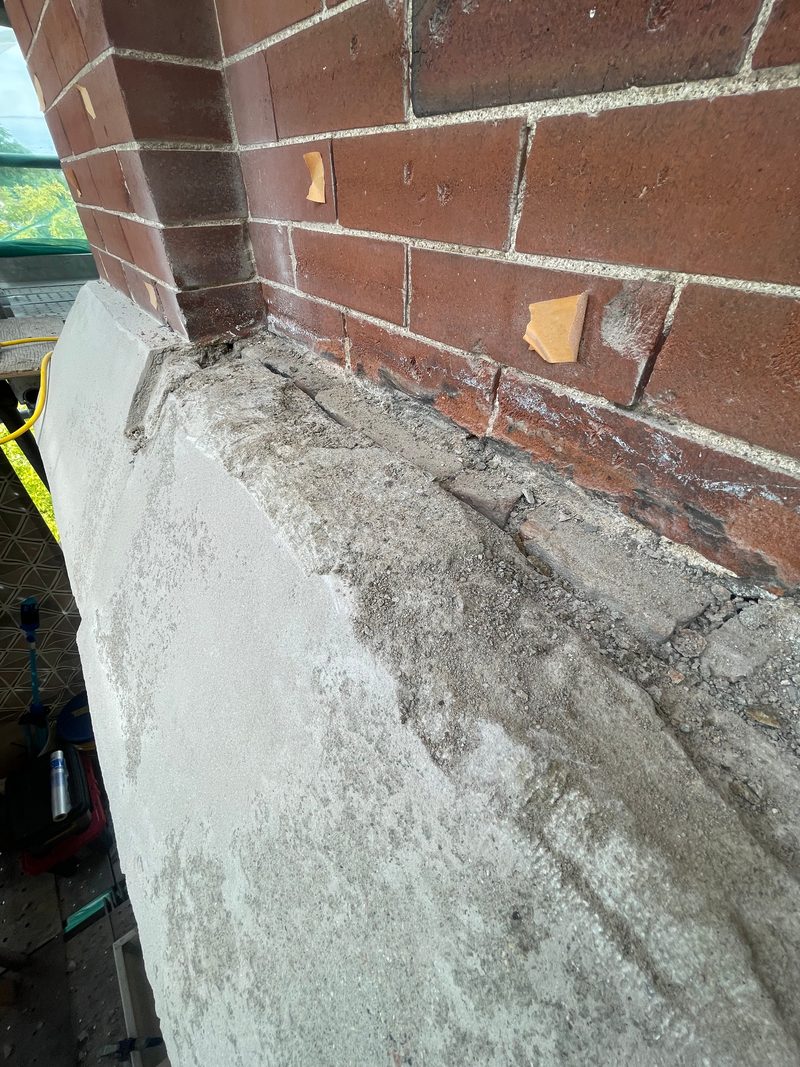
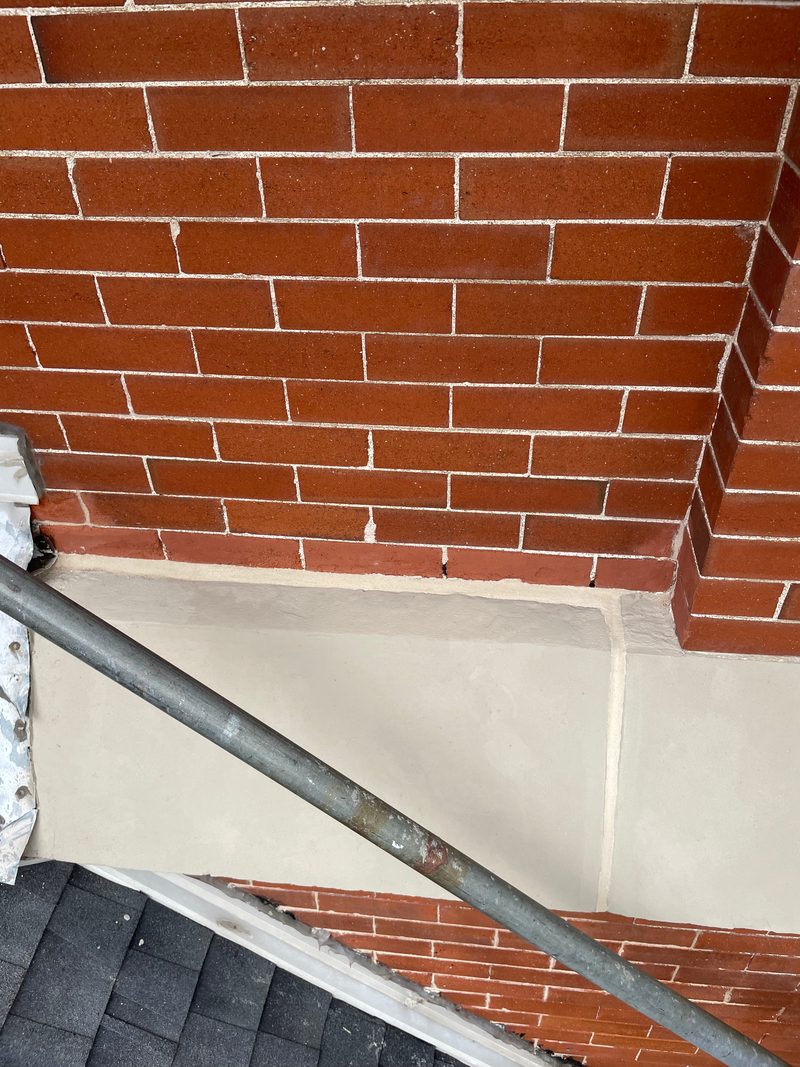
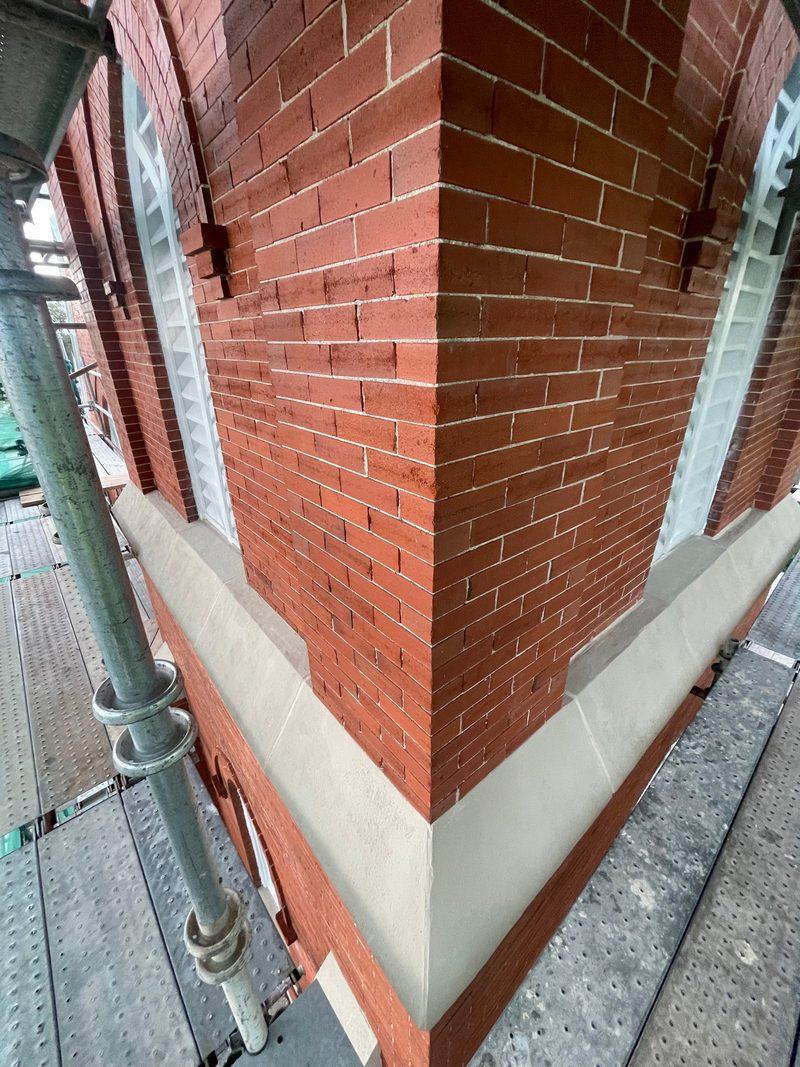
The cast stone band around the bell tower had failed earlier repairs, blackened seams at the louvers and failing joints where it meets the brick. Investigative openings once the scaffold was up showed the damage ran deep, which led to deep removal and rebuilding of the affected band stone. We repaired the band in place, re-profiled it and re-established its joints so it sheds water again. One angled corner looked less damaged than expected, but once we started stabilizing the stone, pieces had to come out, and it turned out to be a very unstable corner.
Existing conditions
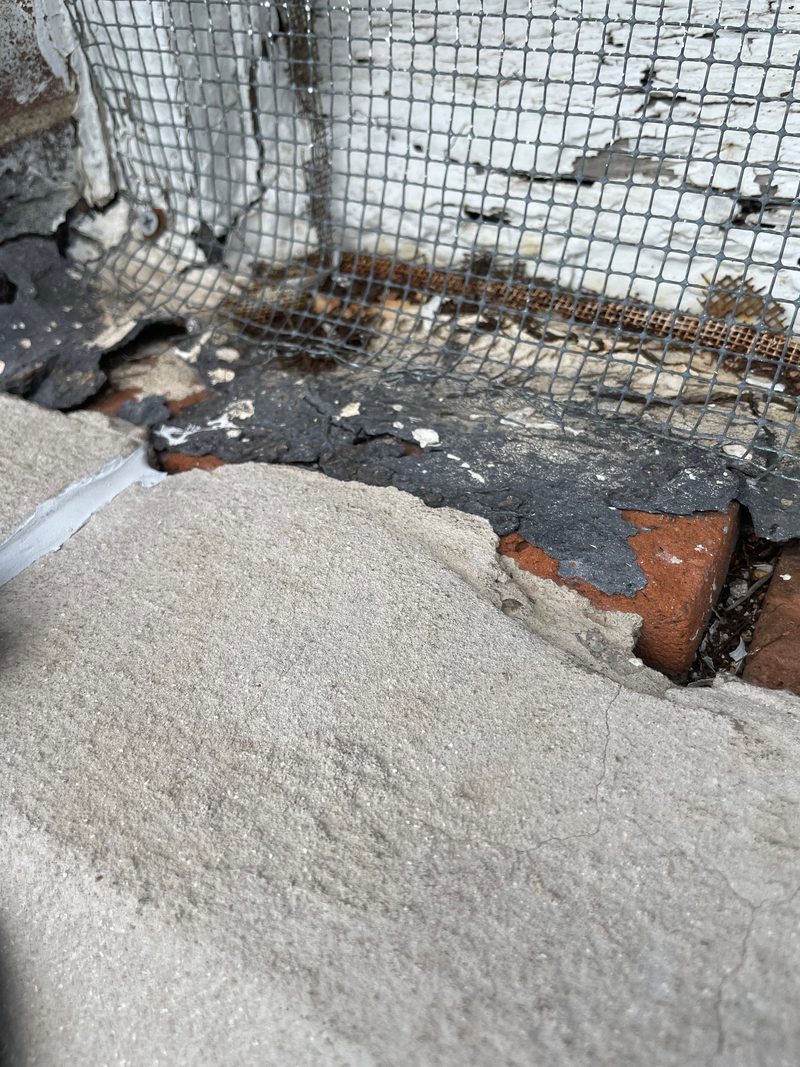
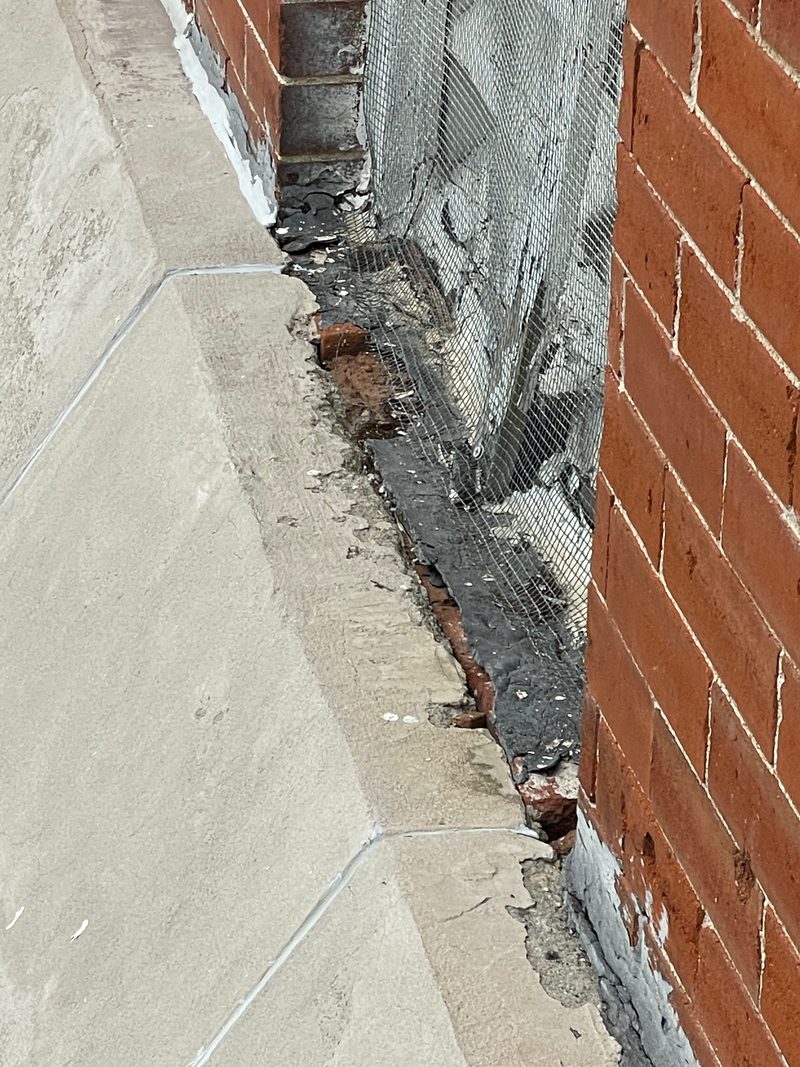
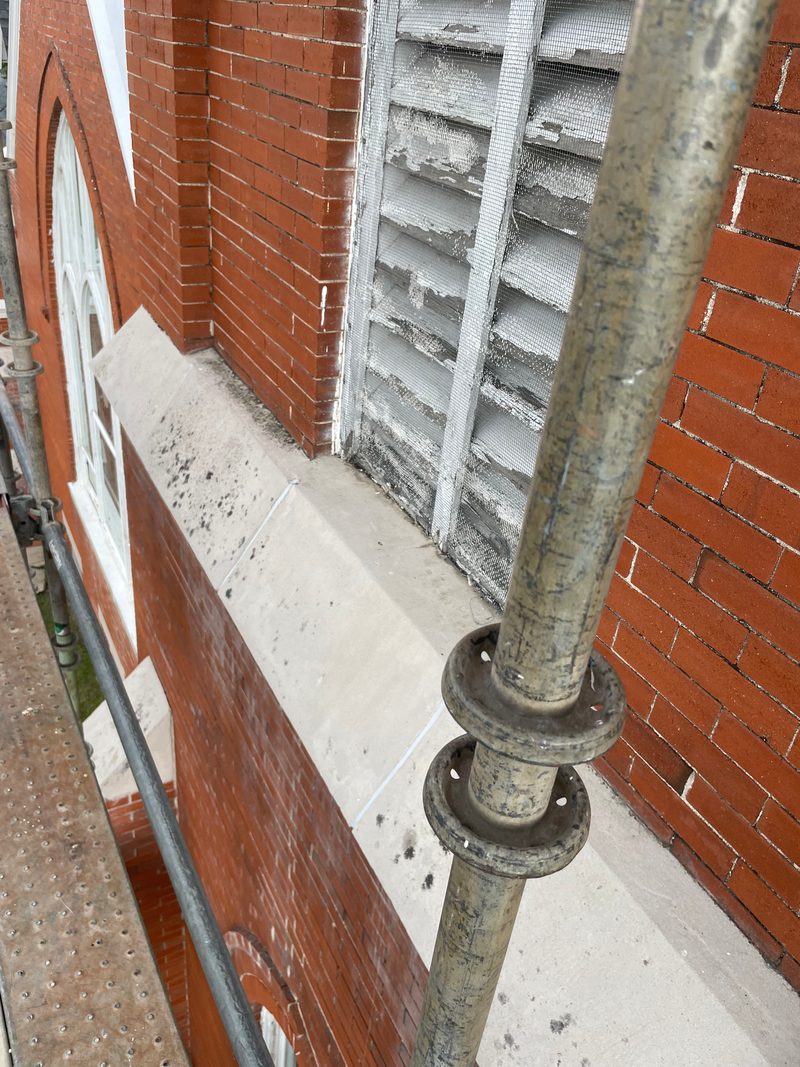
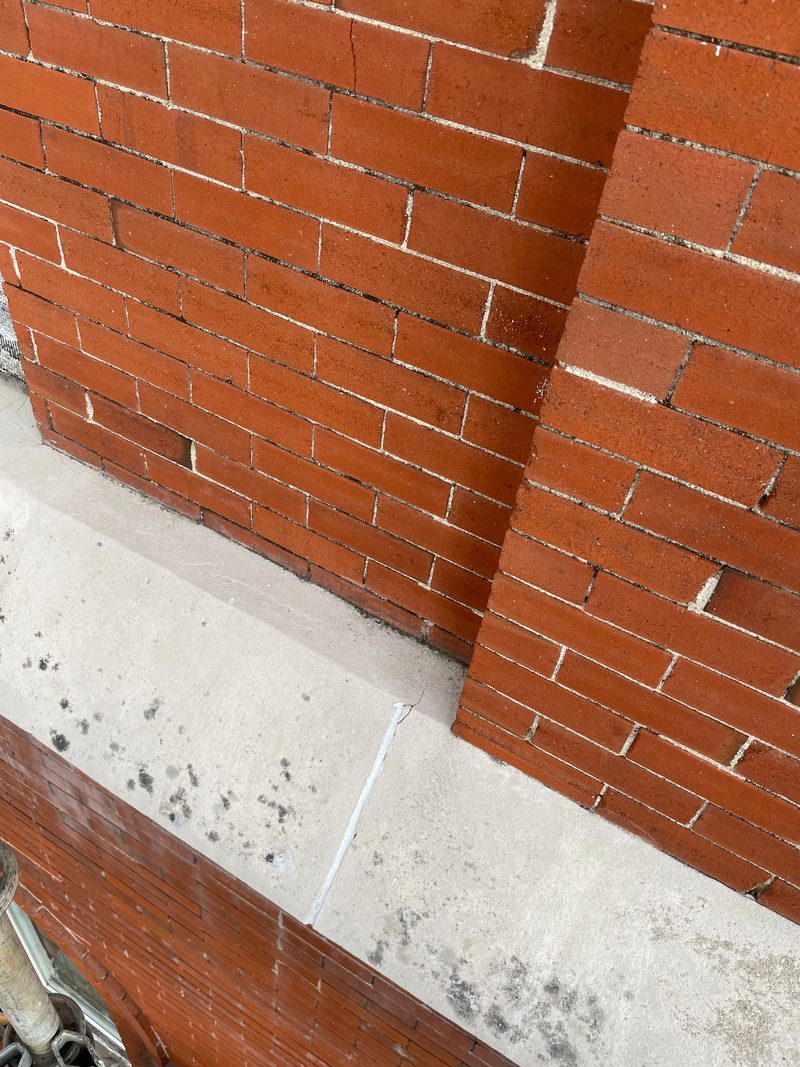
Investigative opening
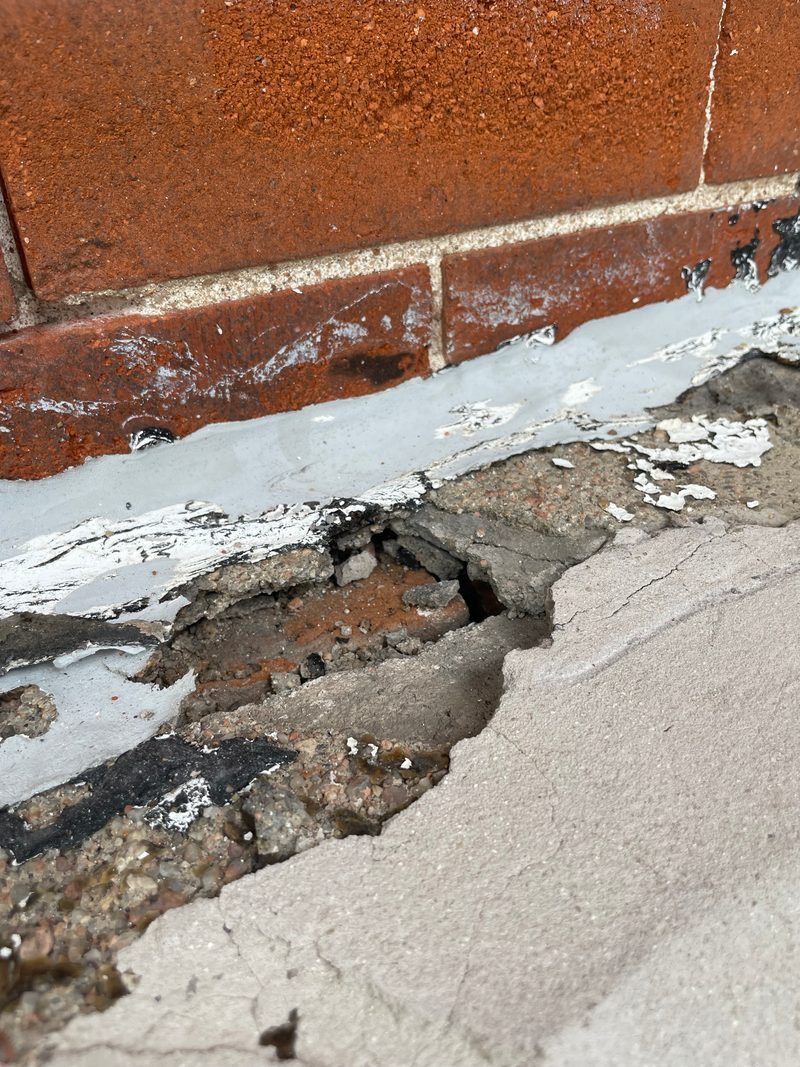
Once the scaffold was up, our crew opened the band to see how deep the damage went. It ran deep, so the failed material came off and the affected stone was removed back and rebuilt.
Same spot, before and after
The band at the louvers
The band end at the roof flashing
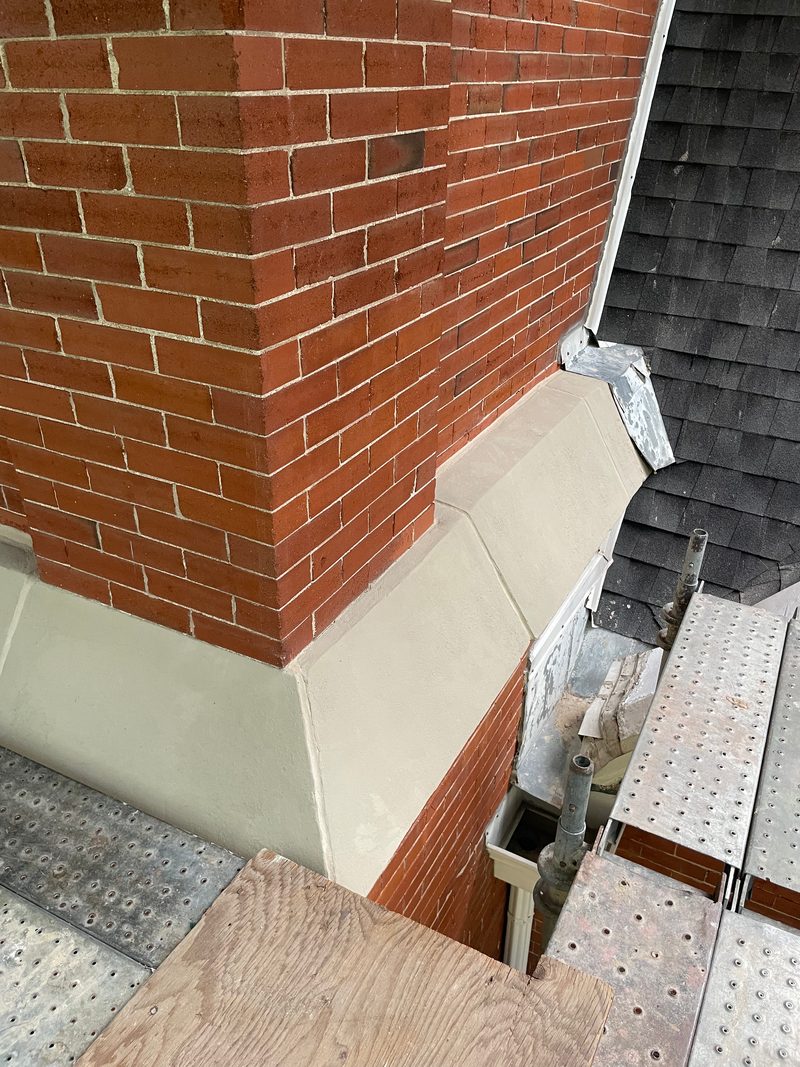
The unstable corner
- 1 · Unstable corner
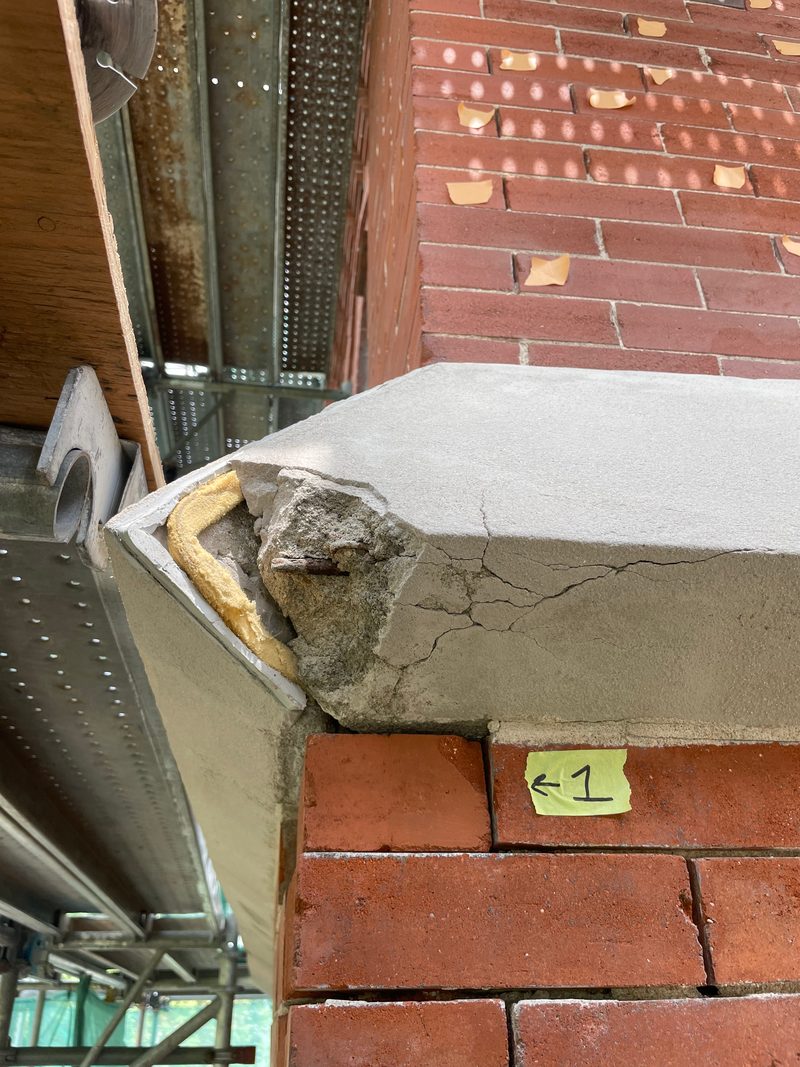
The band corner with a broken, deteriorated end. - 2 · Affected areas removed
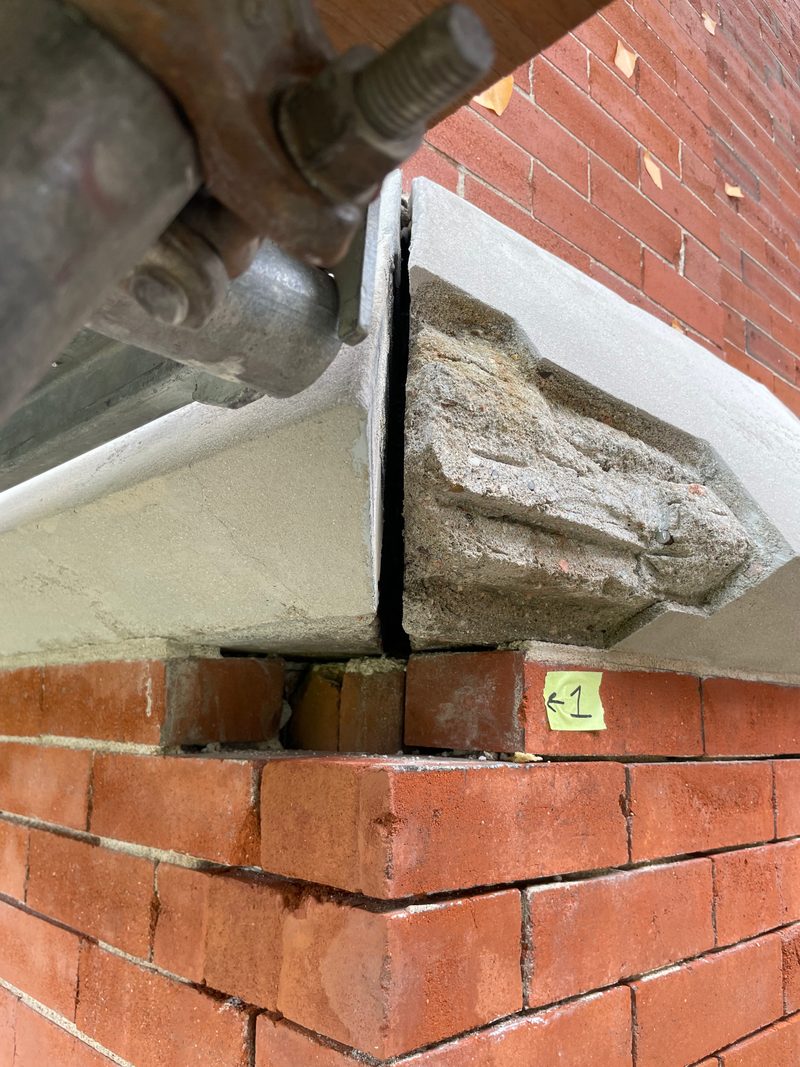
Both stones cut back at the corner, with the joint opened. - 3 · Repair with forms
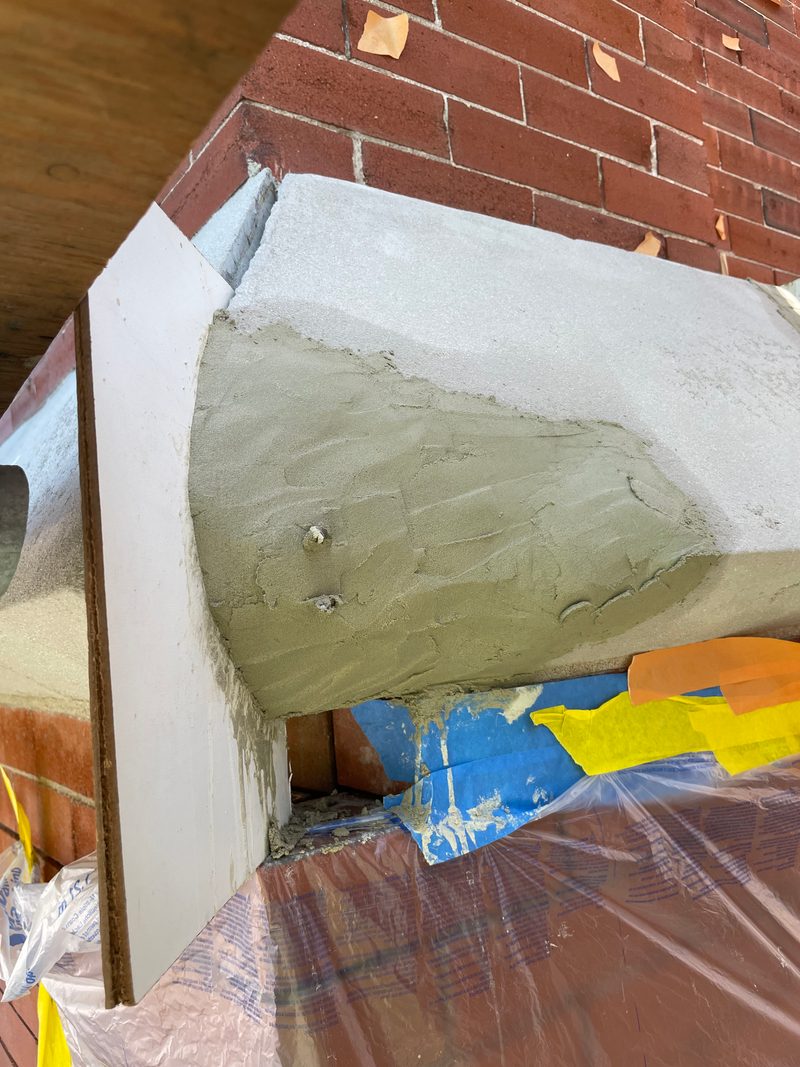
Repair mortar built up inside board forms. - 4 · Re-profiled
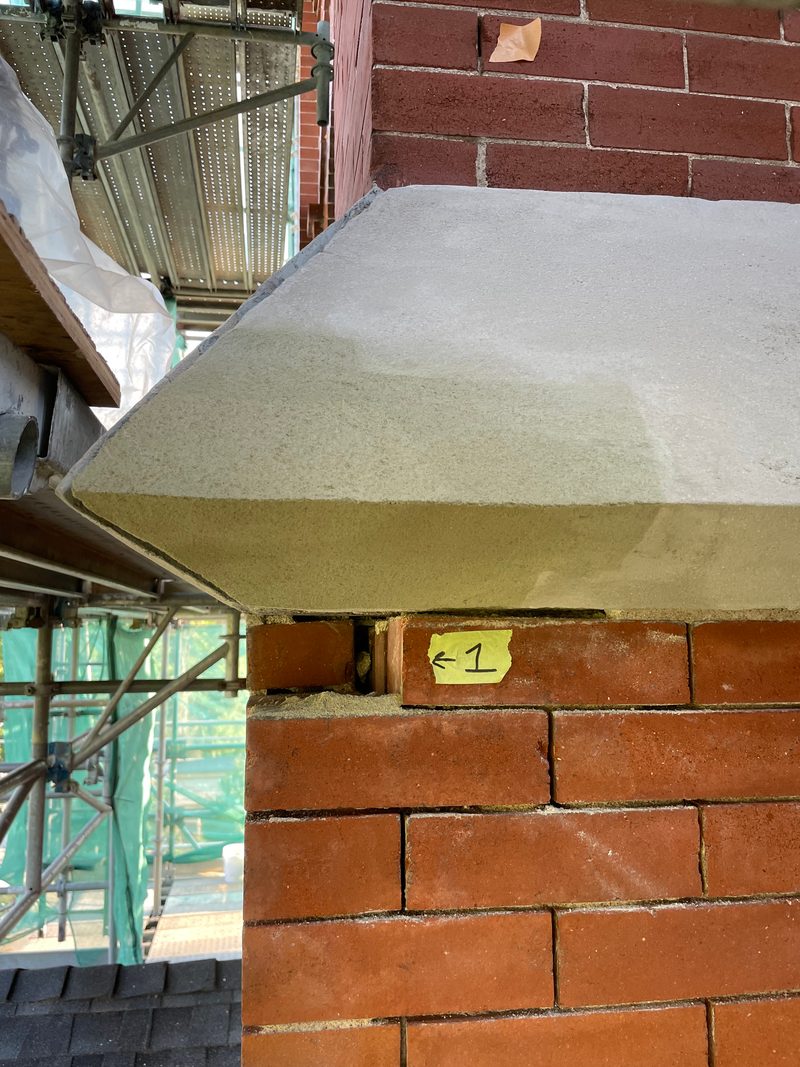
The corner re-profiled to its angled shape.
How the band was repaired (typical)
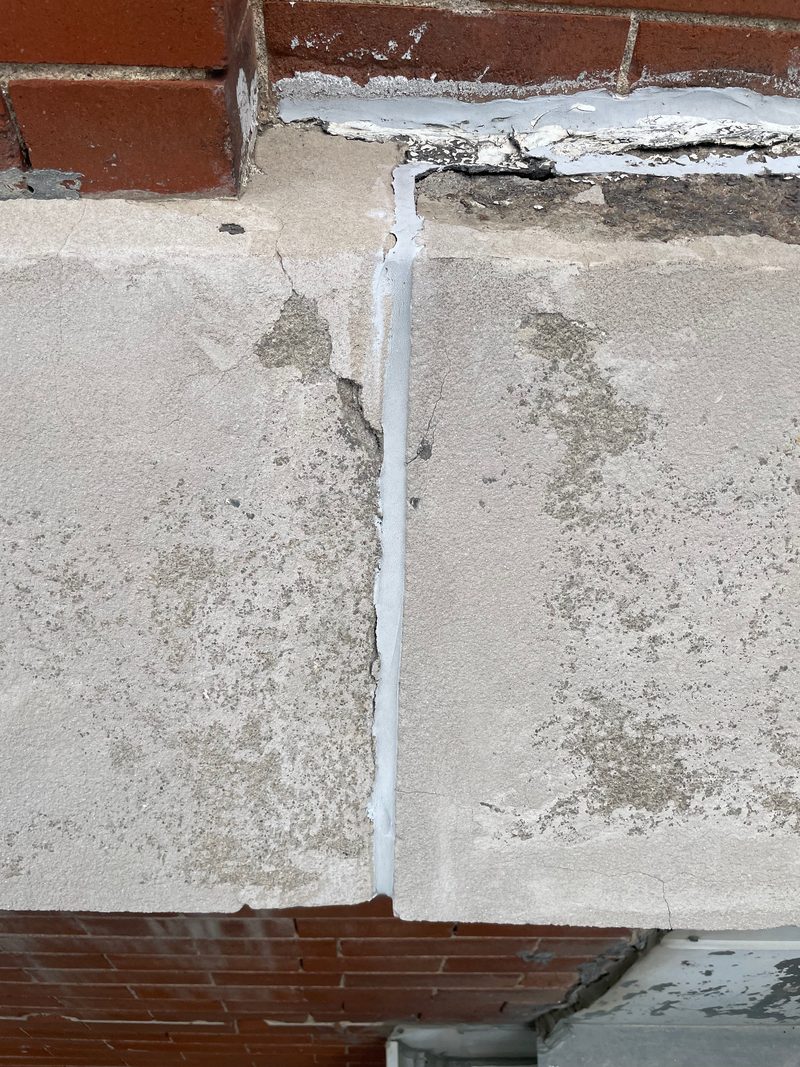
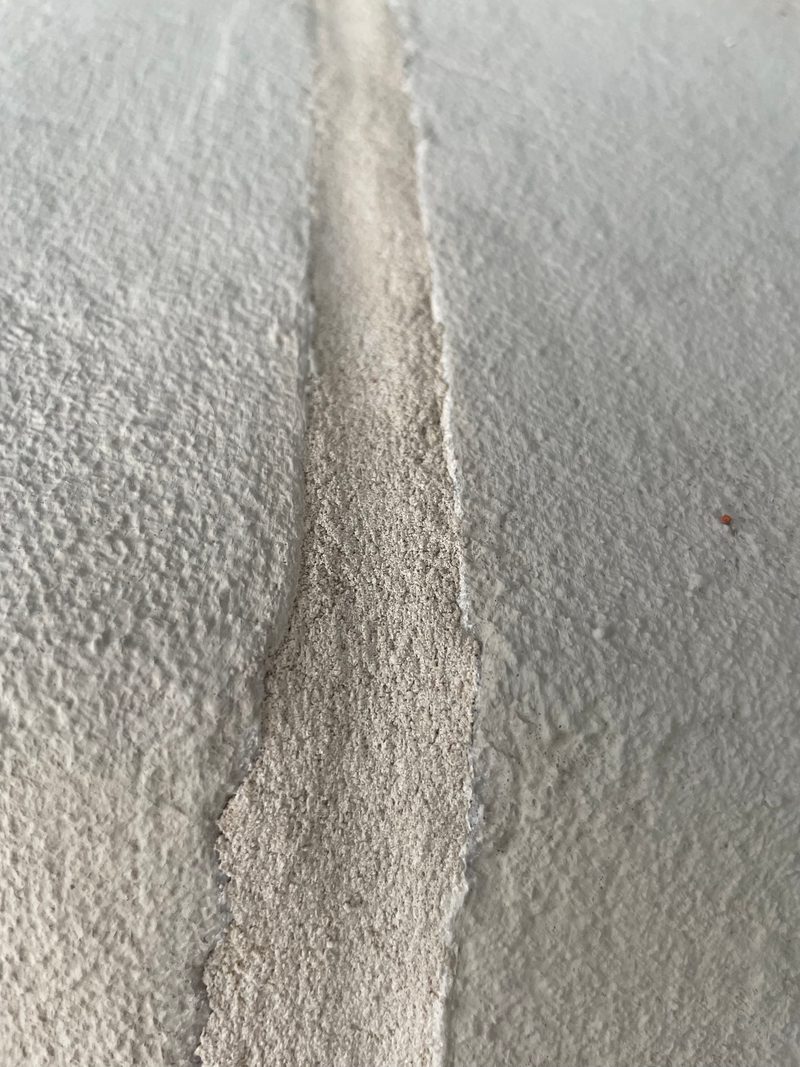
Typical examples from along the band; each row shows the same kind of detail, not the same stones.
Joints between stones
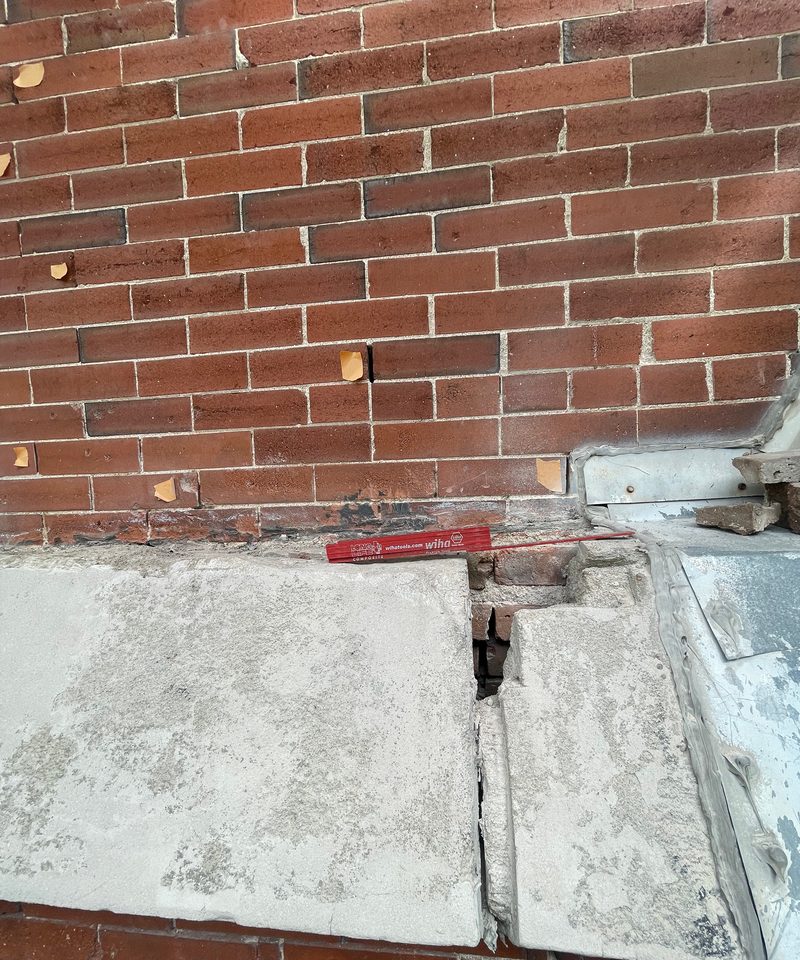
Where the band meets the brick
Finished
07 · Results
Church of the Advent Before and After
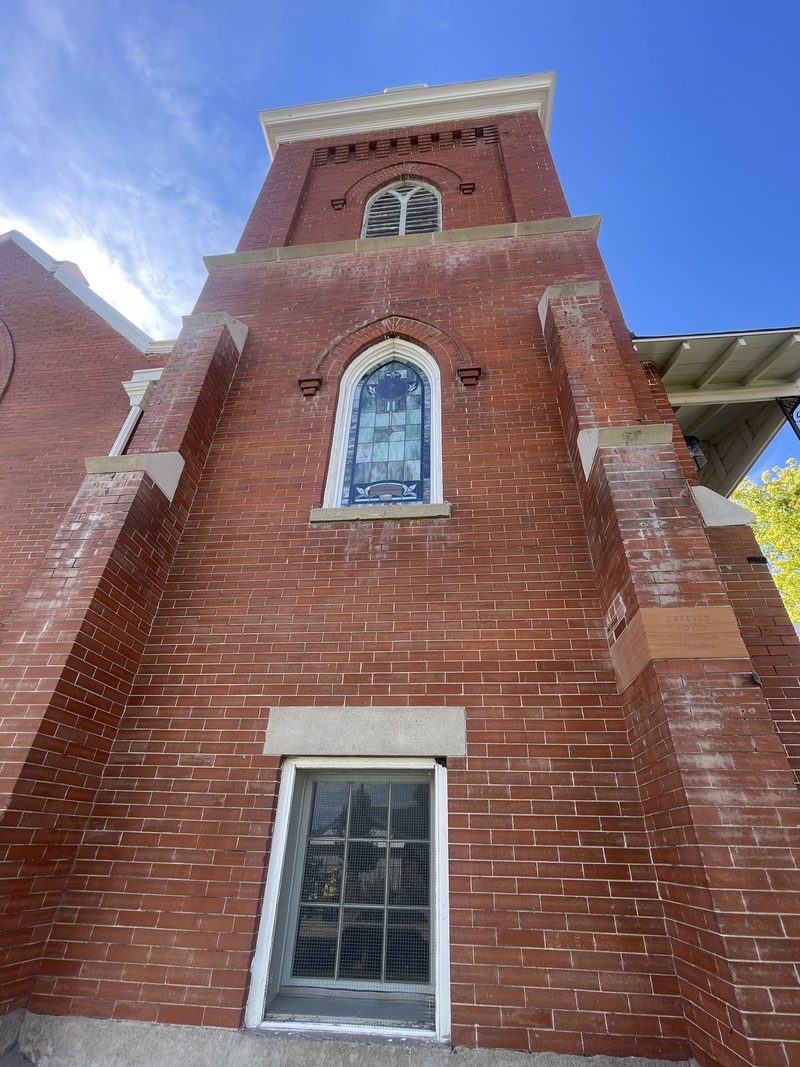
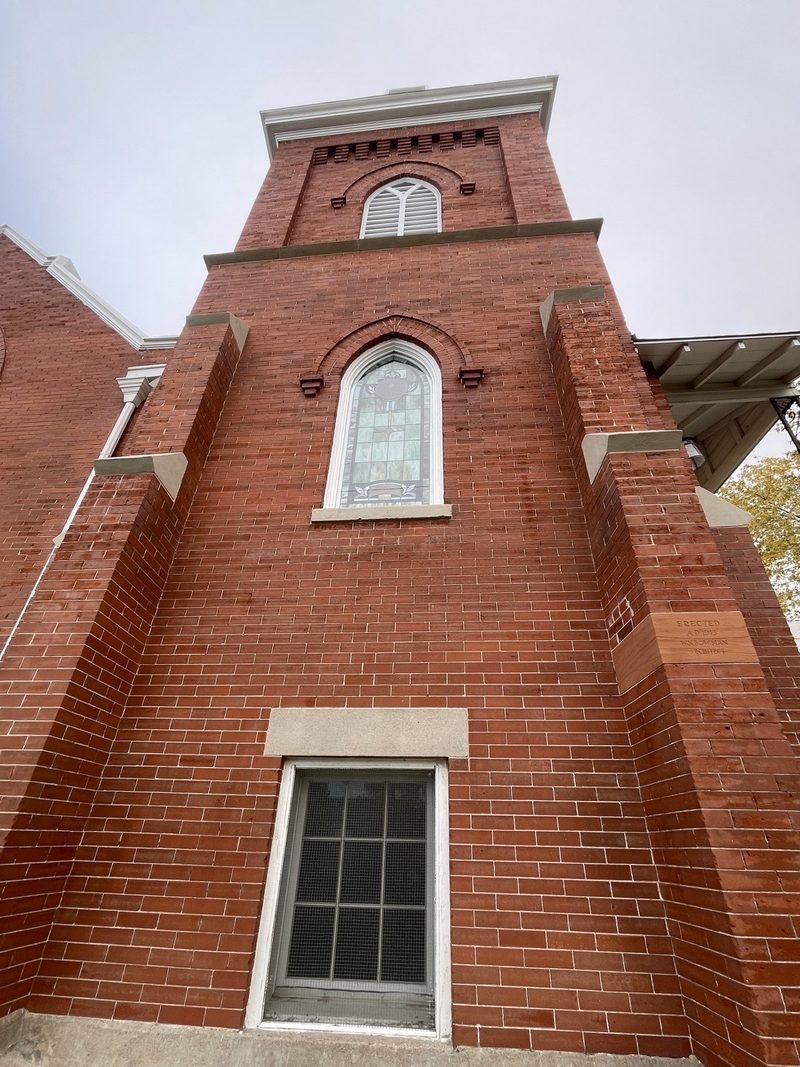
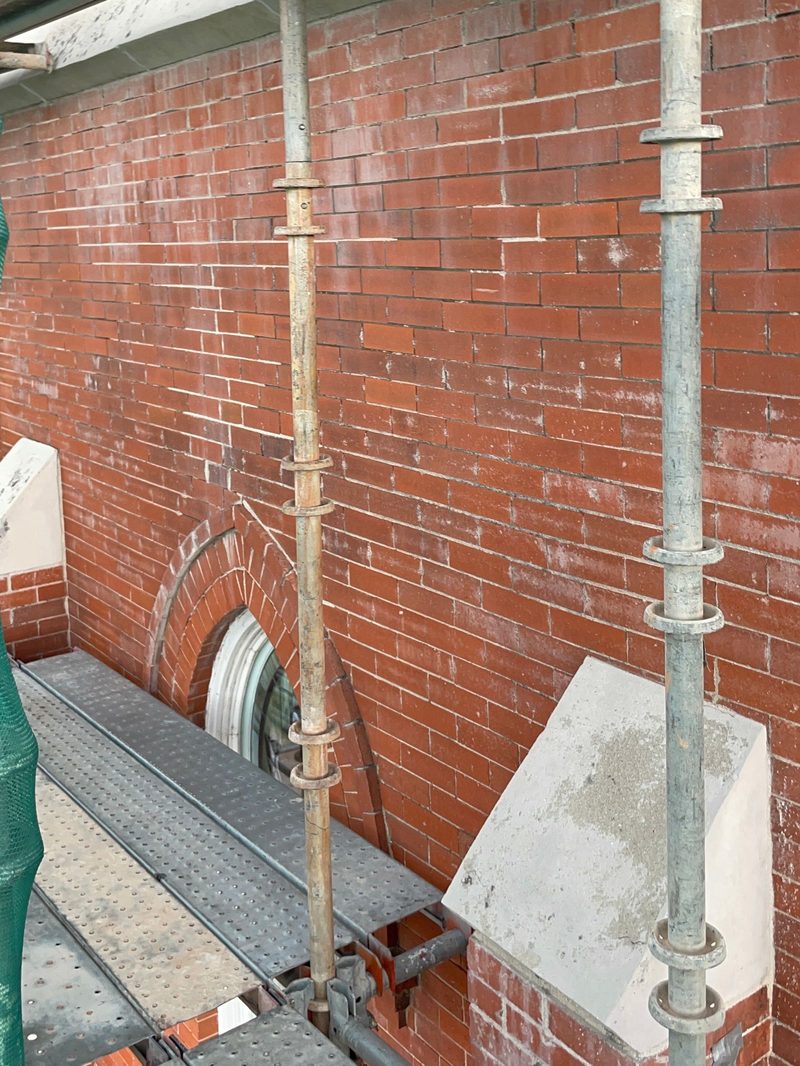
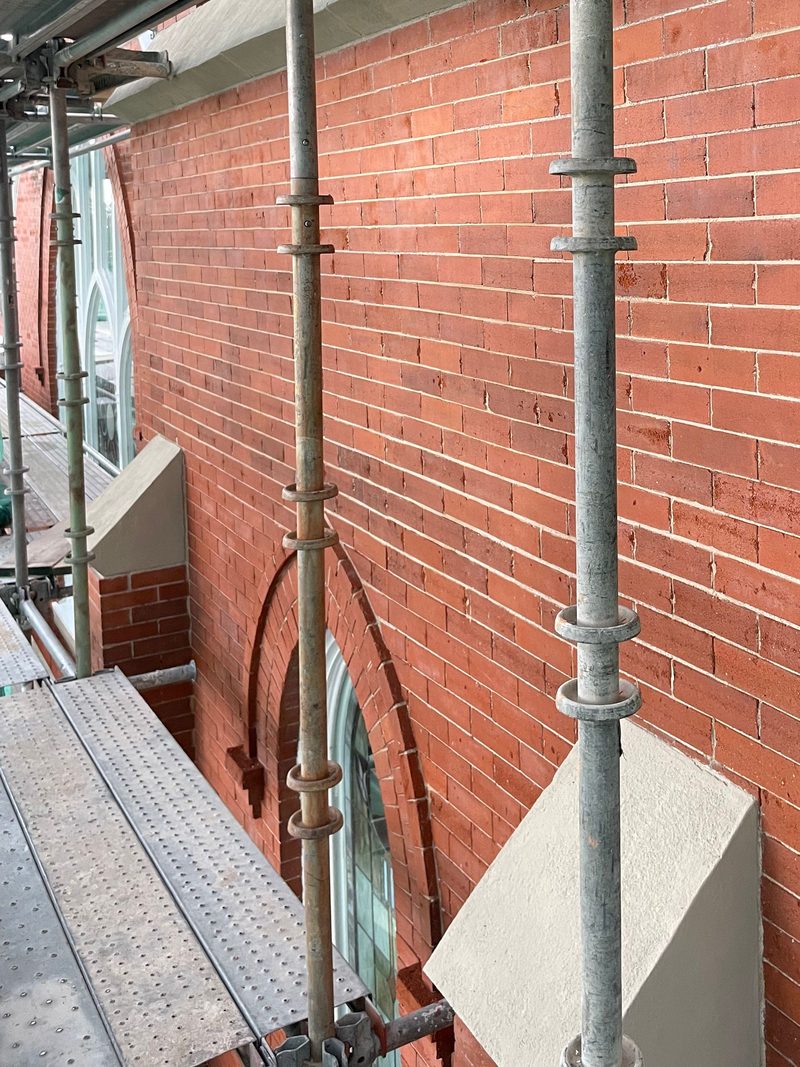
The same views before the work and after it was done. The buttress cap pair shows the same cap from two angles.
The bell tower
Arched window wall
Buttress cast stone caps
08 · Before the scaffolding
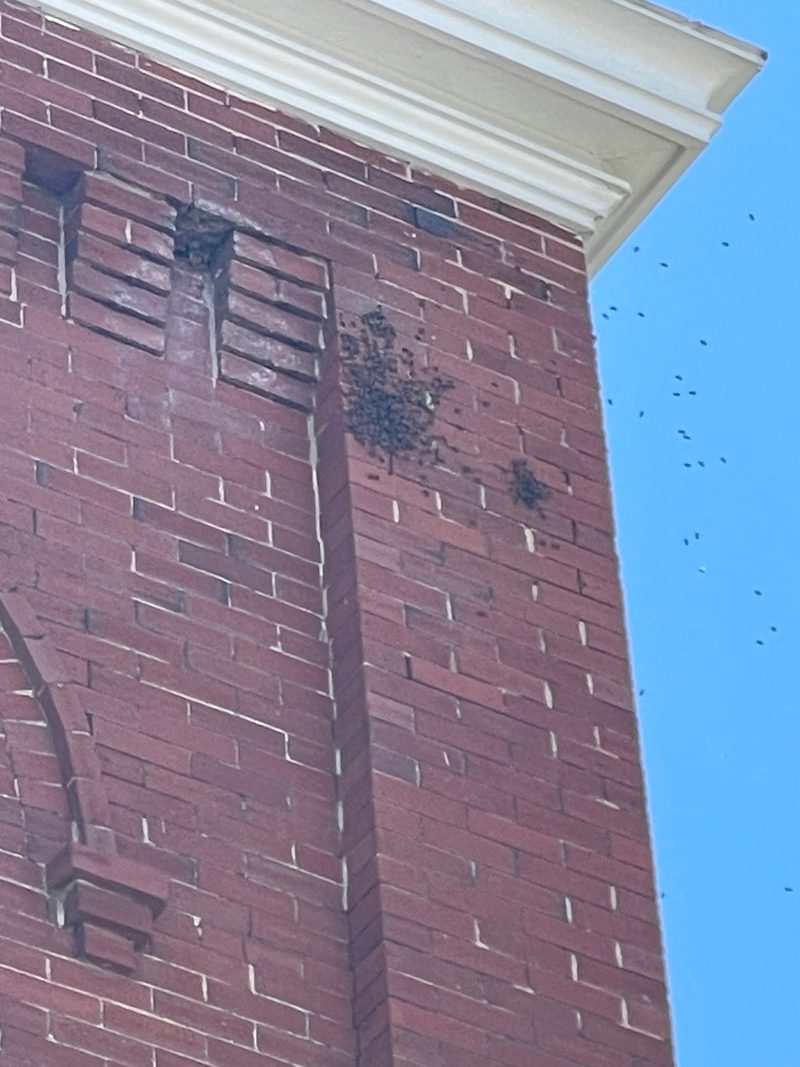
The Bell Tower Bees
09 · History
About the Church of the Advent
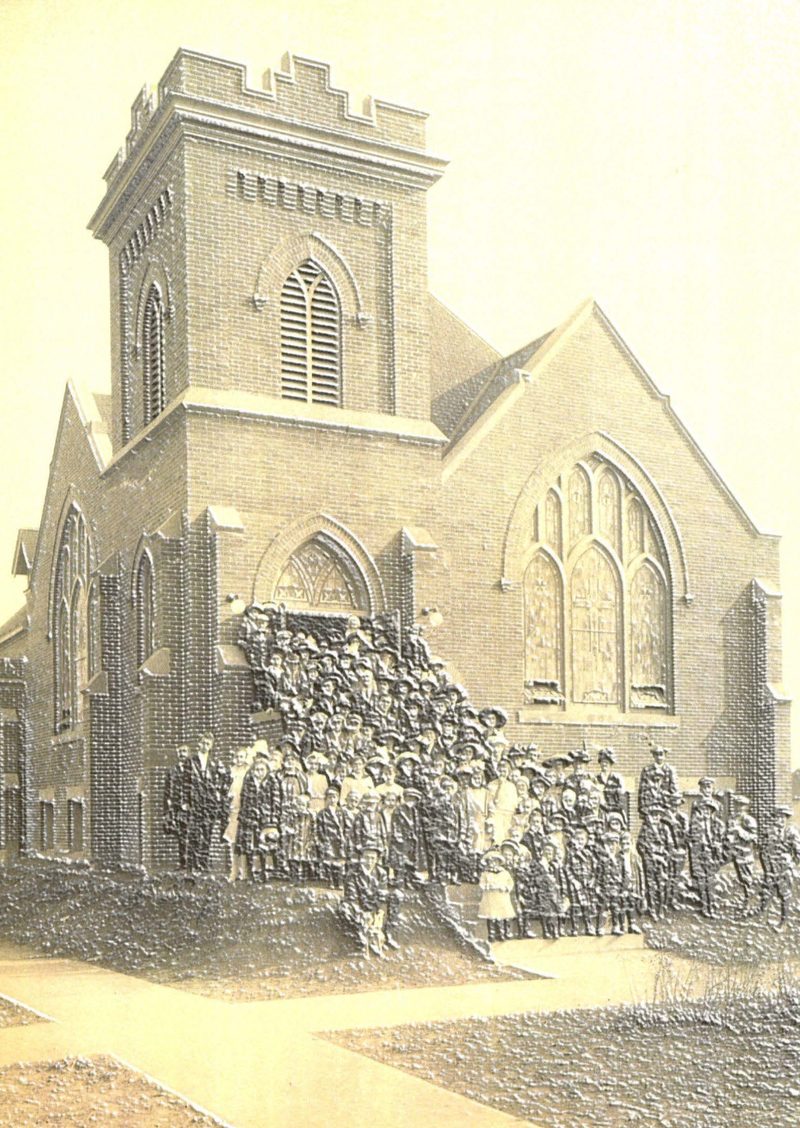
The congregation began in 1890 as the Villa Park Congregational Church. Its brick church was built in 1913 as the Seventh Avenue Congregational Church, with a bell tower, buttresses capped in cast stone and tall arched windows. The City of Denver designated the building a Denver Landmark in 1998.
As a designated landmark, the church's exterior masonry work follows preservation standards, and State Historical Fund projects carry their own reviews. Every method on this project was tested and approved before it went on the building.
Sources: Denver Public Library archives; City of Denver landmarks list.
10 · Neighborhood
Masonry Restoration in Villa Park
Villa Park neighborhood
We bring the same assessment, lab-matched lime mortar and hand repointing from the Church of the Advent to homes and churches across Villa Park, Barnum, West Colfax and Sun Valley.
See Villa Park masonry repair →
Services in Villa Park: tuckpointing and repointing · brick restoration · stone and cast stone repair · brick cleaning · chimney repair · historic masonry restoration
11 · Questions
Church of the Advent Restoration Questions
How was the Church of the Advent restoration funded?
Mostly by a grant from the Colorado State Historical Fund, a program of History Colorado, awarded in 2025. The church's earlier grant applications, built on other assessments, had been turned down. Our assessment documented what needed repair, why, and which methods to use, in the approach the State Historical Fund looks for, and the church received one of the higher award amounts. Church members raised the rest.
Where did the white staining on the brick come from?
The church had been told the white staining came from the mortar. Our assessment found it came from failing, powdering cast stone repairs made in the early 2000s. The white runoff sat directly below the cast stone on the buttresses, the cast stone windowsills and the cast stone band on the bell tower.
Did you replace the cast stone?
No. Instead of a full rebuild, we designed a budget-conscious repair method that the State Historical Fund approved. We stabilized the powdering surfaces during cleaning, removed the failed earlier repairs with stone conservation methods without cutting into sound original stone, patched with a cast stone patching material matched to the original's properties, and re-profiled each piece.
What mortar did you use for repointing?
A lime putty mortar matched to the original through lab analysis of its composition. We made six mortar mockup colors to blend with the brick's varied coloring, including the north side, which gets less sun. Joints were repointed entirely by hand as fine, thin buttered joints, without grout bags, following National Park Service Preservation Brief 2.
How were the restoration methods approved?
The State Historical Fund approved every method before the work began, through cleaning test panels, lab analysis of the original mortar, mortar mockup test panels and on-site reviews of each method.
How long did the project take?
The church first contacted us on August 23, 2024 for an assessment. On-site cleaning and method testing ran in May and June 2025, the masonry work ran from about July to October 2025, and the scope was complete in October 2025, with full closeout in early November 2025.
What happened with the bees in the bell tower?
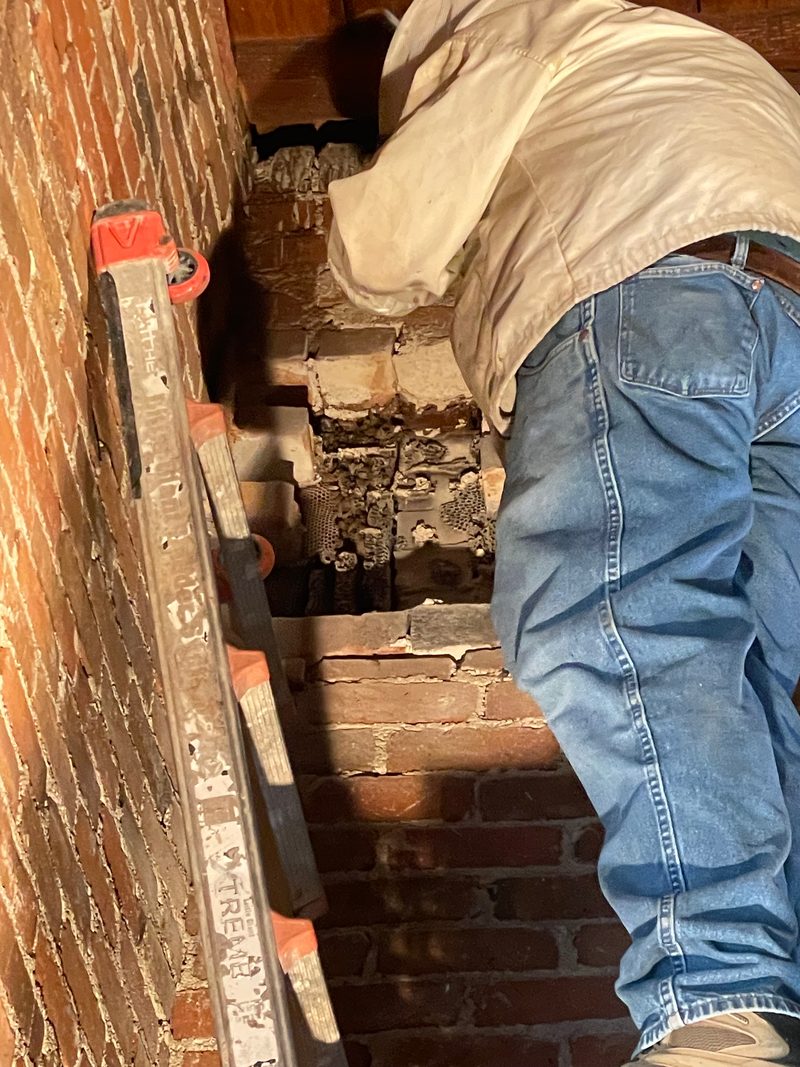
Before scaffolding could go up, a large honeybee infestation in the bell tower had to be dealt with. Bee removal was the church's responsibility, not part of our scope, but when its attempts fell through, our owner, Jesse Smith, brought in a beekeeper. Our crew opened the brick, the beekeeper removed and relocated the bees, and we rebuilt the brick. The full story is on our bell tower honeybee removal page.
Related Denver Masonry Restoration Projects

Tell us about your brick. We will take it from there.
Start Your Project Request
- Tell us what you're seeing on the brick or stone
- Send photographs of the brick or stone and areas of concern
- We review and qualify the inquiry, then recommend the appropriate next step