
Your building has already outlasted most of what was built around it. The brick, the stone and the soft lime mortar holding them together were made to work as one system, and they keep working as long as every repair respects how they were made. Brick Repair Denver restores historic masonry with that system in mind: we study the original materials, match them, and repair only what needs repair so the building keeps its character and its value for the next century.
Tell us about your brick. We will take it from there.
Start Your Project Request
- Tell us what you're seeing on the brick or stone
- Send photographs of the brick or stone and areas of concern
- We review and qualify the inquiry, then recommend the appropriate next step
Selected Historic Masonry Restoration Projects
Our Denver Landmark and State Historical Fund projects, along with National Register properties across Colorado, show the same approach at work: careful diagnosis, matched materials and repairs that look original.
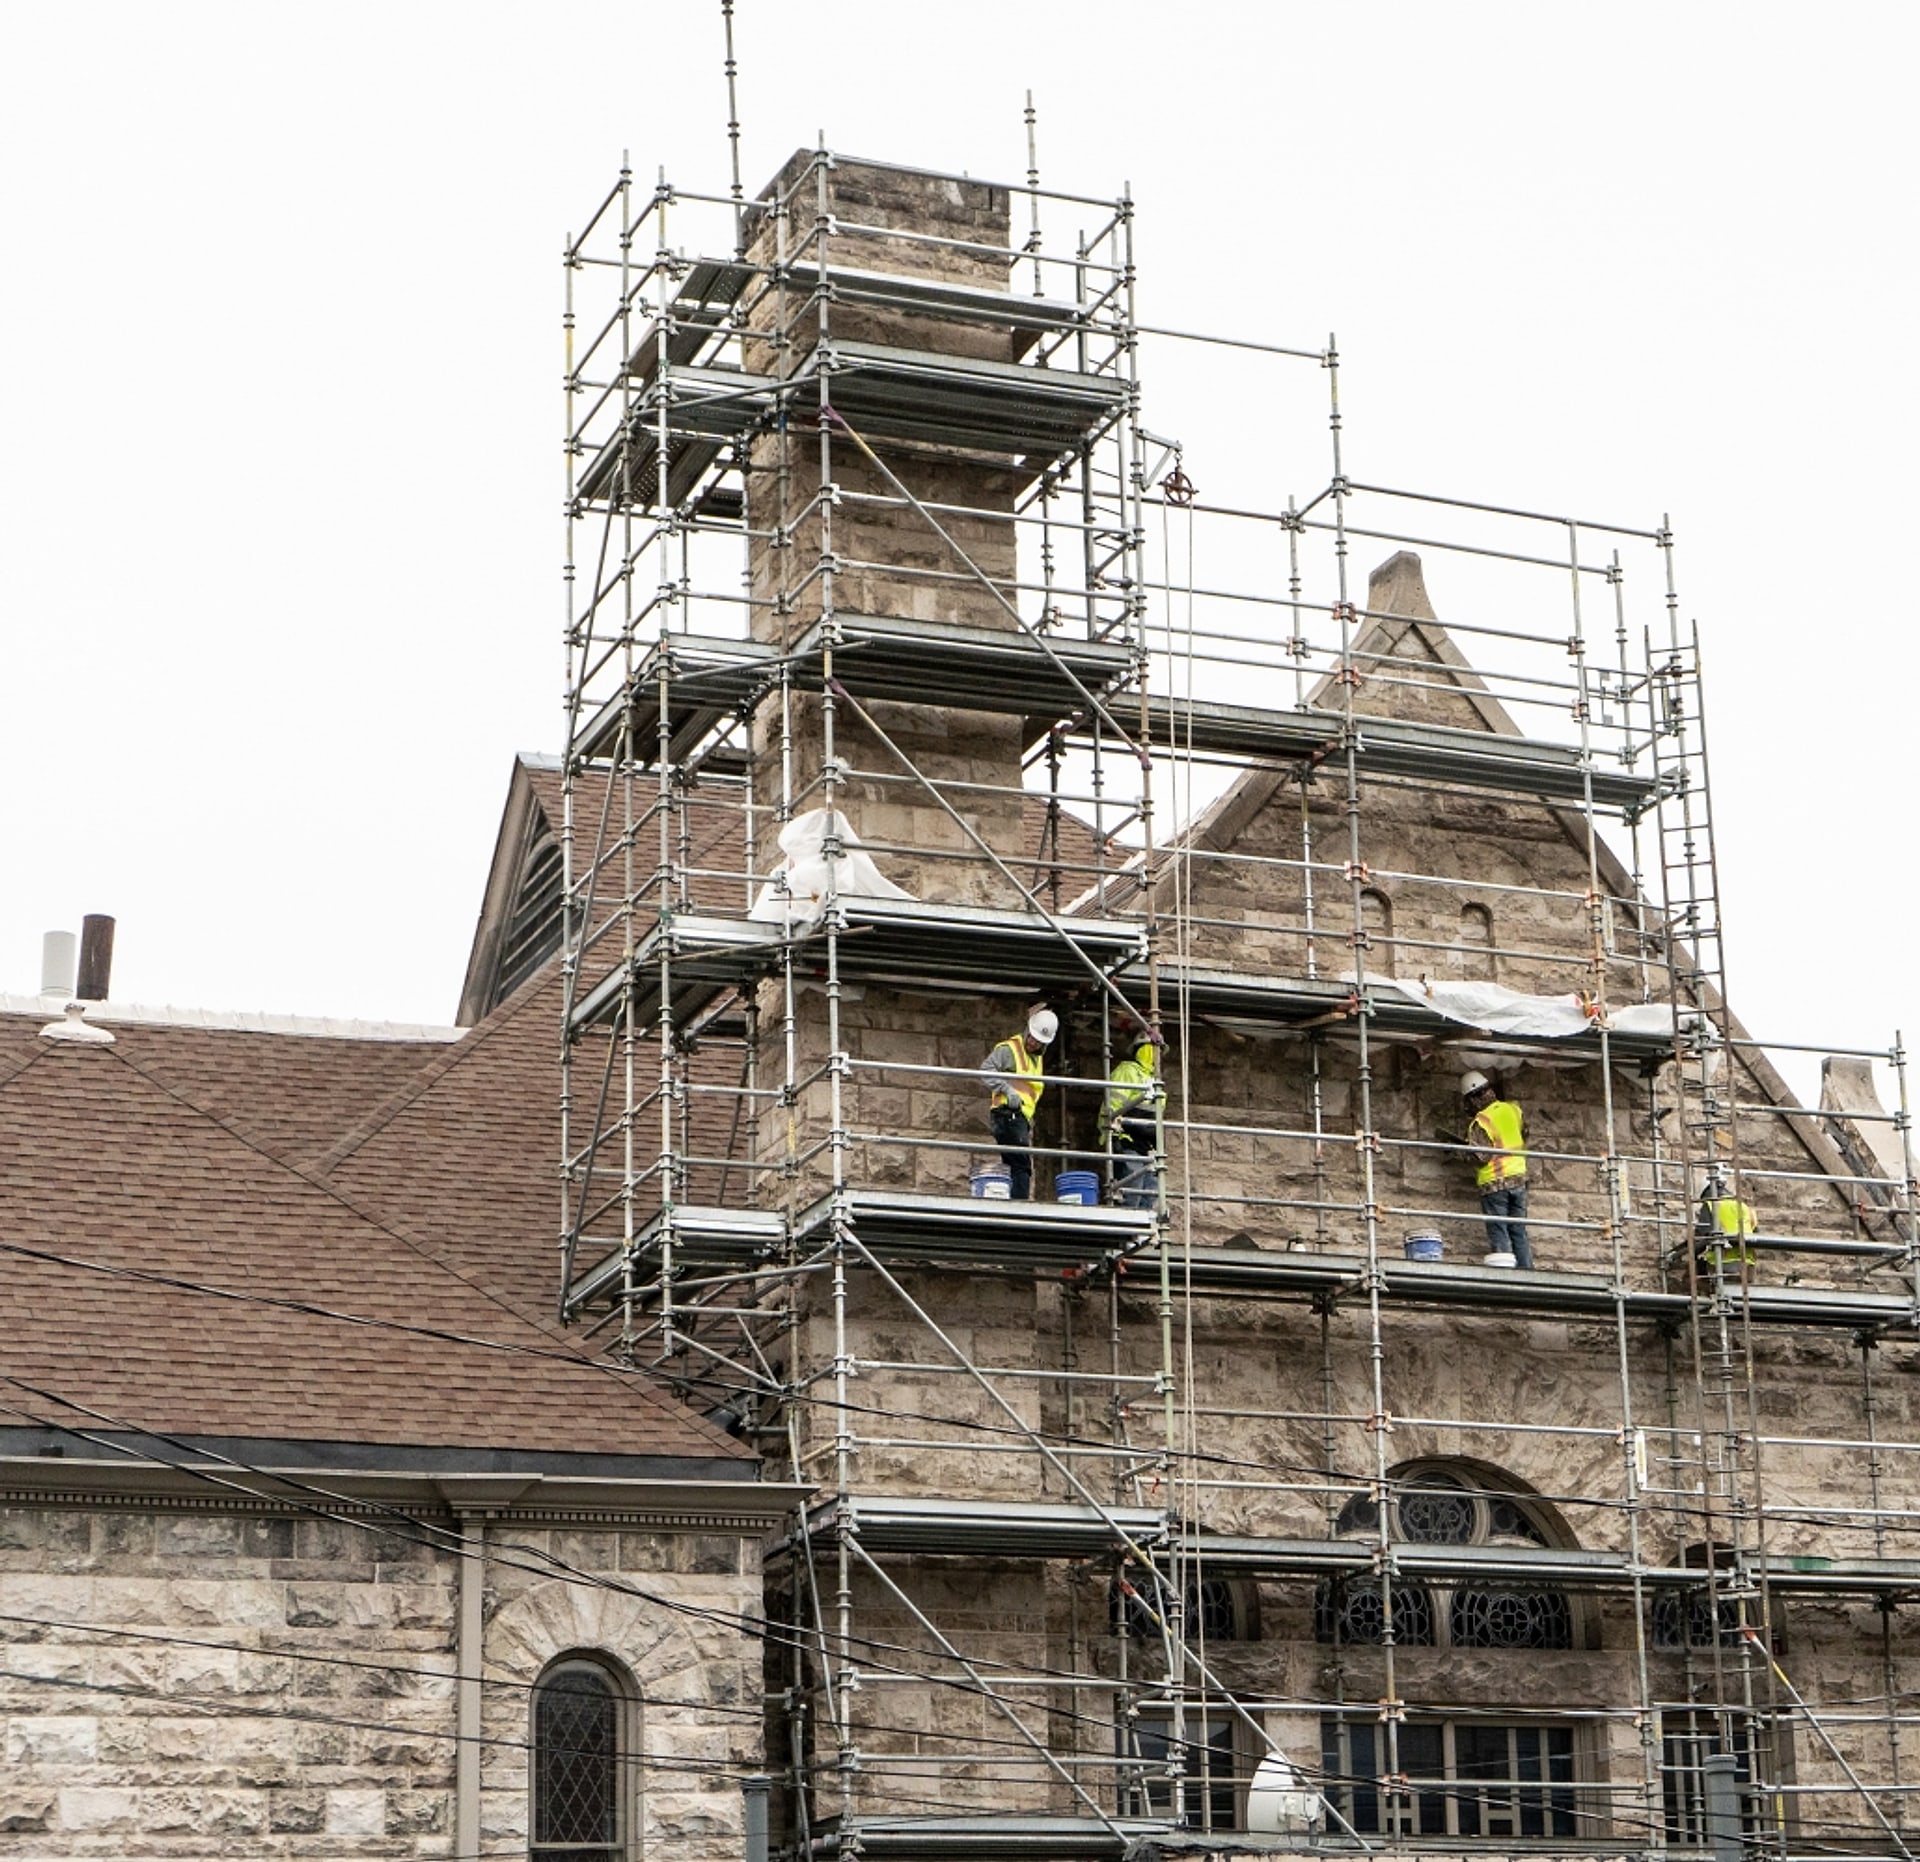
Church of the Advent
A Denver Landmark church built in 1913, restored through a Colorado State Historical Fund project with History Colorado. We prepared the technical assessment, scope and deliverables that behind the church's successful grant, then performed the work: exterior brick and stone cleaning on all elevations, historic mortar analysis and matching, tuckpointing and repointing, cast stone repair and restoration, and rebuilding sections of the bell tower.
Cass Mansion, Capitol Hill
A Dutch Revival residence built in 1899 and designated a Denver Landmark. Our work included Manitou sandstone restoration and repair, historic repointing, matched brick repairs, rebuilding the stepped parapet walls on the south, north and east elevations, repairing and restoring 42 Manitou sandstone copings, and cleaning the brick and stone.
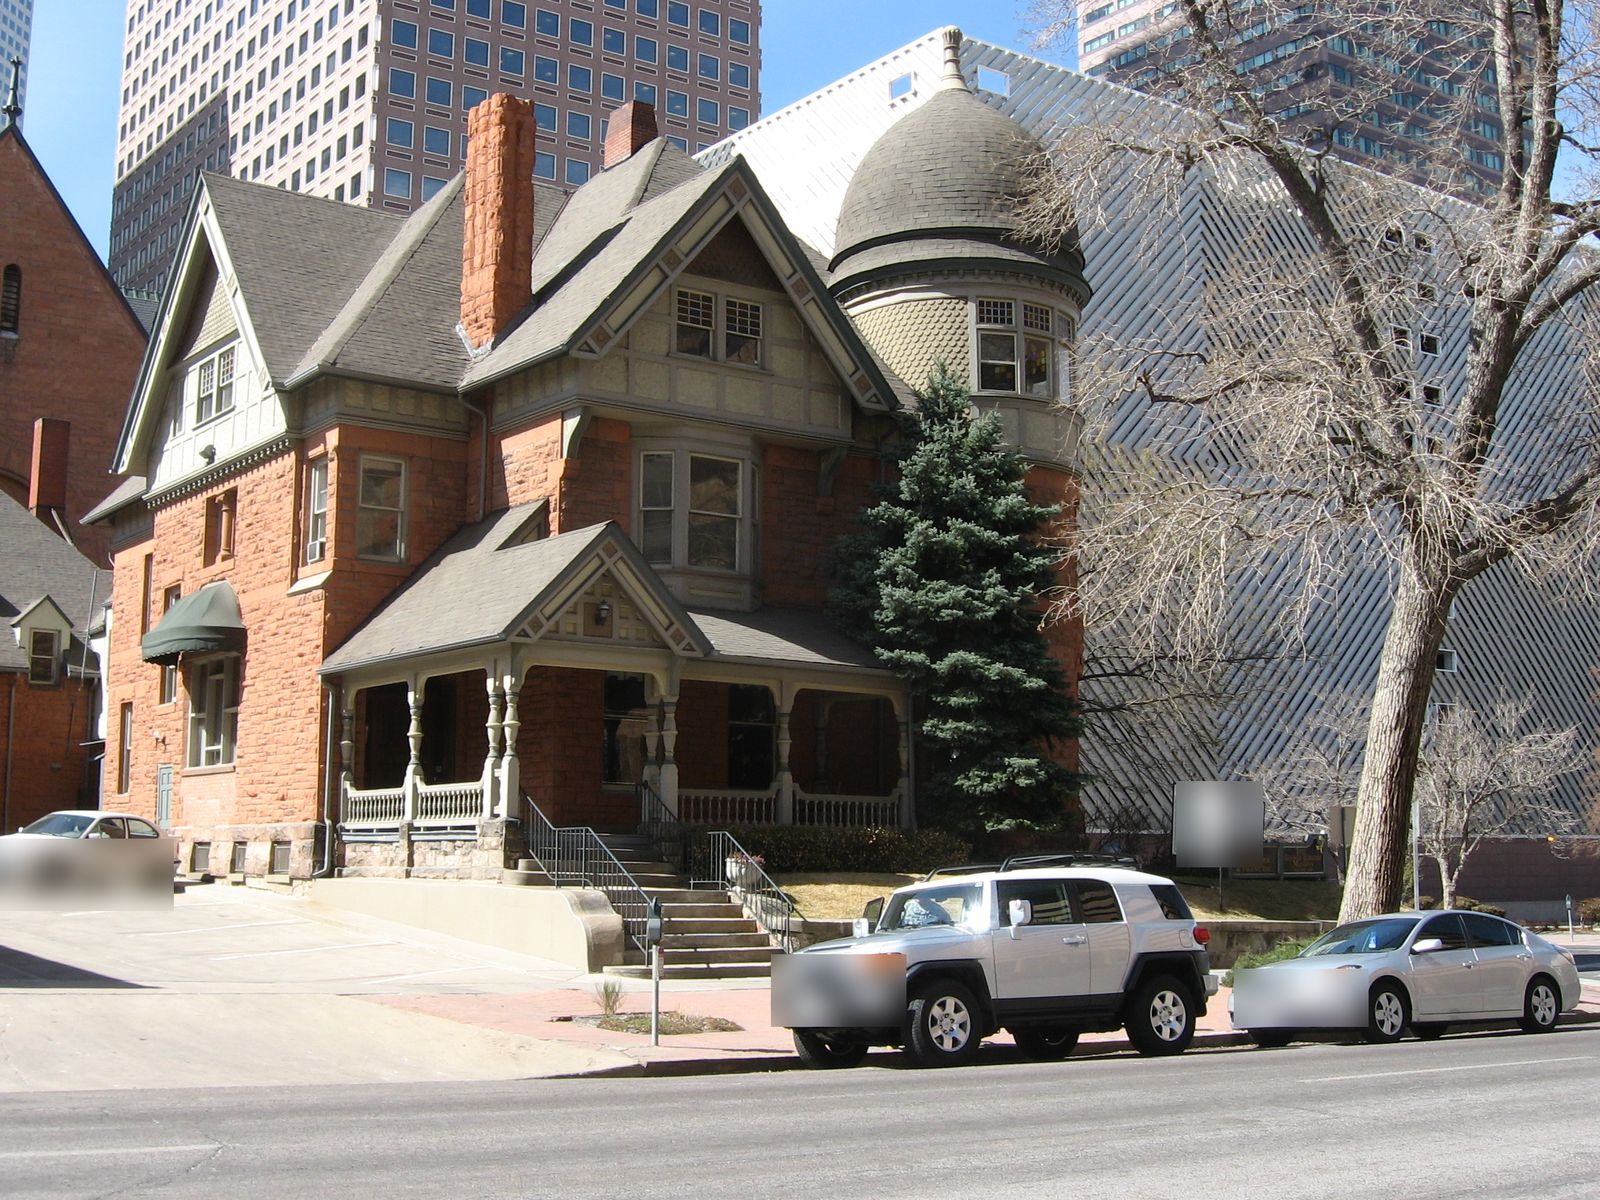
George Schleier Mansion
The George Schleier Mansion in North Capitol Hill is individually listed on the National Register of Historic Places (1977). Designed by architect Frank E. Edbrooke in the Queen Anne style, it is built of red sandstone and crowned by a distinctive onion-domed tower. Brick Repair Denver performed extensive historic sandstone restoration and repair on its red sandstone exterior facade.
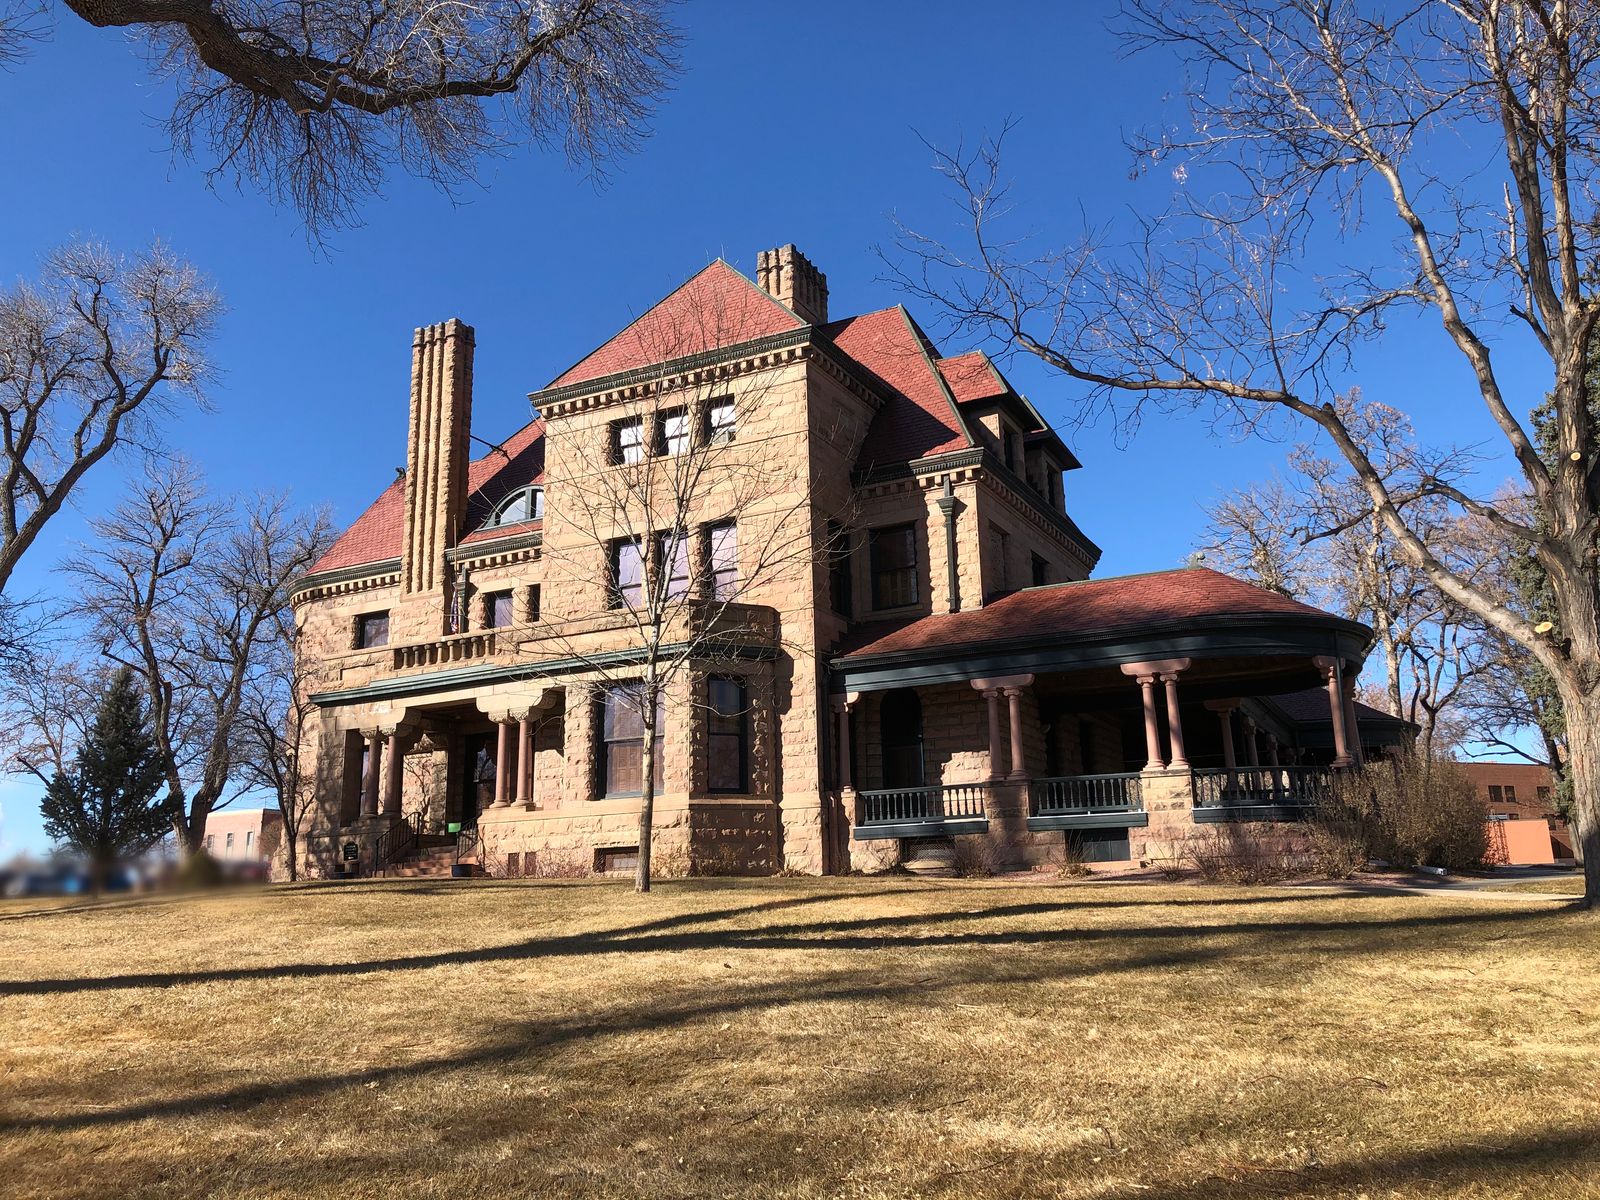
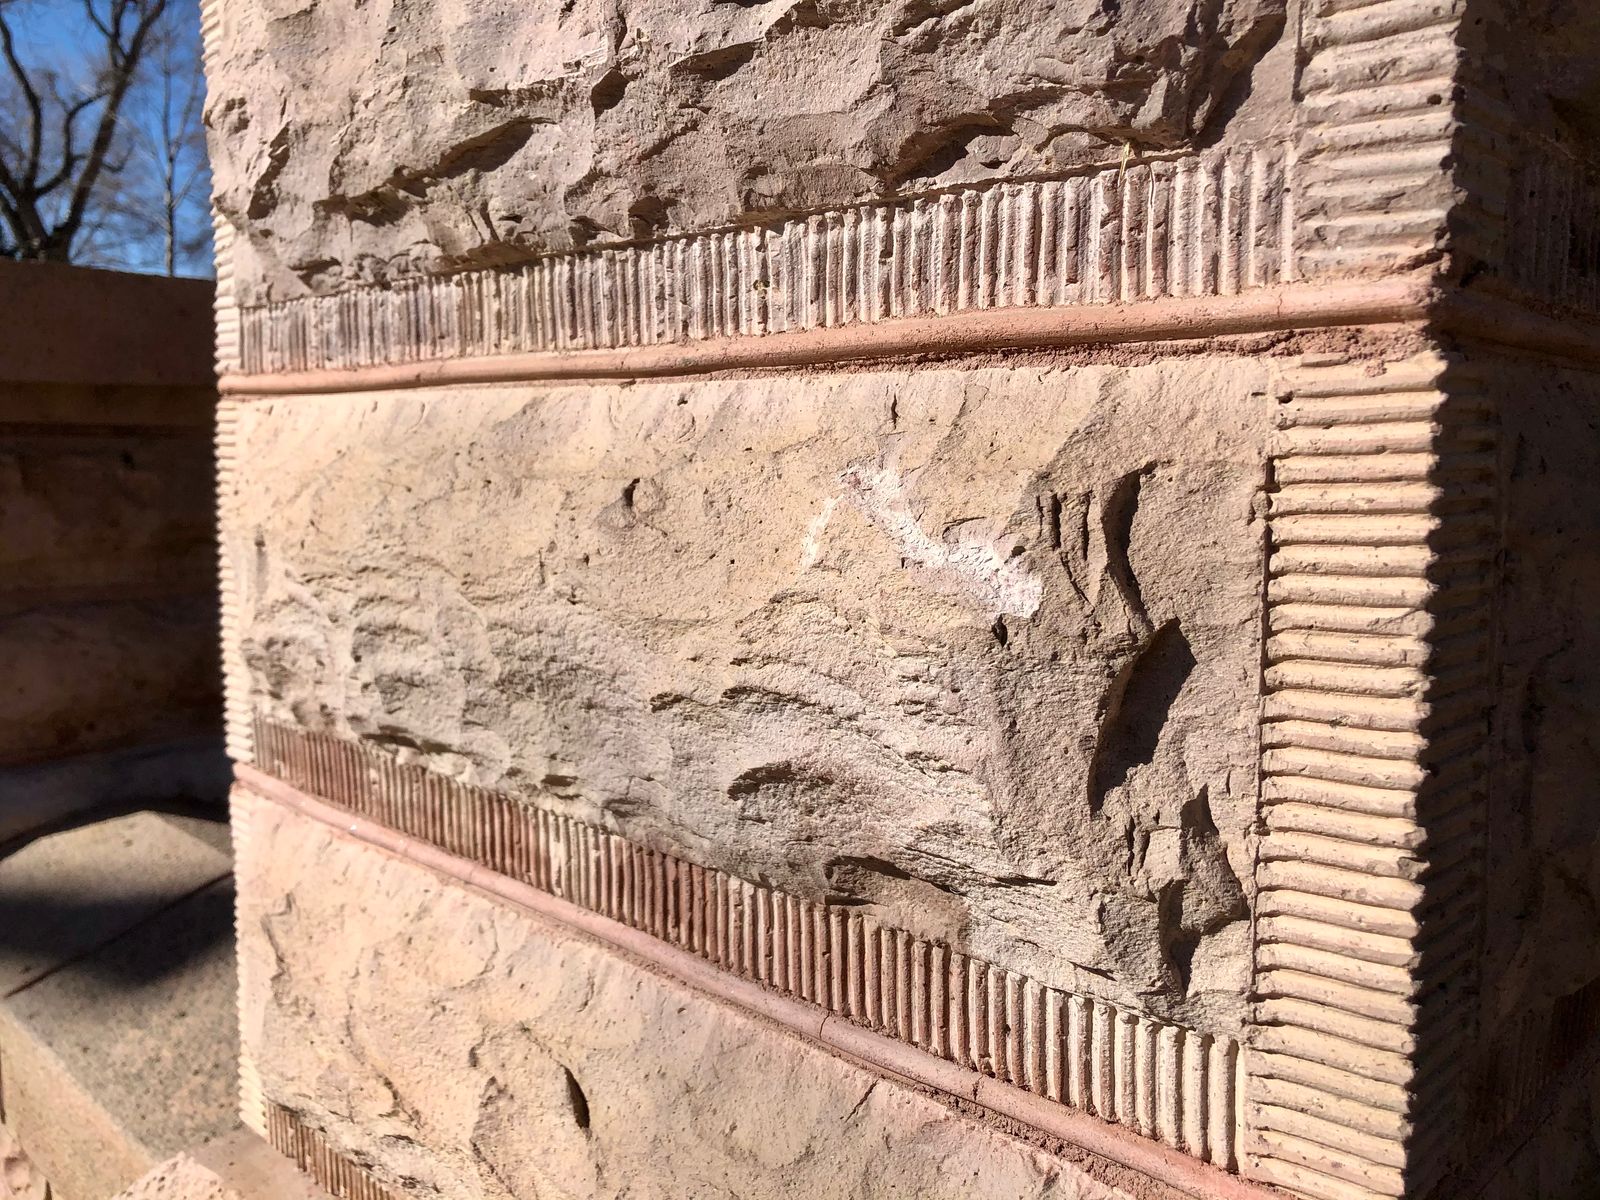
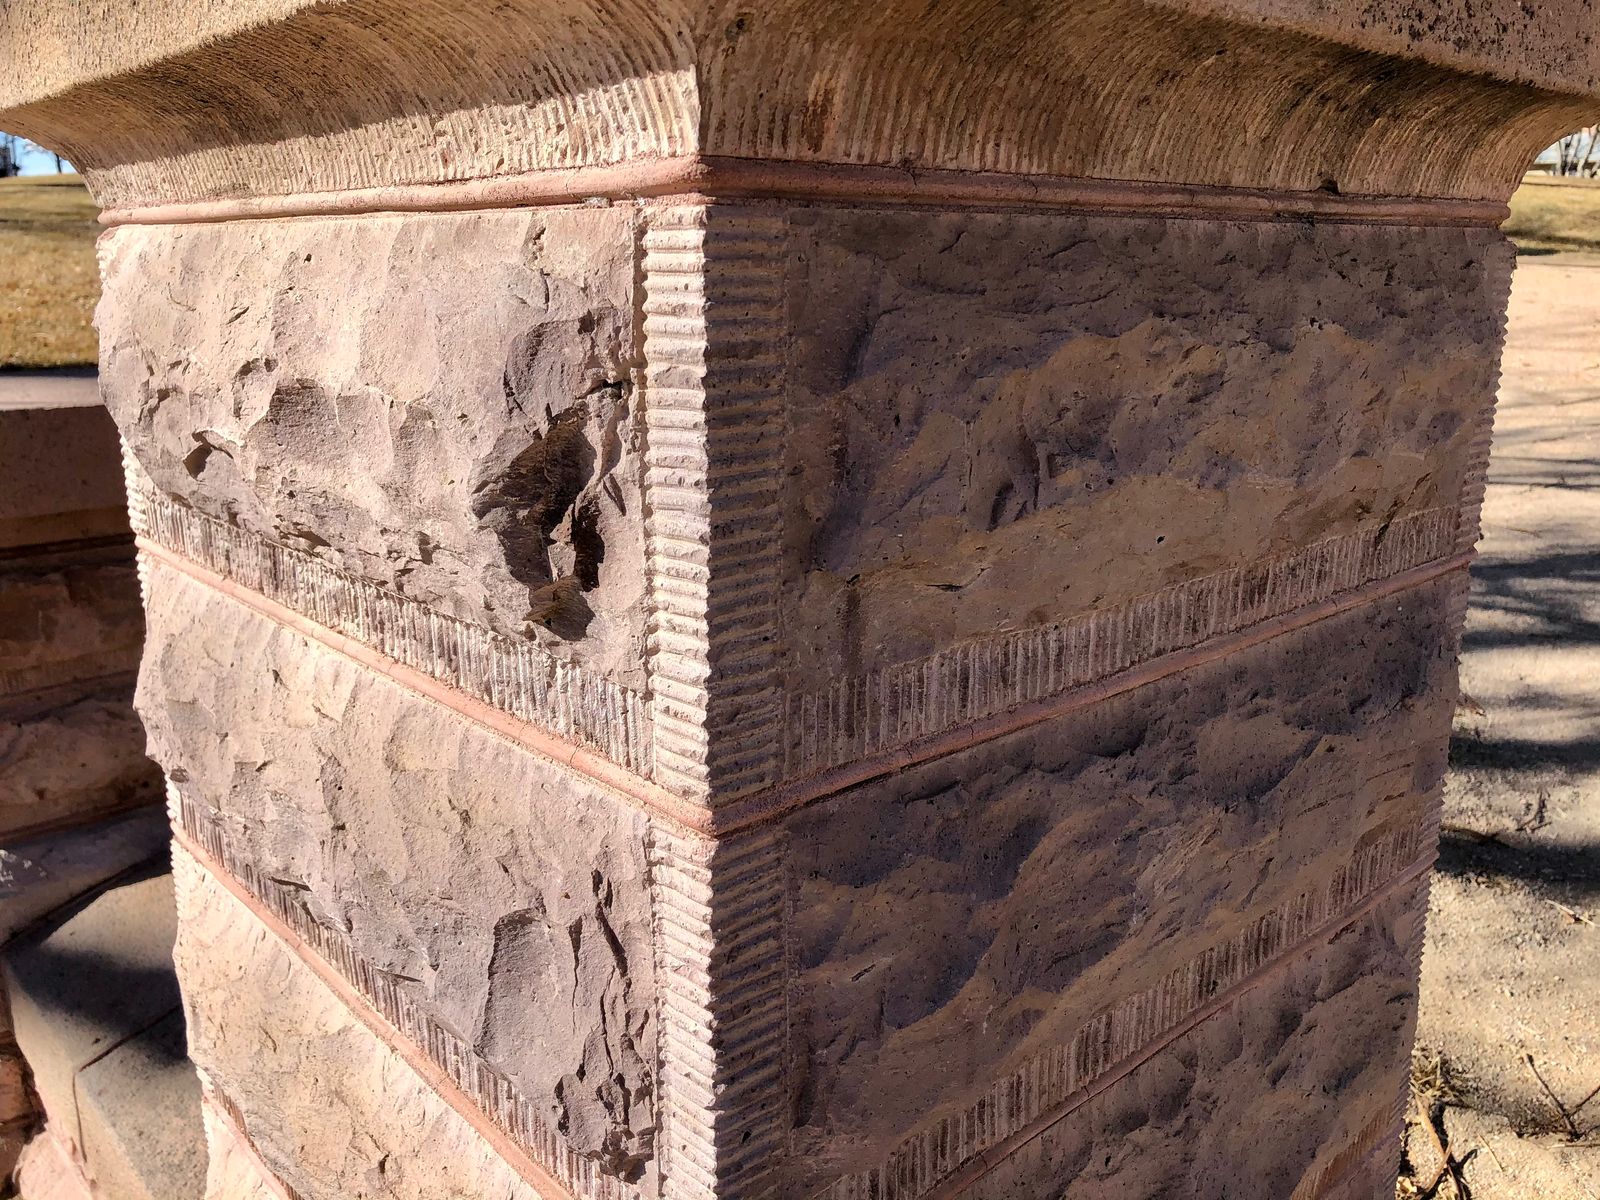
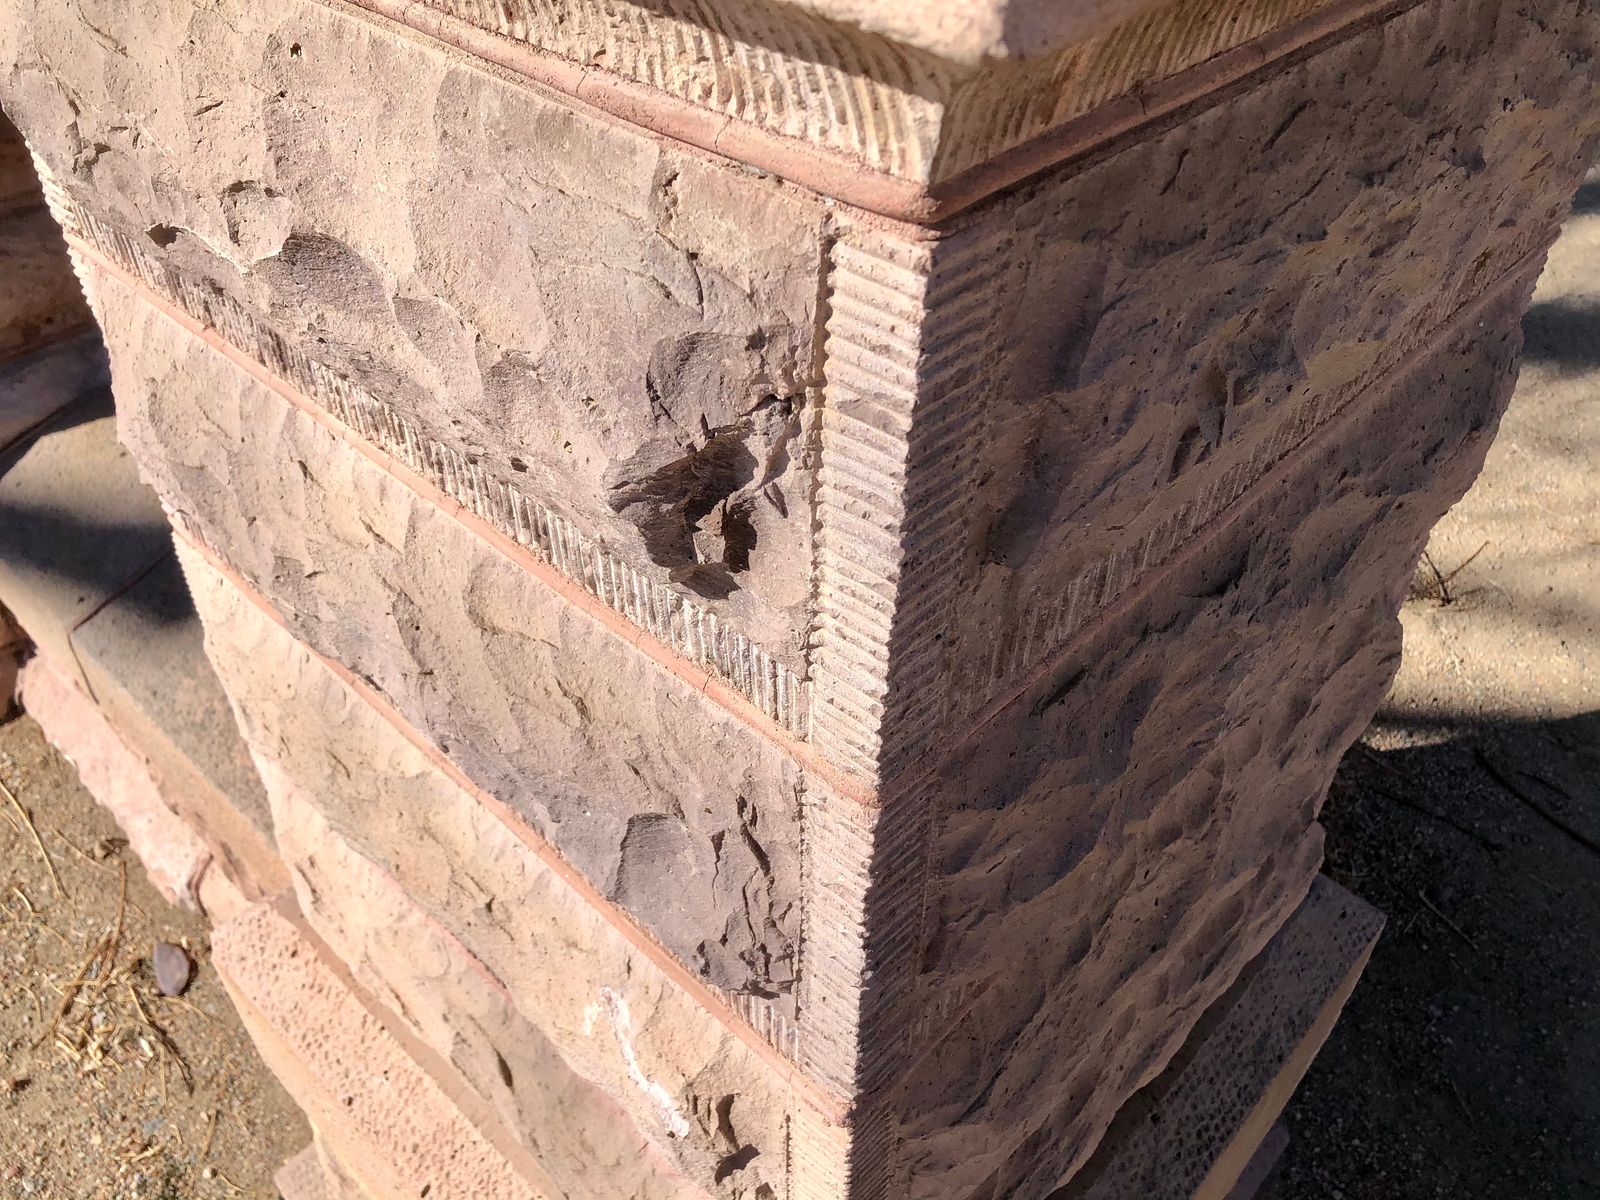
Rosemount Museum, Pueblo
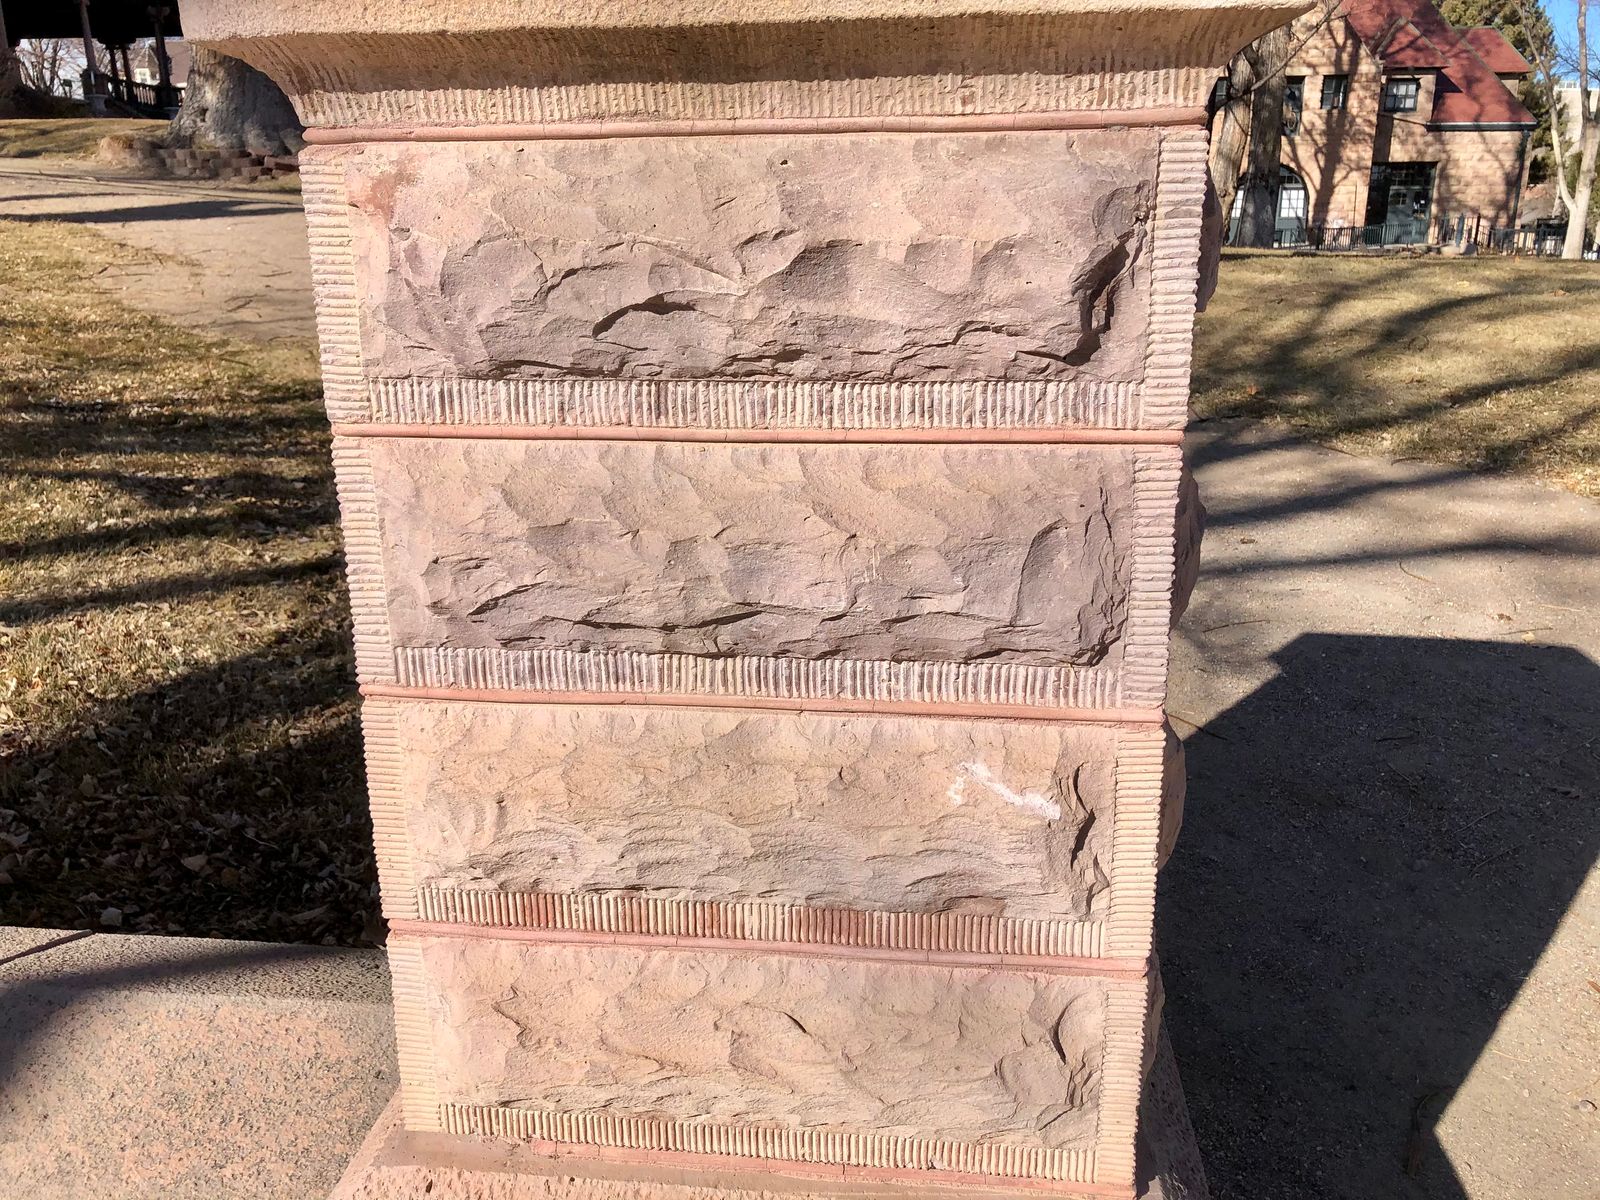
Rosemount, built between 1891 and 1893 for John A. Thatcher and listed on the National Register of Historic Places in 1974, is faced in rose-colored rhyolite over a brick structure and now serves as a house museum. Our work included historic repointing and tuckpointing of the rhyolite, stone repairs including Dutchman repairs, and specialized beaded repointing that reinstated the beaded tooled joint profile across the walls.
Brown Palace Hotel
One of the most recognized buildings downtown, where our work involved the Arizona red sandstone masonry facade.
First Unitarian Church
In Denver, we carried out rhyolite restoration on this church's distinctive stone masonry.
See more of our work on the brick restoration page or learn about our team on the about page.
Cass Mansion: South Elevation Stepped Parapet
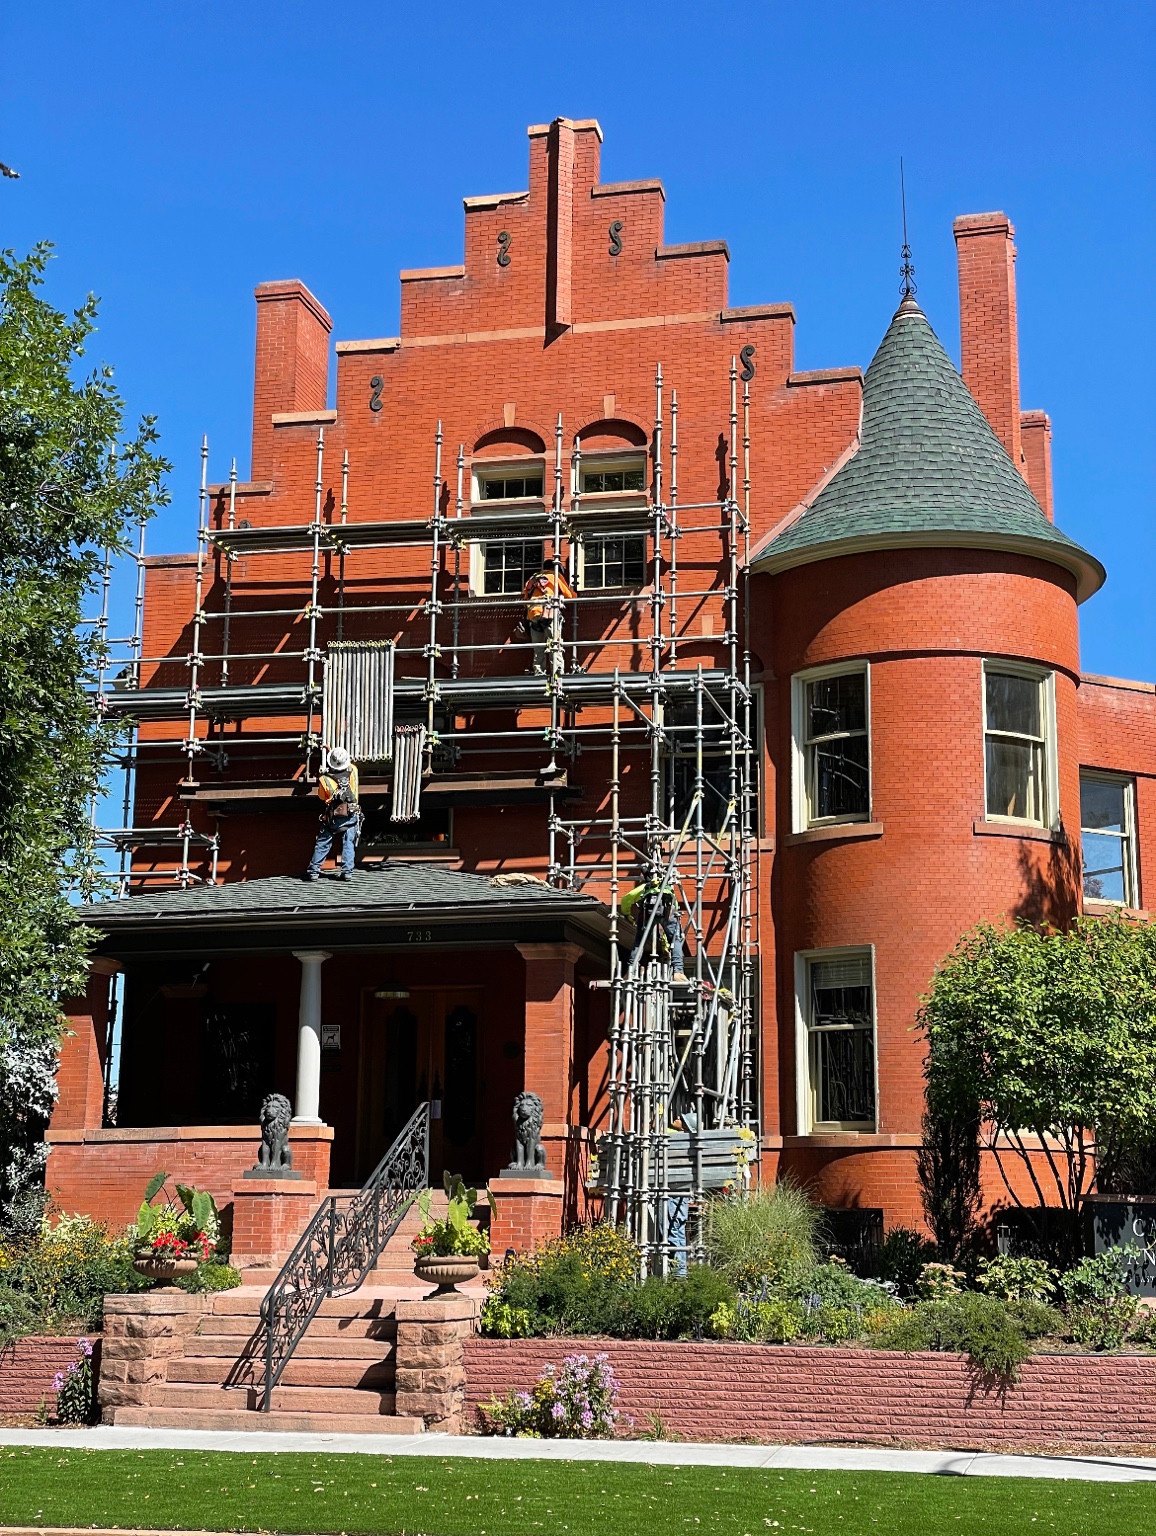
Scaffolding going up at Cass Mansion in Capitol Hill, Denver, Colorado.
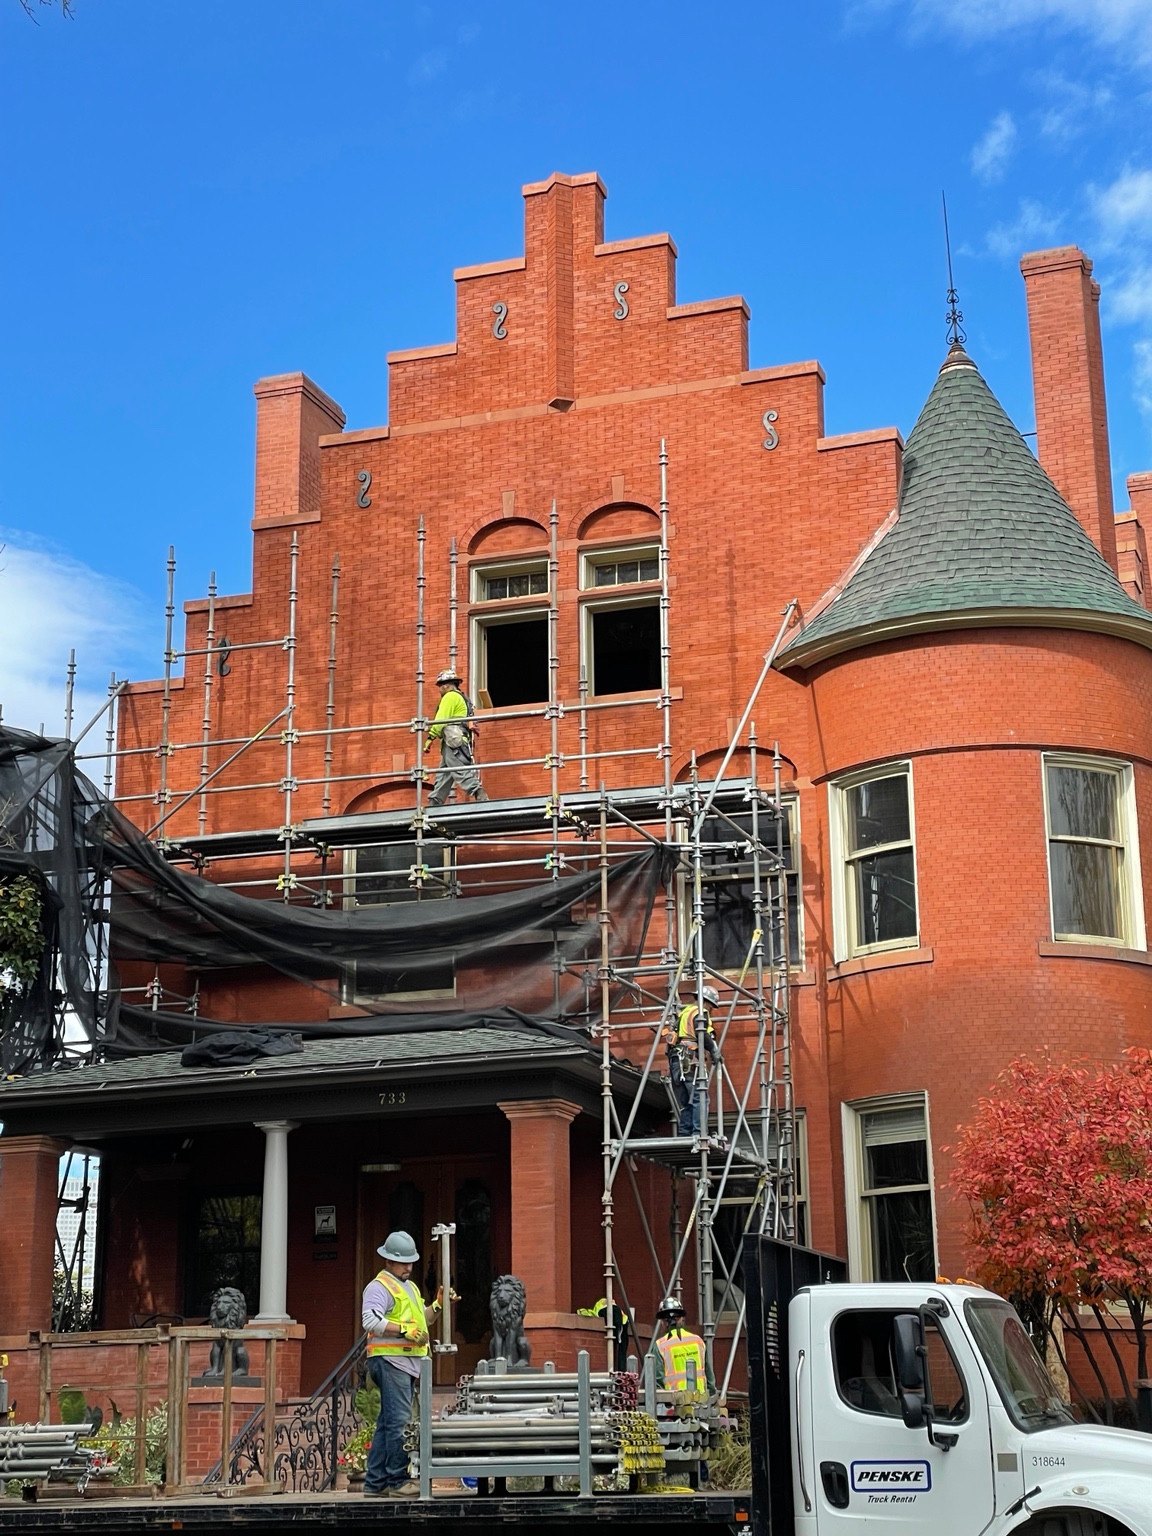
Scaffolding coming down at Cass Mansion in Capitol Hill, Denver, Colorado.
Historic Masonry Restoration in Denver, Led by an Architectural Conservator
Historic masonry restoration in Denver is a different discipline from general masonry repair. A general contractor asks how to make a wall look finished. A preservation mason asks what the wall is made of, why it is failing, and which repair will let it keep performing without damaging the original fabric. That second set of questions is where our work begins.
Brick Repair Denver is a family masonry craft passed down through generations. Owner Jesse Smith is an architectural conservator, and every historic project is assessed and directed through a conservation lens before any mortar is mixed. Bruce Yantis, our Lead Craftsman and Brick Restoration Specialist, leads the hands-on work in the field, from lime mortar tuckpointing to toothing in reclaimed brick so the repair disappears into the wall.
Our approach rests on one conviction: most damaged brick and stone can be repaired without full replacement. Where repair or reuse is not possible, we replace in kind, and where the original can no longer be sourced, we replicate it in materials compatible with the original. At every step, skilled masons remove only what has failed, match new material to the old, and blend the work until it looks original. That is how a historic building keeps the character it was built with.
We restore brick, sandstone, limestone, Arizona redstone, rhyolite, cast stone and terra cotta on homes, churches, schools, institutions, apartment buildings and commercial properties. Our project record includes Denver Landmark and State Historical Fund projects. We prepare the technical material those processes call for: condition assessments, scopes of work and documentation of the historic fabric. If you own, manage or care for a historic building, you get one team that understands the craft, the materials and what reviewers look for.
Evaluating Historic Masonry Before Restoration
Every sound restoration begins with understanding the building. Before we recommend tuckpointing, stone repair or cleaning, we want to know how the walls were built, what they were built with, what has been done to them since, and where water is getting in. That investigation is what separates masonry restoration and repair that lasts from work that has to be redone.
How Historic Walls Were Built
Most buildings from the eighteenth, nineteenth and early twentieth centuries carry their own weight on solid, load-bearing masonry walls. There is no steel frame behind the brick. The wall is several wythes of brick, or brick backed by rubble stone, bonded together and laid in lime mortar. The masonry is the structure. That changes how every repair must be approached: a joint that has failed deep inside the wall is a structural concern, not a cosmetic one, and a hard patch that cracks the surrounding brick weakens the wall that holds up the building.
These walls also manage moisture differently from modern construction. A contemporary cavity wall has an air gap, flashing and weep holes to drain water away. A traditional solid wall absorbs rain and snowmelt into its mass and releases it again by evaporation, mostly through the soft mortar joints. As long as the mortar stays more porous than the brick and stone, the wall dries out the way it was designed to. Treatments that interrupt that cycle, such as hard cement mortar or sealing coatings, are the ones that cause the most harm.
A Short History of Mortar in American Construction
For most of the history of building in America, mortar was simply lime, sand and water, sometimes tinted to suit the brick or stone. John P. Speweik's The History of Masonry Mortar in America 1720-1995 traces how that changed. Natural cement and hydraulic lime entered construction in the nineteenth century, and Portland cement followed. In Speweik's account, builders first added Portland cement to lime and sand mortar in the late nineteenth century as a setting additive to speed construction. As the idea took hold that a stronger mortar was a better mortar, the proportion of cement grew, and in some cases lime was dropped from the mix altogether by the turn of the century.
That history matters to anyone caring for an older building. A house or church in Denver from the 1880s or 1890s can contain pure lime mortar, a lime mortar with a small cement addition, or a later cement repair, sometimes all on the same elevation. Mortar analysis tells us which one we are looking at, so the new work matches the original construction rather than an assumption about it.
Why Lime Mortar Protects Historic Masonry
Lime mortar earns its place in historic restoration for three reasons:
- Compatible strength. Lime mortar is weaker than the brick and stone it bonds. When the wall moves with temperature and settlement, the mortar yields and the masonry units stay whole.
- Vapor permeability. Lime mortar breathes. Moisture inside the wall escapes through the joints instead of being forced out through the face of soft brick or sandstone.
- A sacrificial joint. Mortar is meant to be the part of the wall that wears out. A lime joint erodes slowly over decades and is renewed by repointing, while the brick and stone, which are far harder to replace, are preserved.
Cement-rich mortar reverses all three. It is harder than the masonry, it traps moisture, and it forces the brick or stone to become the part that fails.
Warning Signs Your Historic Masonry Needs Attention
Periodic exterior surveys are the foundation of any maintenance plan for a historic building. Walking the elevations once or twice a year, with binoculars for upper walls and chimneys, catches small problems while they are still small. These are the conditions we look for:
- Efflorescence. A white, powdery deposit on the brick face. It means water is moving through the wall and carrying dissolved salts to the surface.
- Spalling. Missing, loose or flaking pieces of brick or stone face, from moisture freezing inside the unit.
- Mortar joint deterioration. Joints that are recessed, soft, crumbling, cracked or hollow behind the face.
- Loose, cracked or displaced brick. Units that have shifted, bulged or separated from their neighbors, often at parapets, cornices, arches and chimney tops.
- Moisture damage. Stained plaster, peeling paint or damp spots inside, and dark wet patches outside that linger after a storm.
- Biological growth. Moss, algae or plants rooted in the joints, a sign that part of the wall stays wet for long periods.
Early investigation keeps repairs modest. A hairline crack in a joint lets water in; each freeze-thaw cycle widens it; more water enters; the mortar loosens and falls out; and eventually brick at the top of a wall or chimney comes loose. Catching that sequence at the first step is the least expensive repair a historic building will ever need. Just as important, the visible symptom is often not the true cause. Deteriorated mortar below a parapet can trace back to a failed coping, missing flashing or a roof leak, so we diagnose the source before scoping the repair.
Why Historic Masonry Fails in the Front Range Climate
Most deterioration we see on historic buildings in Denver traces back to two forces working together: water and the wrong repairs. Understanding which one is driving the damage on your building is the difference between a repair that lasts and one that quietly makes things worse.
Freeze-Thaw Cycles and Spalling Brick
The Front Range swings above and below freezing again and again through fall, winter and spring, often within a single day. When water soaks into brick or stone and then freezes, it expands inside the pores. Repeat that cycle enough times and the face of the masonry lets go. That flaking or popping of the outer surface is called spalling, and it is one of the most common reasons owners call us.
Spalling is a symptom. The real question is where the water is coming from: failed mortar joints, a leaking parapet or coping, poor drainage at the base of the wall, a downspout discharging against the foundation, or a coating that traps moisture inside the brick. We trace the source first, because replacing spalled brick without stopping the water just schedules the next round of damage.
The local climate adds its own pressures. Intense high-altitude sun warms south and west elevations quickly on winter afternoons, melting snow that has drifted onto sills, ledges and parapet caps, and the same water refreezes in the masonry after dark. North elevations stay cold and damp longer, so moss, efflorescence and mortar loss tend to concentrate there. Dry air pulls moisture back out of the wall quickly, which carries dissolved salts to the surface where they crystallize just under the face of soft brick and sandstone.
Sandstone responds to these cycles differently from brick. Because it formed in layers, water that enters behind the face travels along the bedding planes, and freezing pushes those layers apart. The result is contour scaling or delamination, where a sheet of stone peels away from the block. Sandstone that was set on edge, with its bedding running vertically, is especially prone to this. Correct repair addresses the water path, consolidates or patches the stone where it is sound, and replaces in kind where the unit has lost its integrity.
Soft Brick and Past Hard-Mortar Repairs
Much of the brick in older neighborhoods was fired at lower temperatures than modern brick, and not every unit in a historic wall is equally durable. Face brick on the street elevation was selected for hardness and color, while softer common brick went into side walls, back walls and the inner wythes. Underfired units, often lighter or salmon in color, came from the cooler parts of the kiln and weather fastest when exposed. Knowing which brick is which tells us where to expect trouble and which units need the most protection.
Many of the walls we evaluate also carry a previous repair in hard, gray, cement-rich mortar, for the reasons described under Why Lime Mortar Protects Historic Masonry above. Those repairs are easy to recognize once you know the signs: joints that stand proud of eroded brick, a flat gray color that does not match the original, hairline cracks running along the brick edges, and spalled or broken arrises on the units immediately beside the patched joints. Removing that mortar is delicate work, because hard mortar can be stronger than the brick it surrounds. We cut it out by hand in stages, relieving the joint before lifting the remnant, so the brick edges survive. Where removal would cost more original fabric than it saves, we document the condition and leave sound sections in place. Correcting past hard-mortar repairs is a large part of historic tuckpointing in Denver, and it is why we never choose a mortar until we know what the wall was built with.
Water, Parapets and Failed Copings
Parapets and copings take the worst exposure on any masonry building. They catch wind-driven rain and snow on both faces, sit at the top of the wall where flashing often fails, and send water straight down into the assembly when their joints open. On historic buildings, a failing parapet is often the hidden source of interior plaster damage, efflorescence and spalling several feet below. Repairing or rebuilding the parapet and resetting the copings with proper joints is frequently the single most valuable repair on the building.
Our Approach to Historic Brick and Stone Restoration

Remove only what has failed. Match everything else. Historic masonry restoration is, at its heart, a discipline of restraint. A building that has stood for a century does not need to be remade. It needs the parts that have failed to be carefully taken out and reinstated with materials and workmanship that belong there. Every decision follows a clear order:
- Repair first. Most brick and stone damage can be repaired without full replacement. Sound original material stays; spalled faces are patched, stone is consolidated or receives a Dutchman repair, and failed mortar joints are tuckpointed.
- Replace in kind when repair or reuse is not an option. A unit that has lost its integrity is replaced with salvaged brick or matching stone of the same type, size, color and texture, toothed in or set so the bond and coursing continue.
- Replicate the original in compatible materials when it can no longer be sourced. Missing or failed features are re-created: cast stone or carved replicas of ornament and trim, custom-matched brick, and lime mortar matched to the original. The replica is designed to be no harder and no less breathable than the historic work around it.
Whatever the tier, the method is the same:
- Remove only the damaged sections. A spalled brick, a delaminated piece of sandstone or a run of failed mortar comes out by hand.
- Match the new to the existing in composition, color, texture and profile, so it behaves like the historic materials as well as looks like them.
- Integrate and blend. New brick is toothed in, Dutchman pieces are set tight, and new mortar is tooled to the original joint profile, whether flush, struck, concave or beaded, until the repair looks as if it was always there.
This approach is common practice in historic masonry restoration wherever preserving original character is essential. This is in-kind repair, and it is what these buildings truly need. It retains and reestablishes the built environment instead of changing it with improper materials, shortcuts or techniques borrowed from new construction. It also explains why doing historic work properly costs more than general masonry. Hand removal of mortar, mortar analysis, sourcing salvaged brick or matching stone, cutting Dutchman repairs, building sample panels and tooling every joint to a historic profile take skilled hands and time. That investment is what keeps the original building intact for the next generation of owners.
Our Historic Masonry Restoration Services
Each service below is scoped to the condition of your building. We repair what is failing and leave sound original material in place.
Historic Mortar Analysis and Matching
Every historic tuckpointing project starts with the original mortar. We sample and analyze it to understand its binder, its aggregate, its color and its texture, then design a replacement mortar that is compatible in strength and permeability and matches in appearance. On the Church of the Advent, historic mortar analysis and matching guided the repointing of a 1913 Denver Landmark under a Colorado State Historical Fund grant. The goal is a joint that performs like the original and looks like the original from the sidewalk and up close.
Here is how the process works on a typical project. We collect mortar samples from protected, representative locations, avoiding later repairs so the results describe the original work. The samples are examined for binder type, the ratio of binder to aggregate, and the size, shape and color of the sand. Weathered joints are compared to freshly broken mortar, because the color you see on the wall today reflects the exposed sand more than the binder. From those findings we prepare trial mixes, build small sample panels on the building, and let them cure before anyone judges color and texture. Only after the owner, and any reviewer involved, approves a panel does the mix go into production. Careful mortar matching respects the historic materials already in the wall and keeps every new joint consistent with the original work.
Lime Mortar Tuckpointing and Repointing
Tuckpointing on a historic building means removing deteriorated mortar to a sound depth by careful hand methods that protect the brick edges, then repacking the joint in layers with a compatible lime-based mortar and tooling it to match the historic joint profile. The binder and mix follow the mortar analysis and the selection criteria laid out under Historic Tuckpointing: Methods, Materials and Craft below. When a wall is tuckpointed poorly, with grinders that widen the joints and chip brick edges, with cement-rich mortar, or with mortar smeared over the face, the damage shows up over the following winters as cracked and spalled brick, loosened units and water reaching interior plaster. When it is repointed correctly with traditional materials and methods, the same work protects the structural integrity of the wall, extends its life by decades and preserves the value of the building. The difference lies entirely in the materials, the joint preparation and the hands doing the work.
The same approach applies to facades and chimneys alike, and to homes as much as to large institutional buildings. Chimneys deserve special mention: they stand fully exposed above the roof, take weather on every face and often show mortar loss first, so we tuckpoint and rebuild chimney masonry with the same compatible lime mortar used on the walls below.
Matching the joint profile is as important as matching the mortar. Historic walls carry a wide range of joint finishes, and some of the most demanding is the beaded joint, where a raised, rounded bead of mortar is tooled along each joint for a crisp decorative line. Beaded repointing requires the joint to be packed, cut and tooled with purpose-made irons so the bead runs straight and even across the whole wall. On the Rosemount Museum in Pueblo, our crew tuckpointed the rhyolite walls with beaded tooled joints to reinstate that finished profile.
For more on joint work specifically, see our tuckpointing and repointing page.
Historic Brick Masonry Restoration and Repair
Historic brick masonry restoration starts with the brick that is already in the wall. When individual brick has spalled, cracked or failed, we replace it with brick that matches the original in size, color, texture and hardness. Only the failed units come out; sound brick around them stays. Where possible we use salvaged or reclaimed brick, numbering units during removal and toothing them in so the bond pattern continues without a visible patch. That in-kind approach preserves the original wall while restoring its strength. We also repair brick arches, sills and corbels, and restore matched brick repairs on prominent facades. More detail lives on our brick restoration page.
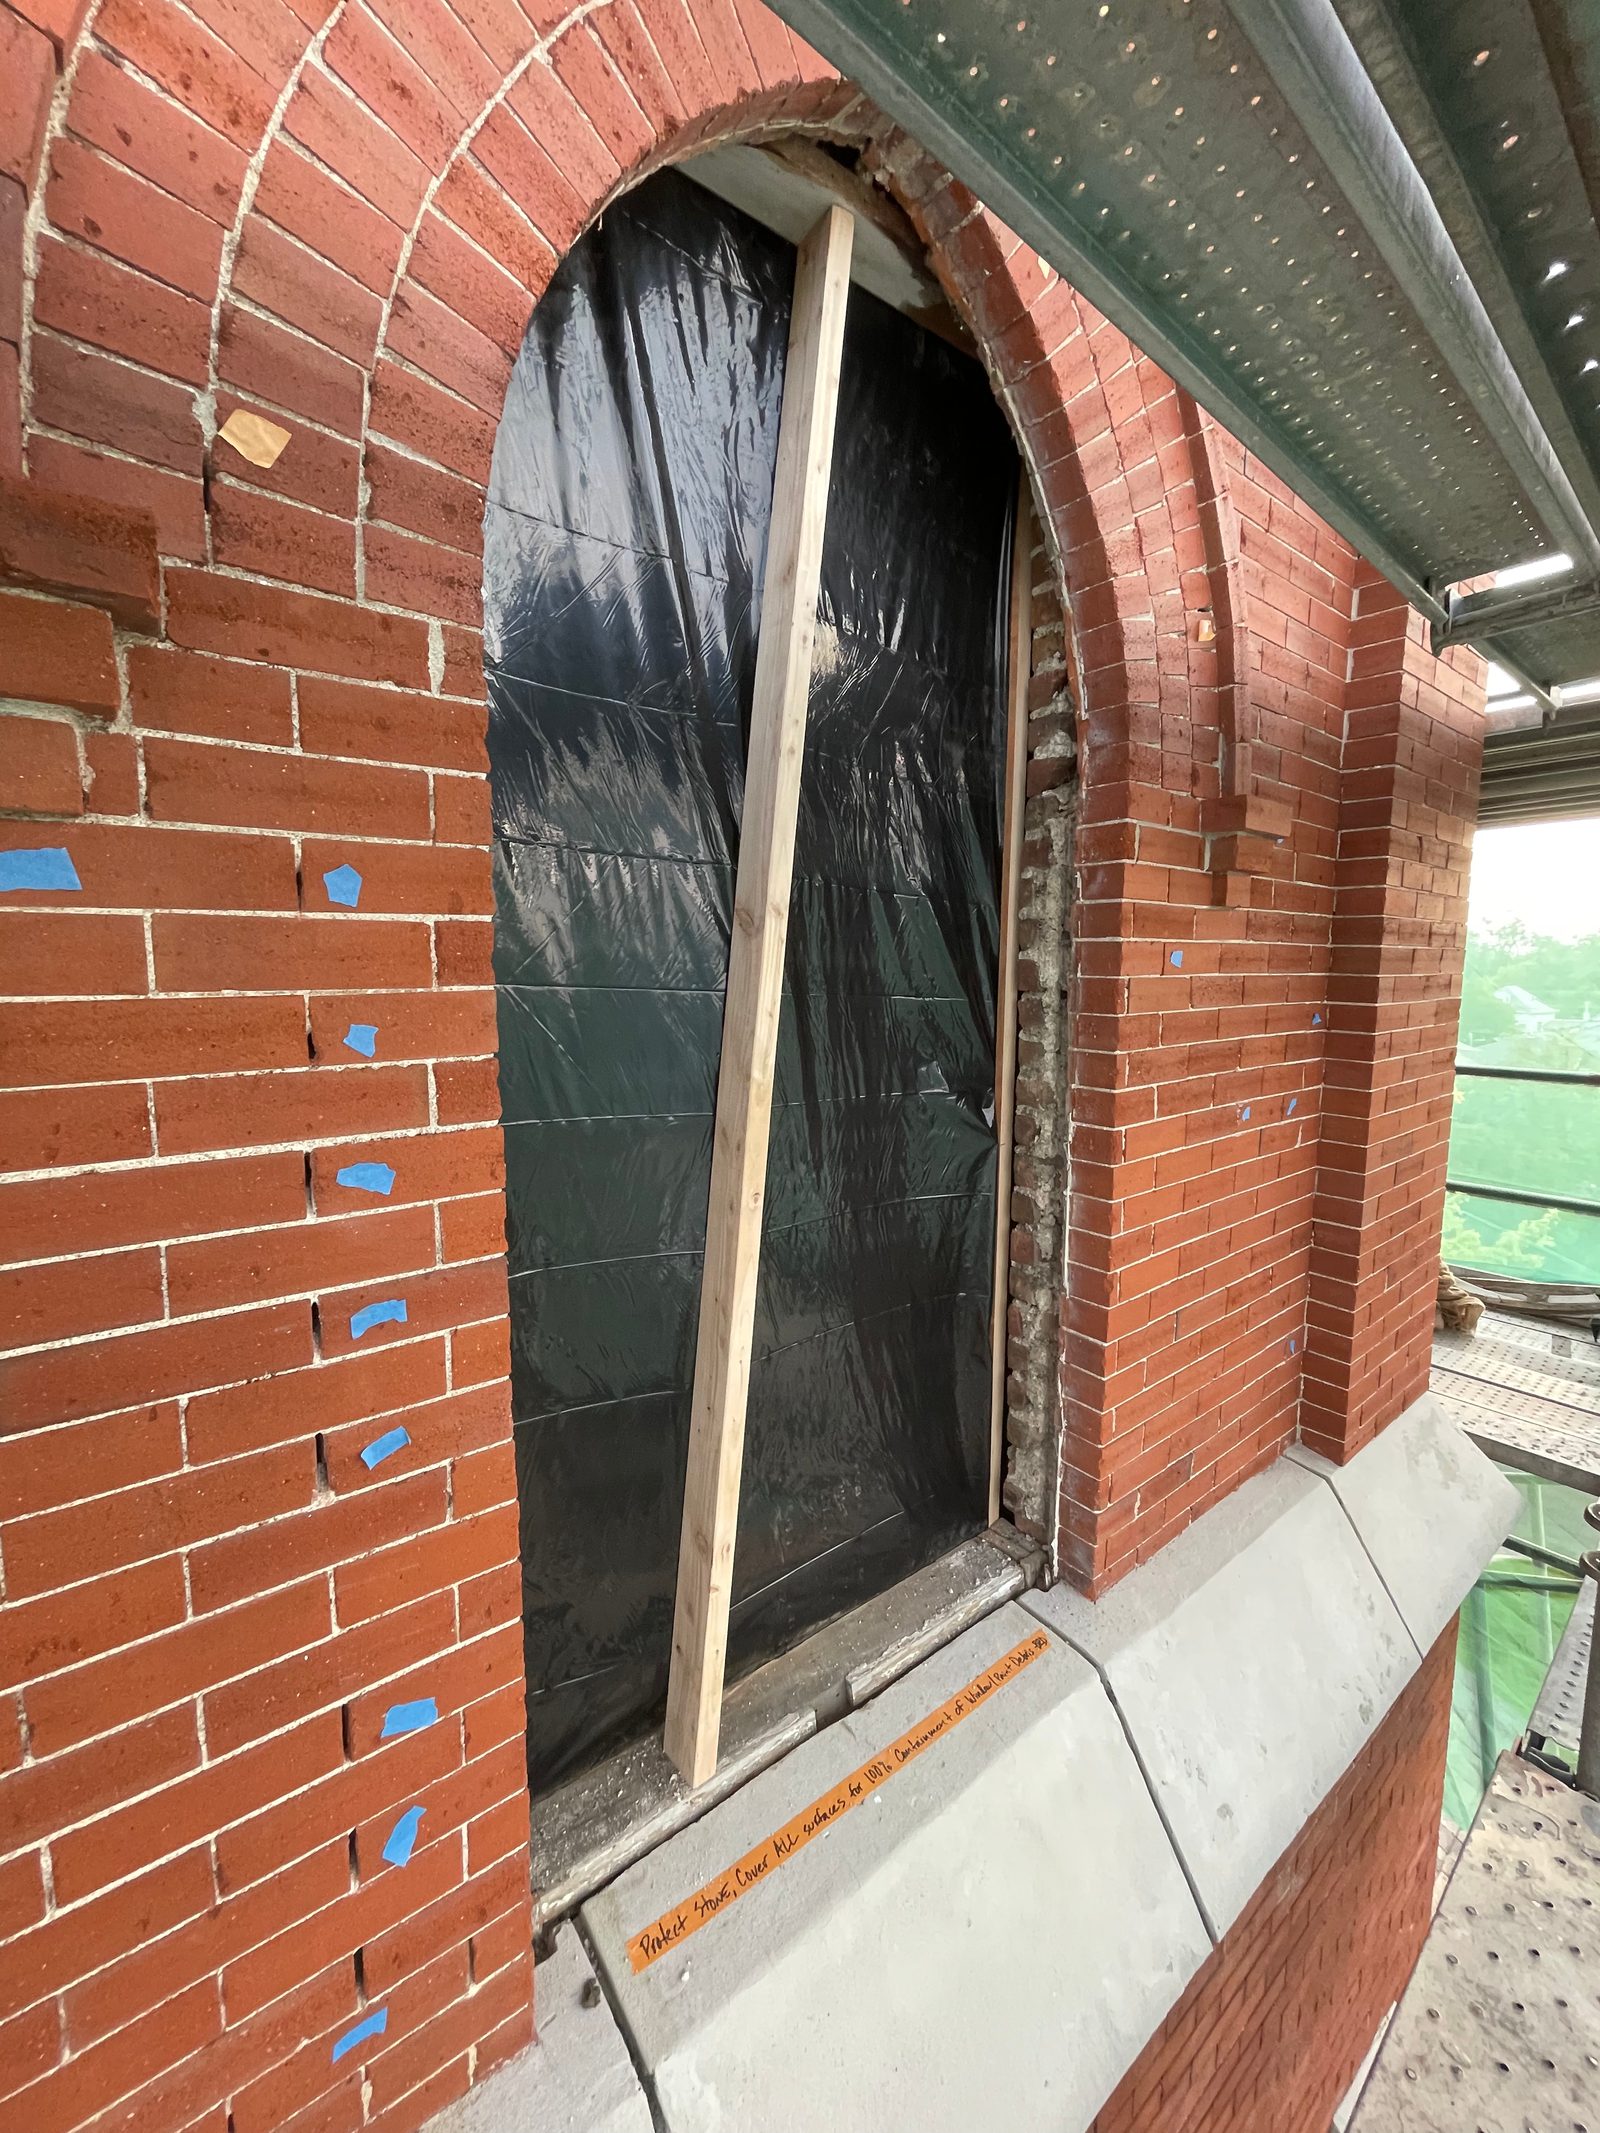
Repair or Replace: How We Decide
The most important preservation decision on any historic wall is whether a given brick or stone stays, gets repaired, or gets replaced. Original material carries the age, tool marks and color that make a historic building authentic, and once it is removed it cannot come back. So we work through the question in order:
- Is the unit structurally sound? A brick with minor surface wear or a stone with shallow erosion still does its job and stays.
- Is the damage active? If spalling or scaling has stopped because the water source has been corrected, cosmetic loss alone rarely justifies removal.
- Can it be repaired in place? Stone can often be consolidated, patched with a compatible repair mortar, pinned, or injected. Brick with a shallow spall can sometimes be turned or dressed back.
- Is replacement in kind available? When a unit has failed, we replace it with matching salvaged brick or with stone that matches in type, color, texture and finish, or we cast or carve a replica.
This sequence keeps as much historic fabric as possible, controls cost by avoiding unnecessary replacement, and gives reviewers a clear rationale for each decision.
Historic Stone Masonry Restoration: Sandstone, Limestone, Arizona Redstone and Rhyolite
Historic stone masonry restoration in Colorado means working with distinctive regional stone, and each type weathers in its own way. Sandstone delaminates along its bedding planes when water gets behind the face. Rhyolite is tough but its joints and surrounding assemblies still fail. Limestone is sensitive to acidic cleaners. Here is how the main historic stones we restore behave:
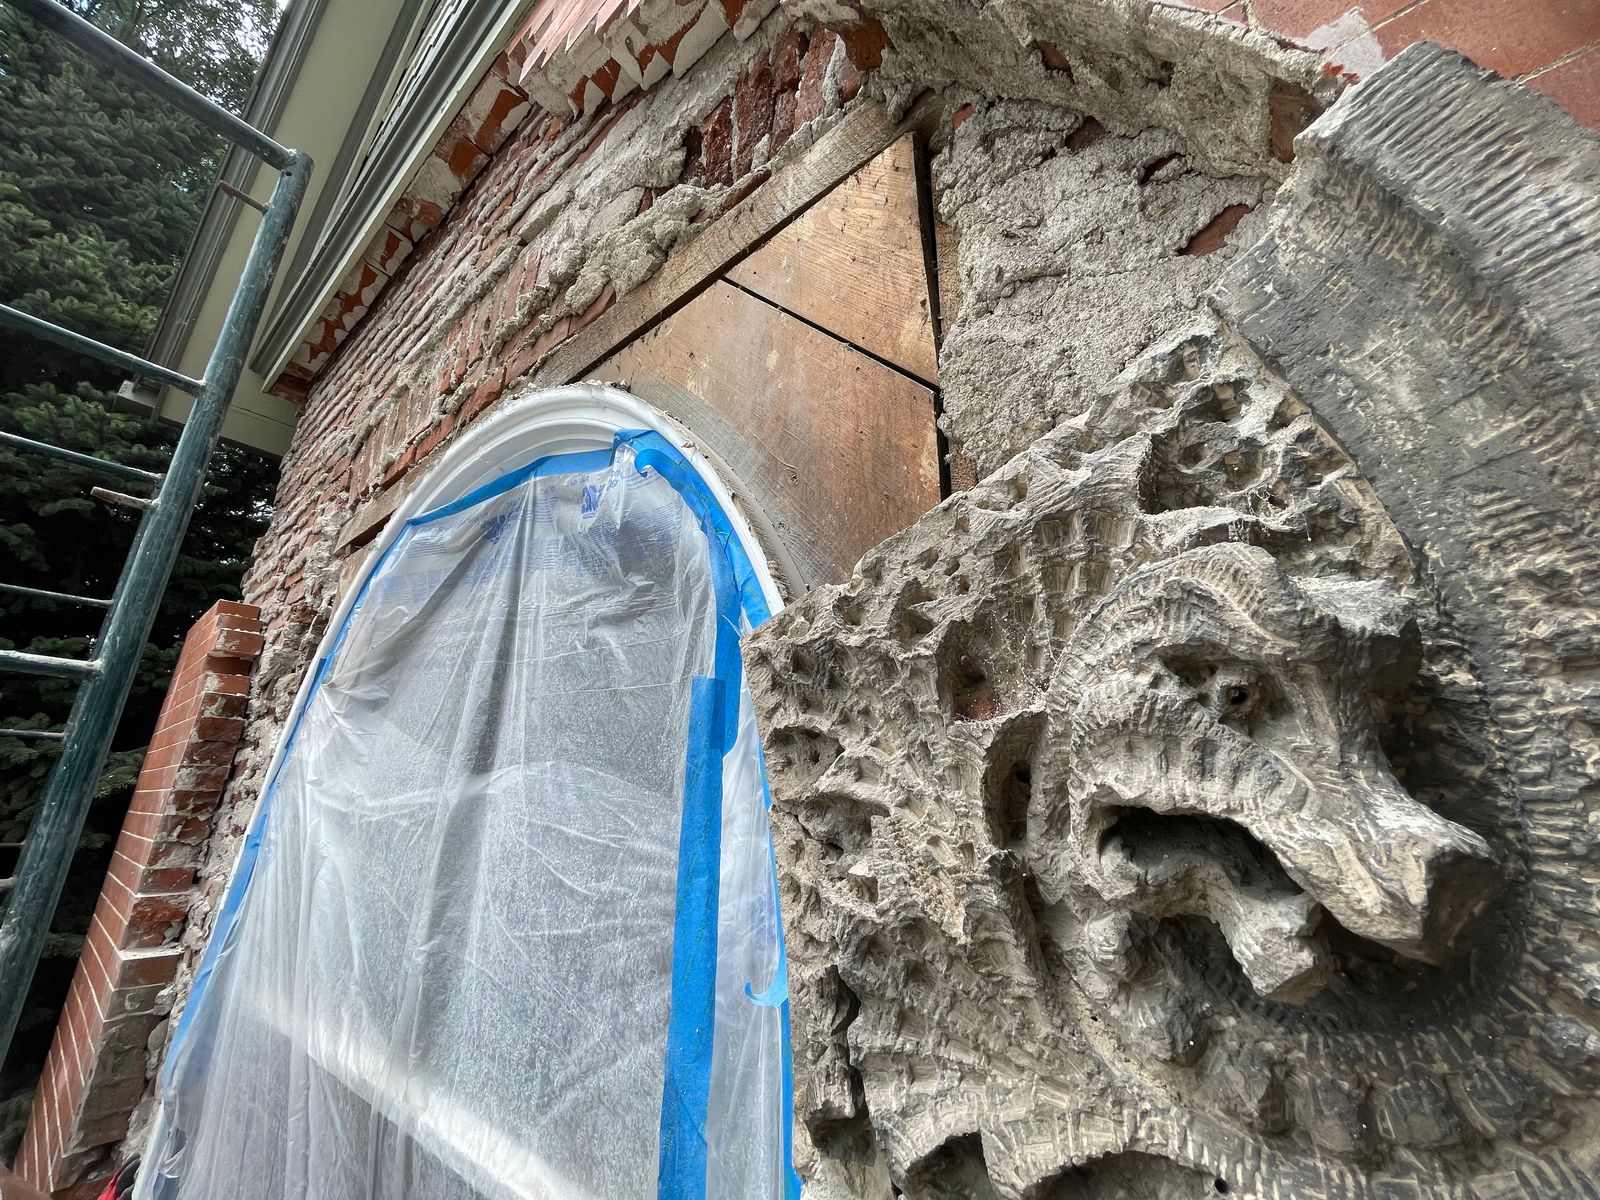
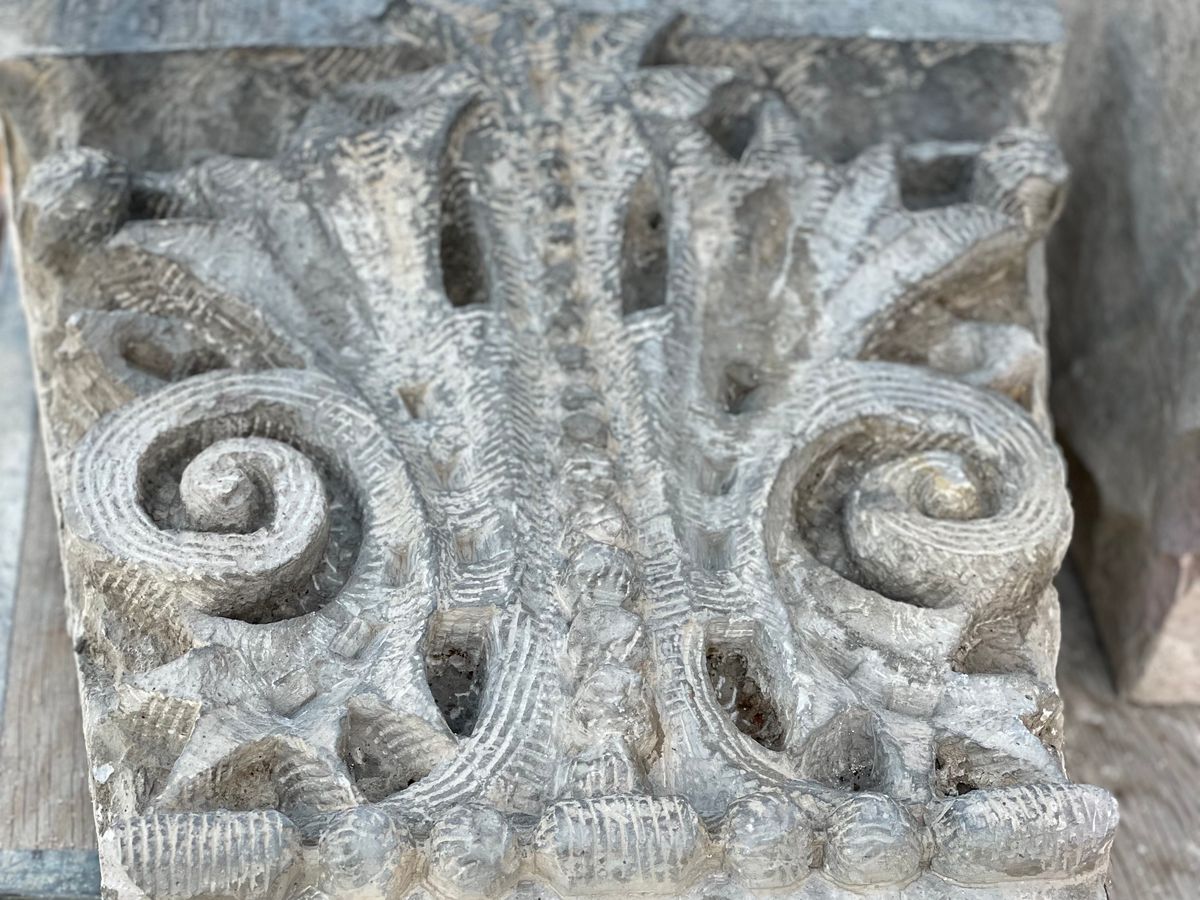
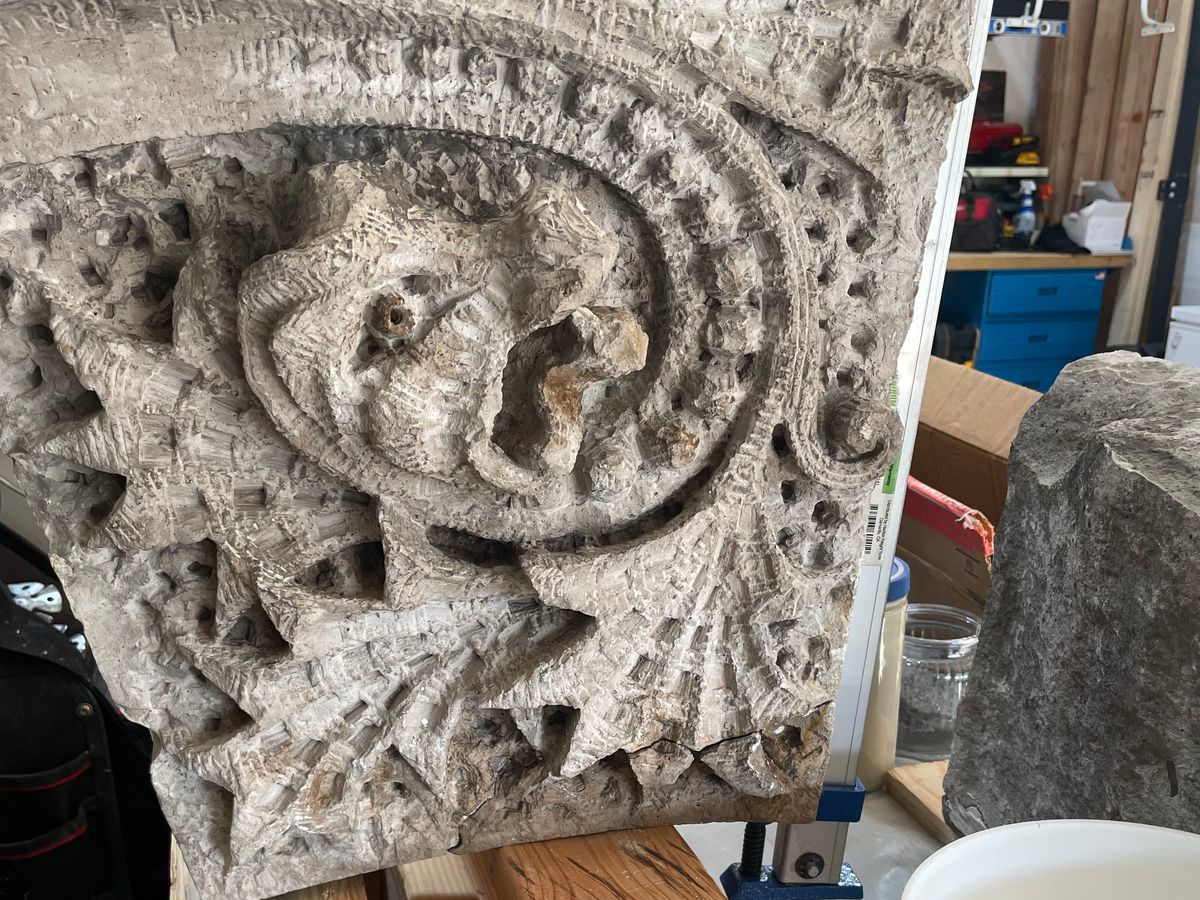
- Manitou sandstone. A warm red to pink sandstone widely used on Colorado buildings for trim, sills, lintels, copings and full facades. It carves well and weathers by scaling along its bedding when water gets behind the face. We restored 42 Manitou sandstone copings on the Cass Mansion in Capitol Hill.
- Arizona red sandstone. A deep red stone seen on prominent commercial buildings, including the facade of the Brown Palace Hotel. It shares sandstone's sensitivity to trapped moisture and aggressive cleaning.
- Rhyolite. A volcanic stone, dense and durable, with a pink to lavender tone. The stone itself resists weathering well, so restoration centers on joints, settlement, past repairs and cleaning. We have restored rhyolite at First Unitarian Church and at the Rosemount Museum in Pueblo, where the work included historic repointing, stone repairs and Dutchman repairs.
- Limestone. A fine-grained calcium-based stone used for carved trim and ornament. It reacts with acids, so cleaning products and repair mortars must be chosen with care.
- Cast stone. A manufactured stone made from cement, aggregate and pigment, cast to imitate cut stone. It cracks and loses its surface when reinforcing corrodes or water gets in, and it repairs with matched patching or recasting.
- Architectural terra cotta. Fired clay ornament with a glazed or unglazed surface. Its glaze sheds water until it cracks; after that, water trapped behind the glaze causes loss. We repair and replicate terra cotta as part of our historic capability.
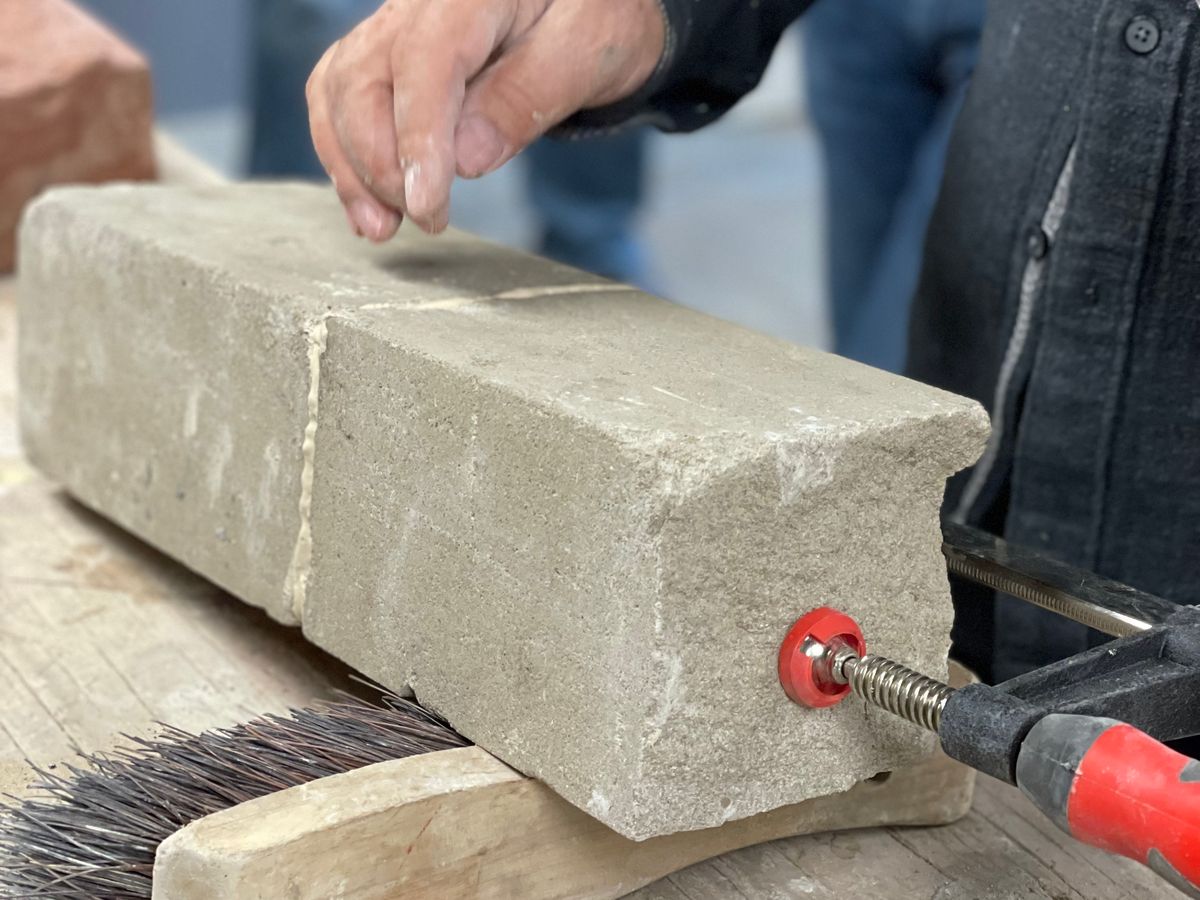
Our first choice with any damaged stone is to keep it. Shallow loss can be patched with a compatible repair mortar tinted and textured to match. Deeper or more defined damage often calls for a Dutchman repair: the deteriorated portion is cut back to sound stone in a clean geometric shape, and a new piece of matching stone is cut, fitted and set into the opening with tight joints. Done well, a Dutchman repair saves the original block, its tooling and its place in the wall, and the inset becomes very difficult to find. Full unit replacement is reserved for stone that has lost its integrity.
We work across these stones with a full range of restoration methods:
- Stone rebuilding and resetting
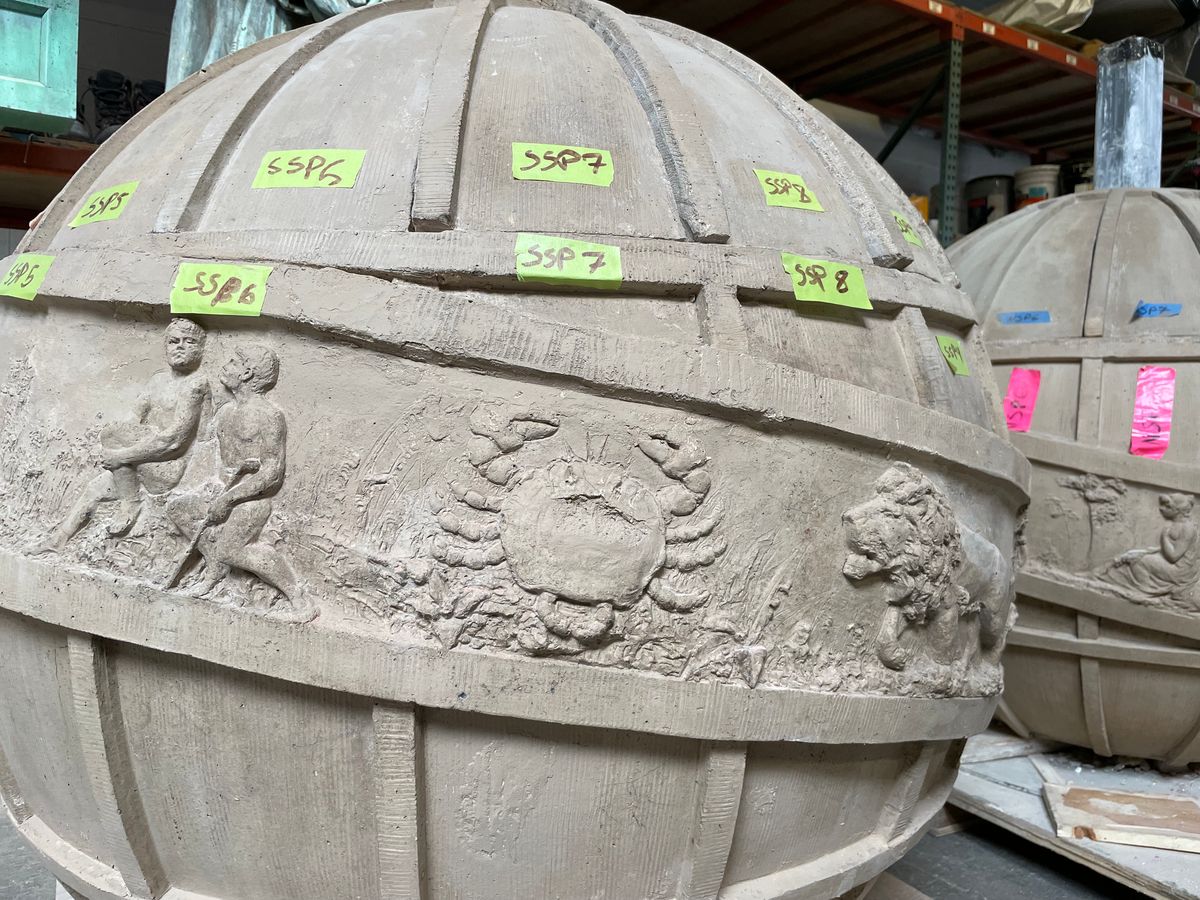
- Casting and carving exact replicas of missing or failed units
- Patching and staining to match weathered stone
- Sill and lintel repair and replacement
- Stone foundation restoration
- Cleaning and paint removal
- Stone conservation and consolidation of the original fabric
- Injection repair of cracks and voids
- Wall stabilization
- New stone installation that matches the historic work
Cast Stone and Terra Cotta Repair
Cast stone and architectural terra cotta give many early twentieth century buildings their ornament: window surrounds, cornices, belt courses and decorative panels. When these elements crack, lose their surface or come loose, we repair and restore them in place where the material is sound and replicate them where it is not. On the Church of the Advent, our scope included cast stone repair and restoration across the building.
Gentle Cleaning and Paint Removal
Cleaning a historic facade is about removing soiling and paint without removing the masonry. Abrasive blasting and high-pressure washing erode the fired skin of brick and the face of stone, and that damage is permanent. We start with test patches to find the gentlest method that works on your building, then clean with low-pressure water and appropriate cleaning agents. Paint removal follows the same test-first approach so the original brick and mortar come back intact. See our brick cleaning page for the cleaning process in detail.
Parapet, Foundation and Structural Masonry Reconstruction
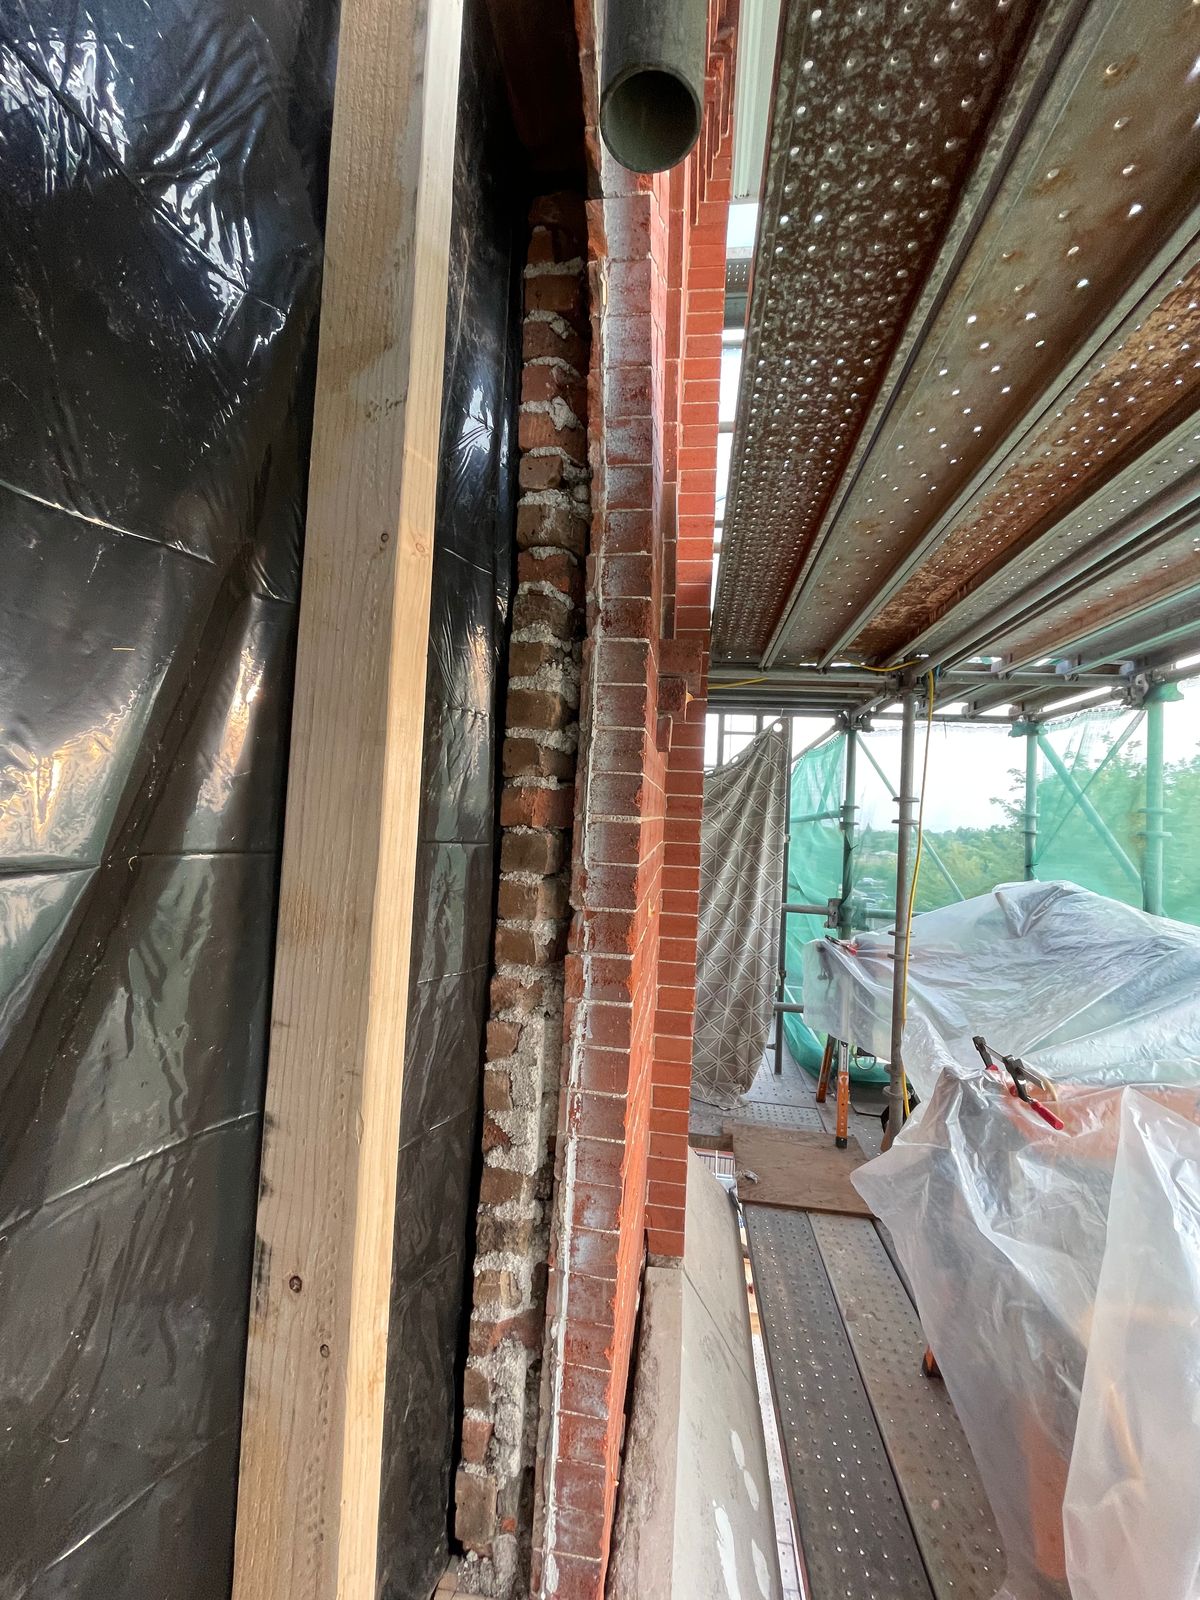
Some conditions go beyond repair. We perform full structural reconstruction of load-bearing brick and stone foundations and wall assemblies, rebuild stepped and straight parapet walls, and stabilize bowing or cracked walls. On historic work, reconstruction means taking the wall down with care, salvaging and cataloging reusable units, and rebuilding with compatible mortar so the rebuilt section looks and behaves like the original.
Historic Tuckpointing: Methods, Materials and Craft
Tuckpointing is the most common treatment on a historic masonry building and the one most often done wrong. The difference between joint work that protects a wall for decades and joint work that damages it comes down to a handful of technical decisions. This is how we make them.
Raking Out by Hand
Deteriorated mortar is removed with hand chisels and plugging tools, not with angle grinders. A grinder blade cuts faster, but it widens the joint, rounds and chips the arrises of soft brick, and scars stone faces in ways that never come back. Hand raking keeps the original joint width and protects the edges of every unit. Joints are cleared to sound mortar, to a depth of roughly two to two and a half times the joint width, so the new mortar has enough body to key in and stay put. Any loose, powdered or failed mortar deeper in the joint comes out as well, and dust is flushed clear before any new material goes in.
Lime Putty, Natural Hydraulic Lime and Choosing the Binder
The binder is the heart of a historic mortar, and the choice follows the mortar analysis rather than habit.
- Lime putty is slaked lime aged as a wet paste. It cures slowly by carbonation, absorbing carbon dioxide from the air, and produces a soft, highly breathable mortar. It is the closest match to the mortar in many nineteenth century walls.
- Natural hydraulic lime (NHL) contains clay impurities that let it set partly through reaction with water. It comes in graded strengths and gains strength faster than lime putty, which suits exposed elevations, cold seasons and walls where the original mortar shows hydraulic character.
- Portland cement belongs in a lime mortar only in small proportions, and only on walls whose original mortar already contained it, and never so much that the joint becomes harder or less permeable than the brick or stone.
Two measurable criteria govern the final choice. The new mortar must be as soft as or softer than the masonry units, and as vapor permeable as or more permeable than both the units and the original mortar. We confirm both on sample panels before production: a finished panel is checked for color and texture against the weathered original, scratched to compare hardness with the adjacent brick, and observed through wetting and drying to confirm the joint dries at least as fast as the units around it. On walls with mixed brick, the softest unit present sets the limit for the whole elevation.
Sand, Aggregate Gradation and Color
Sand makes up most of the volume of a lime mortar, and it controls much of the color and texture you see. We match the original aggregate in particle size, gradation (the spread of coarse to fine grains), shape and color. A well graded sand packs densely, reduces shrinkage and gives the joint the same weathered texture as the historic work. Where the original mortar contains visible lumps of lime, crushed shell or colored grains, those details are part of the match. Pigments are used sparingly, because a mortar that gets its color from the sand ages the way the original did.
Packing, Tooling and Joint Profiles
New mortar goes into the joint in layers of roughly a quarter inch, each one pressed firmly into the one behind and allowed to stiffen before the next, so the joint cures without voids or shrinkage cracks. The final layer is tooled when the mortar reaches thumbprint hardness, firm enough to hold an impression without smearing.
The tooled joint profile is matched to the original. Historic walls show flush, struck, weathered, concave and raked joints, and some of the most demanding finishes are the beaded joint and the tuckpointed ribbon joint, where a fine raised line is formed along the joint. Each profile changes how light falls on the wall and how water sheds from it, so the profile is part of the building's character and part of its weather protection.
Curing and Cleanup
Lime mortar needs moisture and protection to cure properly. Fresh joints are kept damp with fine misting for several days and shaded from hot sun, drying wind and frost. Residual mortar is cleaned from brick and stone faces with natural bristle brushes, never wire brushes, and harsh acid washes are not used on historic masonry. Work is scheduled with the Front Range climate in mind, because lime mortar must not freeze before it has gained strength.
Consolidation, Dutchman Repairs and Replication
The same care extends to the units themselves. Friable stone that is still sound in mass can be treated with a consolidant that strengthens the weakened surface without sealing the pores. Defined losses receive Dutchman repairs, with a new piece of matching stone fitted into the sound block. Shallow losses take a compatible repair mortar matched in color and texture. When a unit has failed beyond repair and matching original material cannot be sourced, it is replicated in compatible material, whether cast stone, a carved replica or custom-matched brick, so the replacement is no harder and no less breathable than the historic masonry around it.
Preservation Standards That Guide the Work
Historic masonry restoration earns its name by following recognized preservation guidance, not by using the word "historic" in a proposal.
The Secretary of the Interior's Standards
Our preservation oversight works within the Secretary of the Interior's Standards for the Treatment of Historic Properties. In practical terms that means a few principles show up on every project: repair rather than replace when the original material can be saved; replace in kind when it cannot; use the gentlest effective methods; and never introduce a material that harms the historic fabric it touches. These principles are the reason landmark reviewers, grant managers and tax credit reviewers look for them in a scope of work.
National Park Service Preservation Briefs We Work From
The National Park Service publishes Preservation Briefs as technical guidance for historic building work. Several speak directly to masonry, and they shape how we scope projects:
- Preservation Brief 1: Assessing Cleaning and Water-Repellent Treatments for Historic Masonry Buildings. Guides selection of the gentlest effective cleaning method and cautions about water-repellent and waterproof coatings on historic masonry.
- Preservation Brief 2: Repointing Mortar Joints in Historic Masonry Buildings. The core reference for mortar analysis, compatible mortar design and proper joint preparation and tooling.
- Preservation Brief 6: Dangers of Abrasive Cleaning to Historic Buildings. Explains why sandblasting and similar methods permanently damage brick and stone.
- Preservation Brief 16: The Use of Substitute Materials on Historic Building Exteriors. Guides when and how a compatible substitute material, such as cast stone in place of carved stone, is appropriate for in-kind replication.
- Preservation Brief 42: The Maintenance, Repair and Replacement of Historic Cast Stone. Covers repair and replication of cast stone elements.
When a reviewer evaluates our scope, they find methods that line up with this guidance, which keeps approvals moving and protects your building.
Denver Landmark Review and Historic Districts
Landmark Preservation Commission Review
Exterior work on an individually designated Denver Landmark or a property inside a designated historic district requires design review through the City and County of Denver before work begins. Masonry projects such as tuckpointing, cleaning, brick and stone replacement and parapet reconstruction often fall within that review, so it belongs in the plan from the start.
We prepare the documentation reviewers need: existing condition photographs, a clear description of materials and methods, mortar analysis results, sample panels and specifications that show the work follows preservation guidance. Owners tell us the review process feels far less daunting when the scope already speaks the reviewer's language.
What Landmark Owners Should Expect Through Review
If your building is a designated landmark or sits in a historic district, the project has a few more steps than a standard repair, and knowing them ahead of time keeps the schedule calm:
- Early clarity on scope. Reviewers want to know what is being repaired, what is being replaced and why. Our condition assessment and repair or replace rationale answer that directly.
- Materials described in plain terms. Mortar composition, joint profile, replacement brick or stone source, and cleaning method are all spelled out, so nothing is left to interpretation.
- Sample panels. Expect a mortar panel and a cleaning test area for the reviewer to see before approving production work.
- Questions and revisions. Reviewers sometimes ask for clarification or adjustments. We respond with documentation and, where useful, additional samples.
- Work that matches the approval. Once approved, the work follows the approved scope, and any field discovery that changes the scope is documented and brought back for discussion before we proceed.
- A clean record at closeout. Completion photographs and notes show that the work matched what was approved, which also supports grant and tax credit files.
Historic Neighborhoods and Districts We Serve
Denver's historic fabric is spread across many neighborhoods, each with its own building stock. In Capitol Hill and Cheesman Park, we see grand brick and stone residences from the city's boom years, many with sandstone trim and ornate parapets. Curtis Park and Five Points hold some of the oldest brick rowhouses and Victorian homes in the city, where soft brick and old lime mortar demand careful tuckpointing. Congress Park, Country Club and Hilltop feature substantial masonry homes with stone detailing that rewards patient restoration. In the Highlands and Baker, brick bungalows and Victorian cottages often carry decades of mismatched repairs we can correct. Wash Park and Park Hill blend early twentieth century brick homes with masonry chimneys that take the brunt of the weather. Downtown and in LoDo, historic warehouses and commercial blocks raise their own questions of parapets, loading and large facade cleaning. Smaller districts such as Clements and San Rafael preserve some of the earliest residential masonry in Denver.
Funding Historic Masonry: State Historical Fund and Historic Tax Credits
Historic masonry work on a qualifying building can open the door to preservation funding, and the quality of the technical scope often decides whether that funding comes through.
Colorado State Historical Fund. The State Historical Fund, administered by History Colorado, awards grants for preservation projects on qualifying historic properties. On the Church of the Advent, Brick Repair Denver prepared the technical assessment, scope and deliverables that behind the church's successful grant, then carried out the restoration itself. That continuity matters: the team that writes the scope understands exactly what the grant committed to deliver.
Historic tax credits. Federal and Colorado state historic tax credits reward qualifying rehabilitation work that meets preservation standards. We prepare the technical scope and documentation of the masonry work, so you and your advisors have the material reviewers expect to see in your application.
Our team has supported publicly funded and grant-assisted projects backed by the City and County of Denver, the Colorado State Historical Fund, the National Trust for Historic Preservation, the State of Colorado, the U.S. Department of the Interior and the U.S. Department of the Treasury.
How a Historic Restoration Project Moves Forward
- Photos and project information. You send photographs of the building and the areas of concern, along with what you know of its history, past repairs, and any landmark, grant or tax credit status.
- Review and qualification. Jesse Smith reviews what you send to determine whether the project is a fit for our historic restoration work and what it needs.
- Recommended next step. We tell you the appropriate next step for your building. For qualified projects that call for one, that step is a conservation assessment, in which we inspect the masonry, trace water sources, identify past incompatible repairs and document conditions with photographs.
- Material analysis. We sample mortar and evaluate brick and stone so the repair materials match the original in performance and appearance.
- Scope and documentation. Where a project proceeds, we prepare a written scope built around preservation principles, laid out so it supports your landmark review, grant application or tax credit records.
- Sample panels and approvals. We build mortar and cleaning test areas for your review and for any reviewers involved.
- Restoration. Bruce Yantis and our crew remove only the failed material, reinstate it with matched brick, stone and mortar, and blend every repair into the original work with hand methods suited to historic fabric, and Jesse Smith oversees it for conformance with the approved scope.
- Closeout. We provide completion photographs and documentation for your records, your reviewers and your funders.
Masonry Restoration in Denver and Across the Front Range
We provide masonry restoration in Denver and throughout the surrounding communities, including Lakewood, Englewood, Littleton, Aurora, Arvada, Wheat Ridge, Golden, Edgewater, Boulder, Westminster, Centennial, Greenwood Village, Cherry Hills Village, Sheridan, Louisville, Fort Collins, Loveland, Castle Rock and Parker. Many of these towns have their own historic main streets, landmark programs and early brick and stone buildings, and the same preservation approach applies wherever the building stands. Visit our homepage for the full list of communities we serve.
Historic Masonry Restoration FAQ
What is historic masonry restoration?
Historic masonry restoration is the repair of older brick, stone and mortar with materials and methods compatible with the original construction. It repairs original fabric first, replaces in kind only when repair is not possible, and replicates missing features in compatible materials, so the building keeps its character, structure and value.
How do I know if my historic building needs tuckpointing?
Look for mortar recessed a quarter inch or more from the face, joints that crumble when scratched, open or cracked joints, efflorescence, damp interior plaster and loose brick at parapets or chimneys. Any of these means water is entering the wall, and a conservation assessment identifies the cause before it spreads.
What is the difference between tuckpointing and repointing?
In everyday use both mean raking out deteriorated mortar and filling the joint with new mortar. Historically, tuckpointing also described a decorative finish with a fine raised ribbon of putty along the joint. On historic buildings the essentials are the same: compatible lime mortar, hand raking and the original joint profile.
Why does historic brick need lime mortar instead of modern mortar?
Historic brick is softer and more porous than modern brick. Lime mortar stays softer and more breathable than the brick, so moisture and movement pass through the joints instead of the brick face. Hard cement mortar reverses that relationship, trapping water in the brick and causing spalling and cracking through freeze-thaw winters.
What is the difference between lime putty and natural hydraulic lime mortar?
Lime putty is aged slaked lime that cures slowly by absorbing carbon dioxide, producing a very soft, breathable mortar. Natural hydraulic lime sets partly with water, gains strength faster and suits exposed walls or original mortars with hydraulic character. Mortar analysis of the original joint determines which binder a wall needs.
What does a historic mortar analysis tell you?
A mortar analysis identifies the binder type, the ratio of binder to sand, and the size, gradation and color of the original aggregate. Those results guide a replacement mortar that matches the original in appearance and is compatible in strength and permeability, which is what landmark reviewers and grant managers expect to see.
Why is hand raking better than grinding out mortar joints?
Grinders cut quickly but widen joints, chip the edges of soft brick and scar stone faces permanently. Hand raking with chisels and plugging tools preserves the original joint width and unit edges, and lets the mason clear failed mortar to the right depth so the new mortar bonds and lasts.
Can damaged historic brick or stone be repaired instead of replaced?
In most cases, yes. Skilled masons remove only the damaged sections and repair them with Dutchman repairs, toothed-in brick and matched joints. When repair or reuse is not an option, the unit is replaced in kind, and when the original cannot be sourced, it is replicated in compatible materials such as cast stone or custom-matched brick.
What is a Dutchman repair on historic stone?
A Dutchman repair removes a damaged portion of a stone block in a clean geometric shape and sets a precisely cut piece of matching stone into the opening. It saves the original block, its tooling and its place in the wall, and when matched well in color and bedding, the inset is very hard to find.
Why does specialized historic masonry repair cost more?
Doing it right takes more skill, time and material care. Hand mortar removal, mortar analysis, salvaged brick or matched stone, Dutchman repairs, sample panels and tooling joints to a historic profile all add labor. That investment preserves original fabric and avoids the repeat repairs that follow quick, incompatible fixes.
Do I need approval to tuckpoint or repair a Denver Landmark?
Exterior masonry work on an individually designated Denver Landmark or a building in a designated historic district requires design review through the City and County of Denver before work begins. Brick Repair Denver prepares the condition photographs, mortar analysis, methods and specifications reviewers expect, so the review has what it needs.
Can masonry restoration qualify for a State Historical Fund grant?
Masonry restoration on qualifying historic properties in Colorado can be funded through the State Historical Fund, administered by History Colorado. On the Church of the Advent, Brick Repair Denver prepared the technical assessment, scope and deliverables behind the church's successful grant, then performed the restoration. The church remained the applicant; we mapped out the technical side so its members did not have to.
Does historic masonry work count toward historic tax credits?
Qualifying rehabilitation work on historic buildings, including masonry, can support federal and Colorado state historic tax credit applications when it meets preservation standards. Brick Repair Denver prepares the technical scope and documentation showing the masonry work was planned, carried out and recorded to those standards. Your tax advisor confirms eligibility.
How should a church or institution plan a historic masonry project?
Start by sending photos and project information for review. For qualified projects, a conservation assessment documents conditions, traces water sources and prioritizes repairs by urgency. That record supports phased budgets, grants and board decisions. On the Church of the Advent, our assessment and scope became the basis for a State Historical Fund grant and the restoration that followed.
Should historic brick be sealed or waterproofed?
No. Clear water repellents and waterproof coatings slow the wall's ability to dry, trapping moisture and salts behind the face where freeze-thaw cycles cause spalling. The lasting solution is to stop water at its source by repairing joints, copings, flashing and drainage, and let the masonry breathe as it was designed to.
What types of historic buildings do you restore?
We restore historic homes, churches, schools, institutions, apartment buildings and commercial properties. Our record includes Denver Landmark and State Historical Fund projects such as the Church of the Advent and Cass Mansion, plus National Register properties including the George Schleier Mansion and the Rosemount Museum in Pueblo.
Who oversees the restoration work?
Owner Jesse Smith, an architectural conservator, directs the assessment, scope and preservation oversight on each historic project. Bruce Yantis, Lead Craftsman and Brick Restoration Specialist, leads the work in the field. That pairing keeps conservation decisions and hands-on craft connected from the first inspection to closeout.
How do I start a historic masonry restoration project?
Request a Consultation or call (720) 445-9474, then send photos of the building and the areas of concern with any history, past repairs and landmark or funding status. We review and qualify the project, then recommend the appropriate next step, which for qualified projects is a conservation assessment.
Talk With a Conservator About Your Building
Historic masonry repairs begin with an assessment of the materials and the cause of the damage. If you are seeing loose mortar, flaking brick, cracked stone, a leaning parapet or the marks of an old repair that did not hold, the right first step is to send us photos and a short description of the building. We review every submission, determine whether the project is a fit, and recommend the appropriate next step for your masonry.
Tell us about your brick. We will take it from there.
Talk With a Conservator About Your Building
- Tell us what you're seeing on the brick or stone
- Send photographs of the brick or stone and areas of concern
- We review and qualify the inquiry, then recommend the appropriate next step