
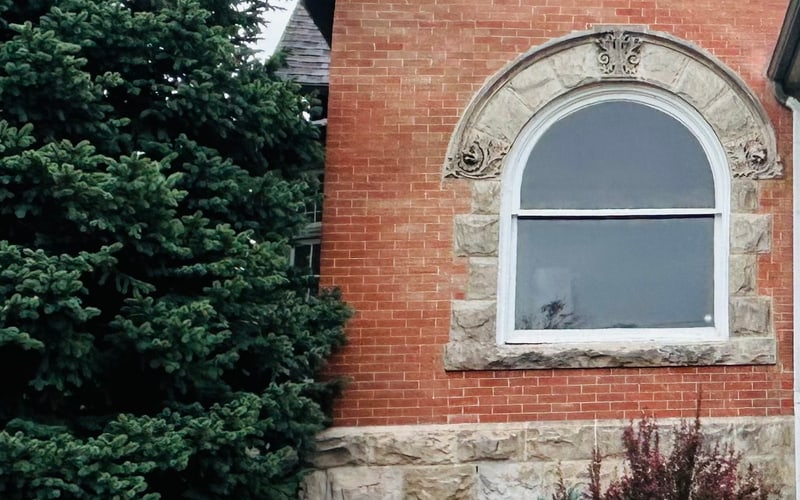
The homeowners of an 1892 brick house in the Highlands of northwest Denver called Brick Repair Denver because the carved stone arch over their front window had visibly slipped at the top. From the initial assessment in June 2023 to completion in late August 2023, we traced the problem to the brick wall around it, took the arch and much of the outer brick down, reset the brick in lime mortar and reinstalled every original rhyolite stone, including its historic carved dragon faces, in its exact original position.
01 · The call
Why the Homeowner Called: A Slipping Stone Arch
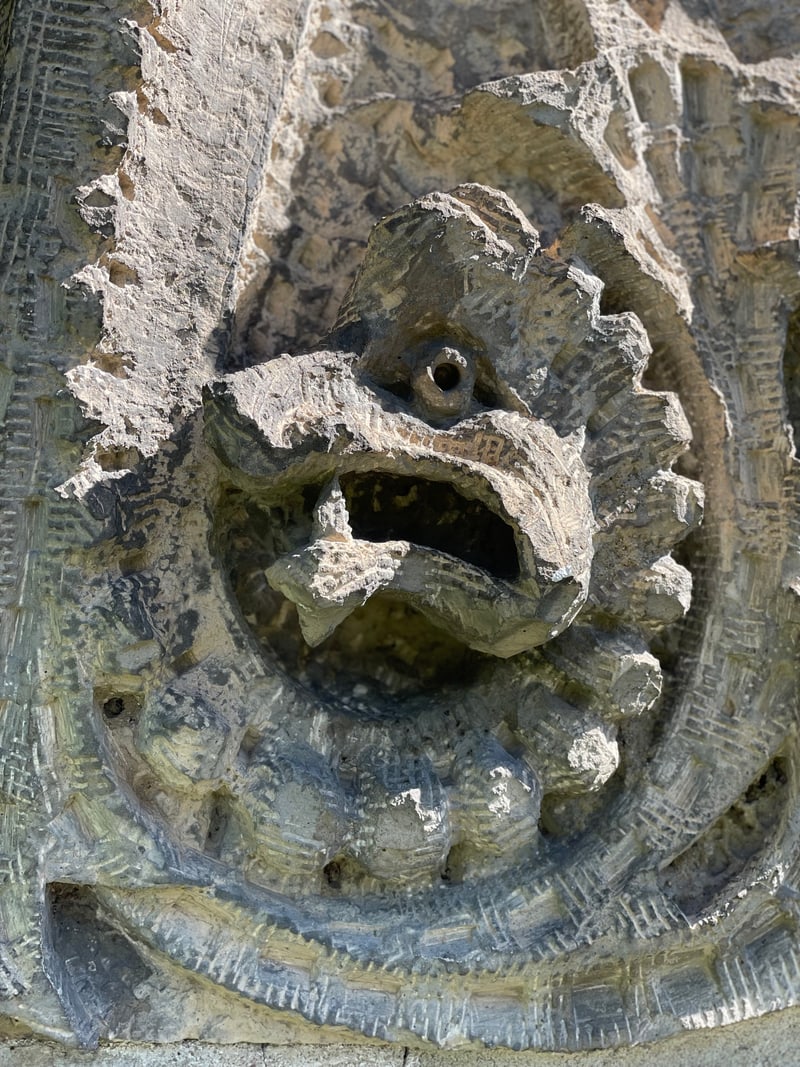
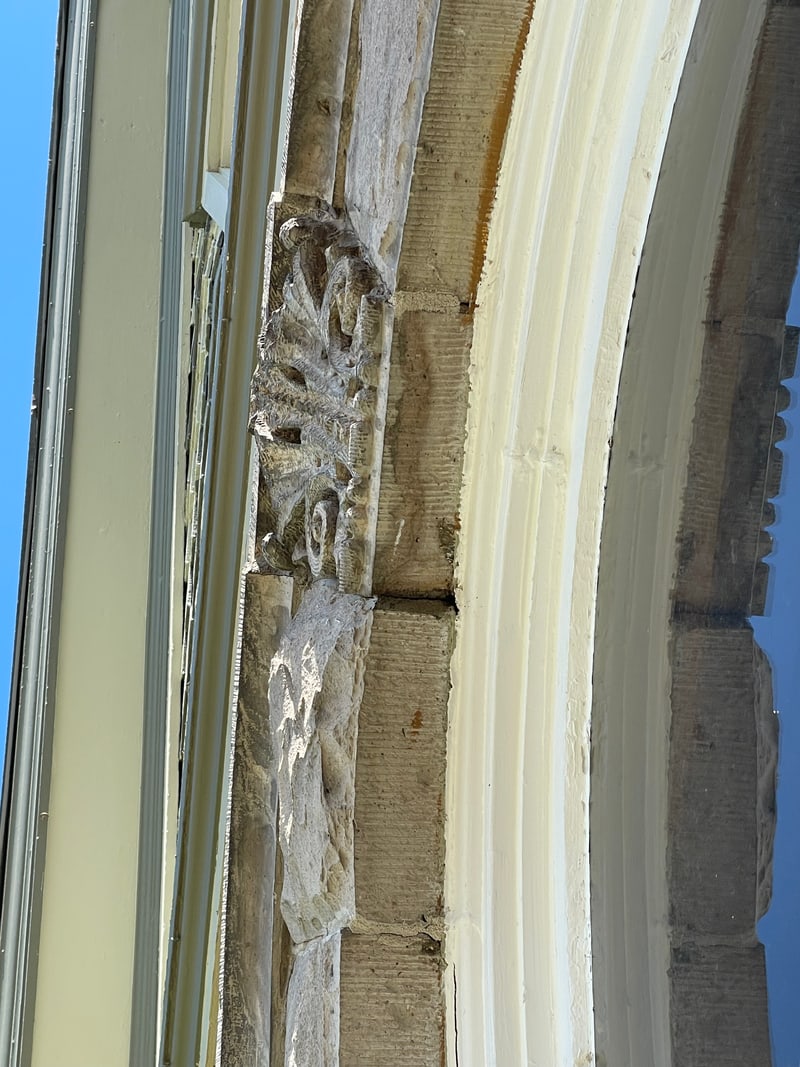
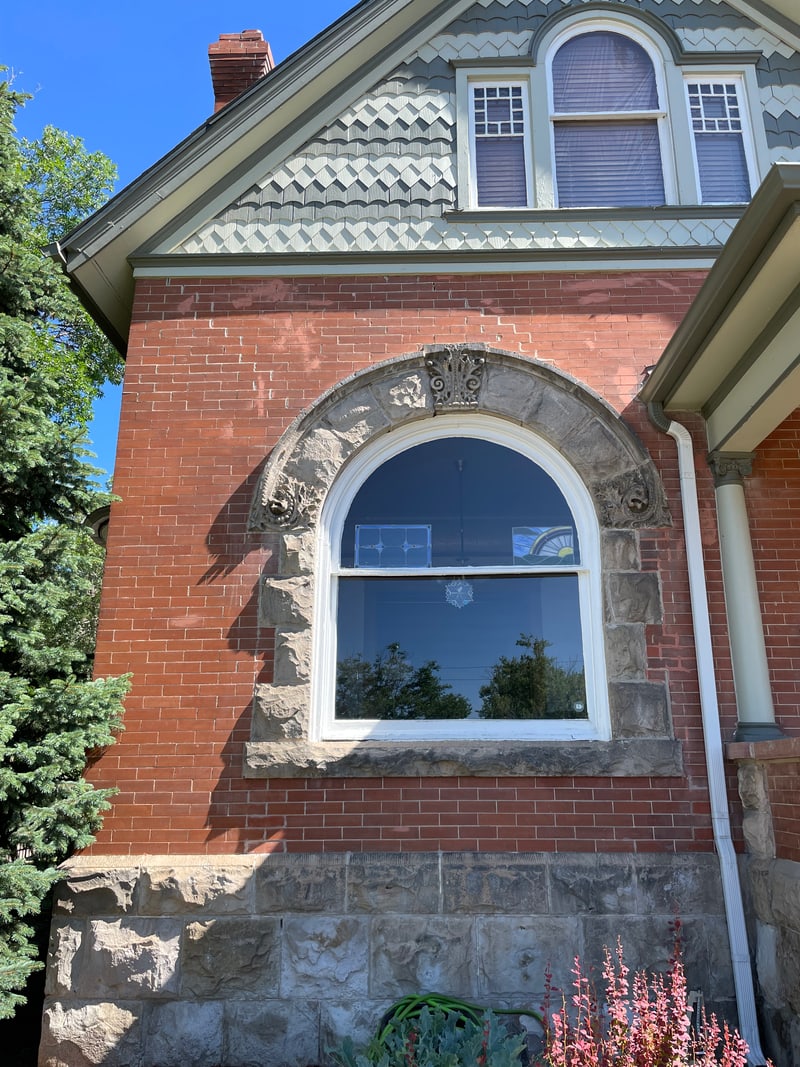
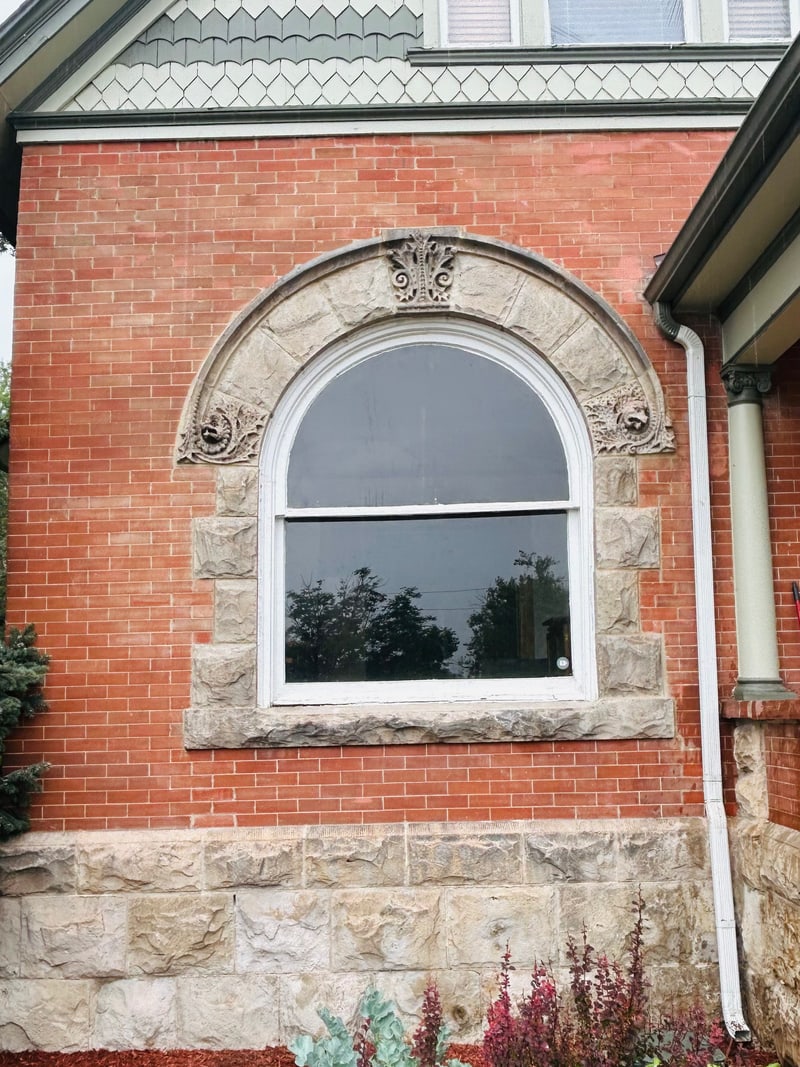
The client contacted us worried about the stone arch over the main front window. It had visibly slipped at the top. The arch is the centerpiece of the front of the house: rhyolite stones with carved architectural faces, including historic dragon faces, set into red brick above a stone foundation.
02 · Assessment
What the Assessment Found: The Cause Was in the Wall
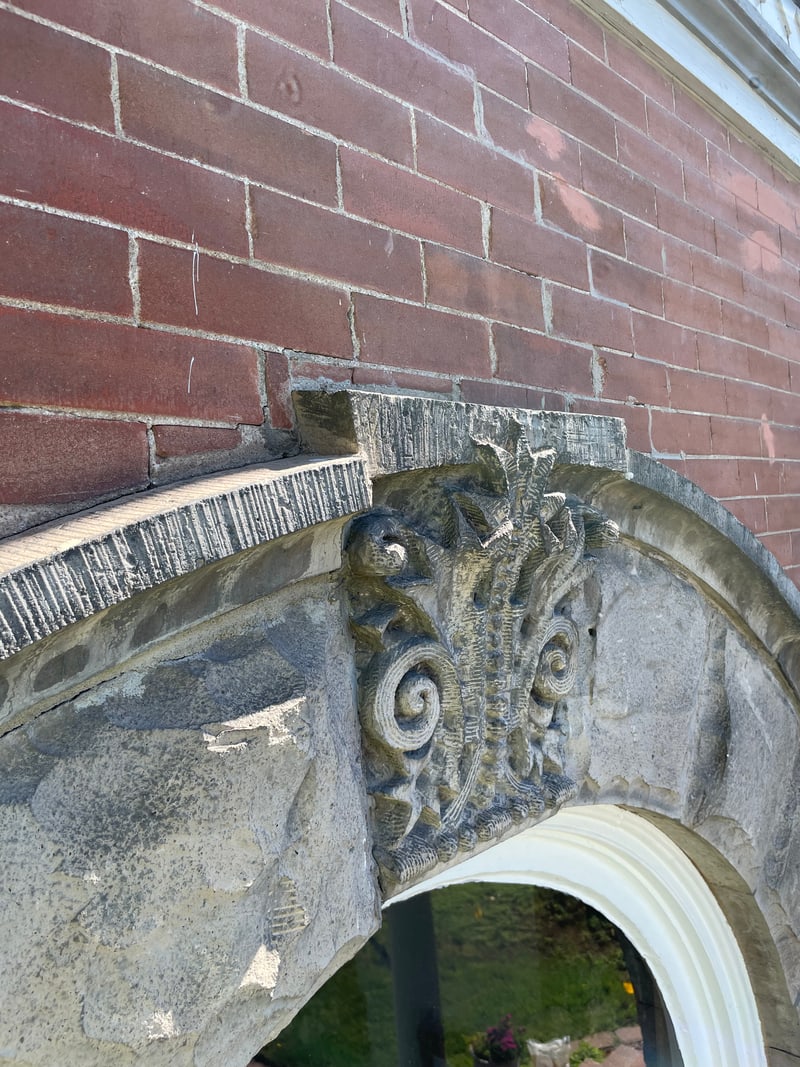
A slipped arch is a symptom, so the assessment looked for the root cause. We found stair-step cracking in the front brick, tapering down into the stone. Earlier repair work had failed. And the exterior wythe, the outer layer of brick, was pulling away from the interior wythe, with disruption visible even at the corner of the home.
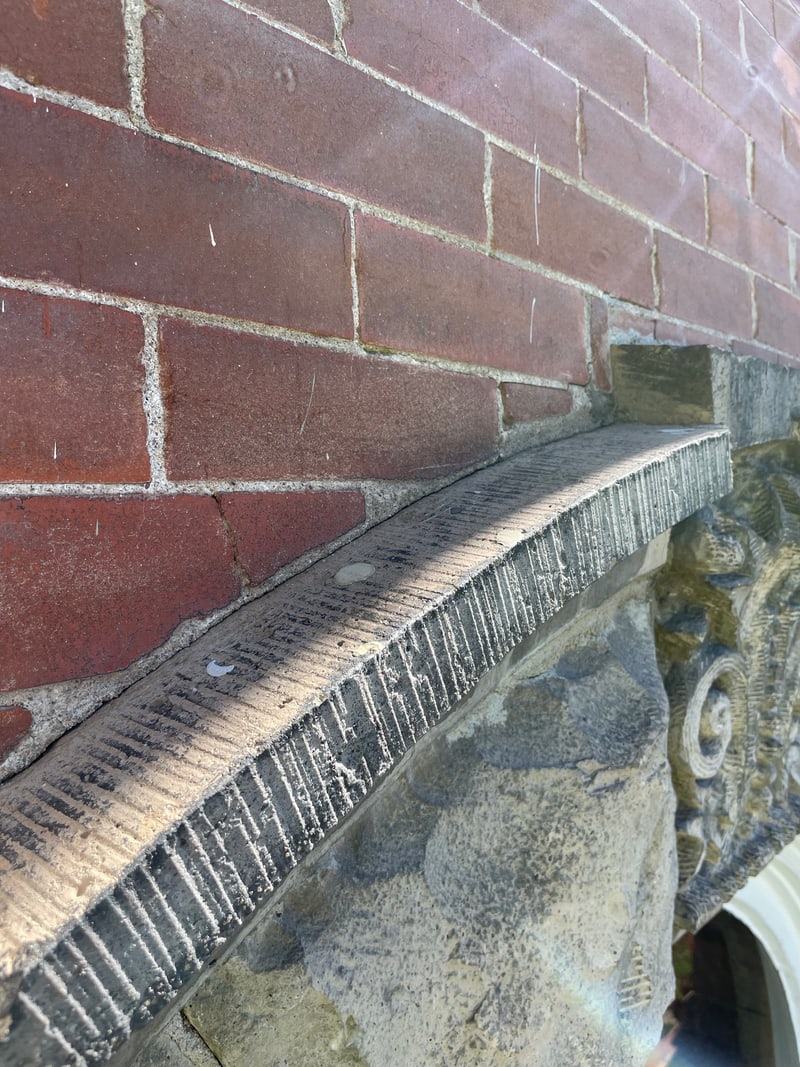
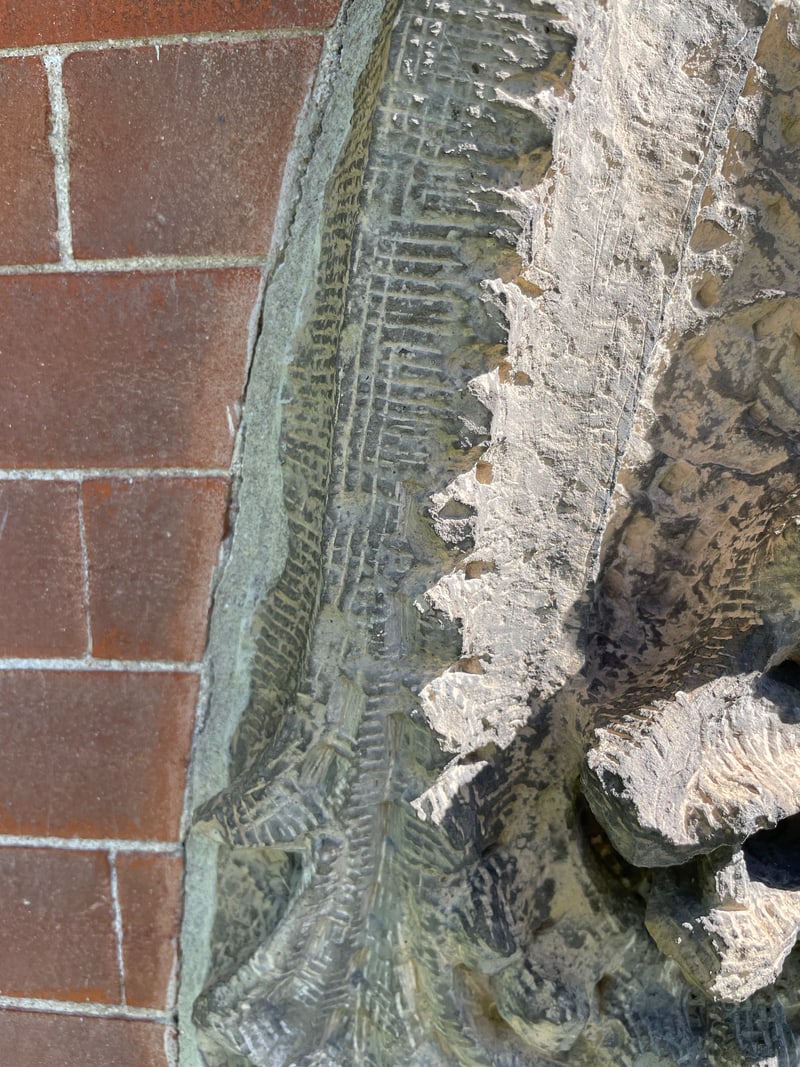
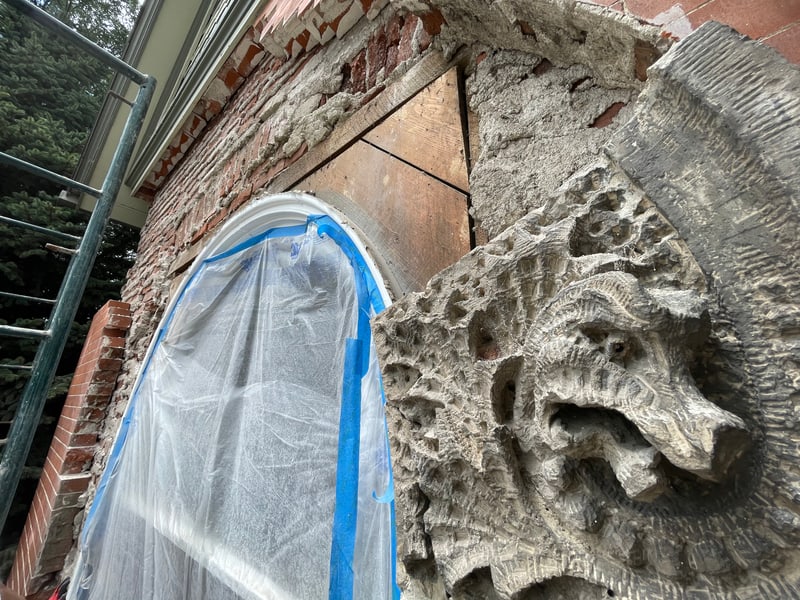
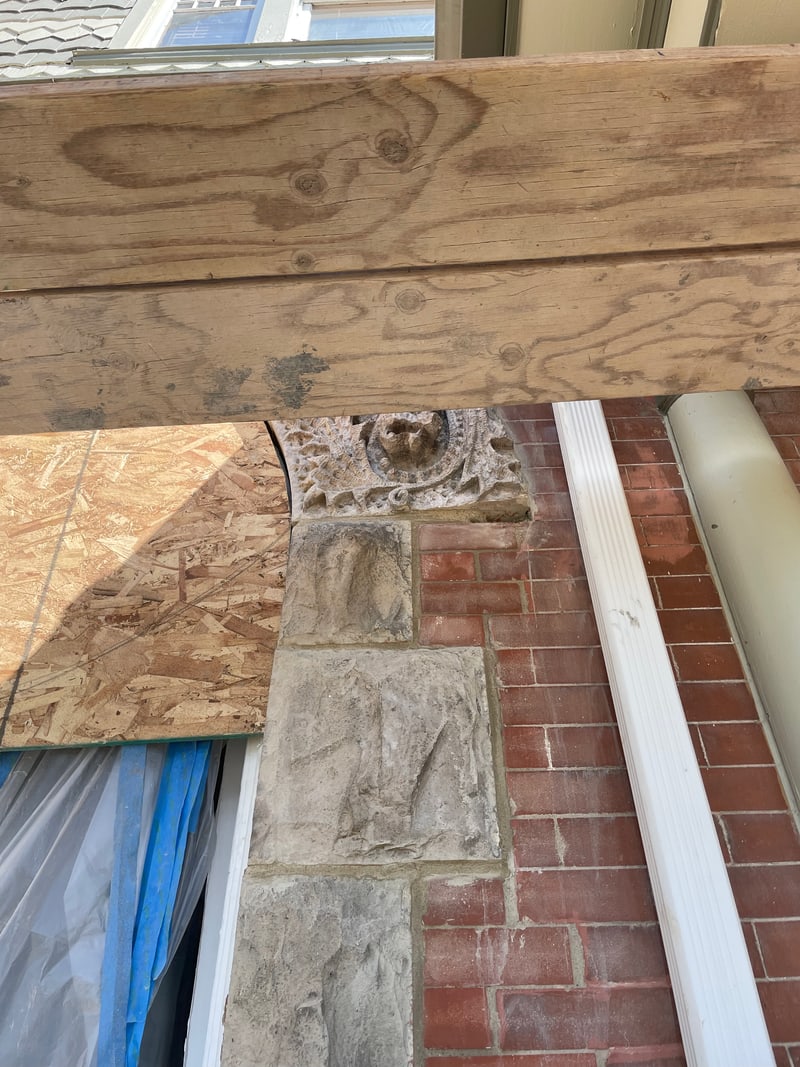
Earlier repairs had failed. We saw mismatched mortar and a poor earlier repair, including grey mortar smeared along the joints above the keystone (below). Repairs like that fail when the root cause is not properly assessed and found first.
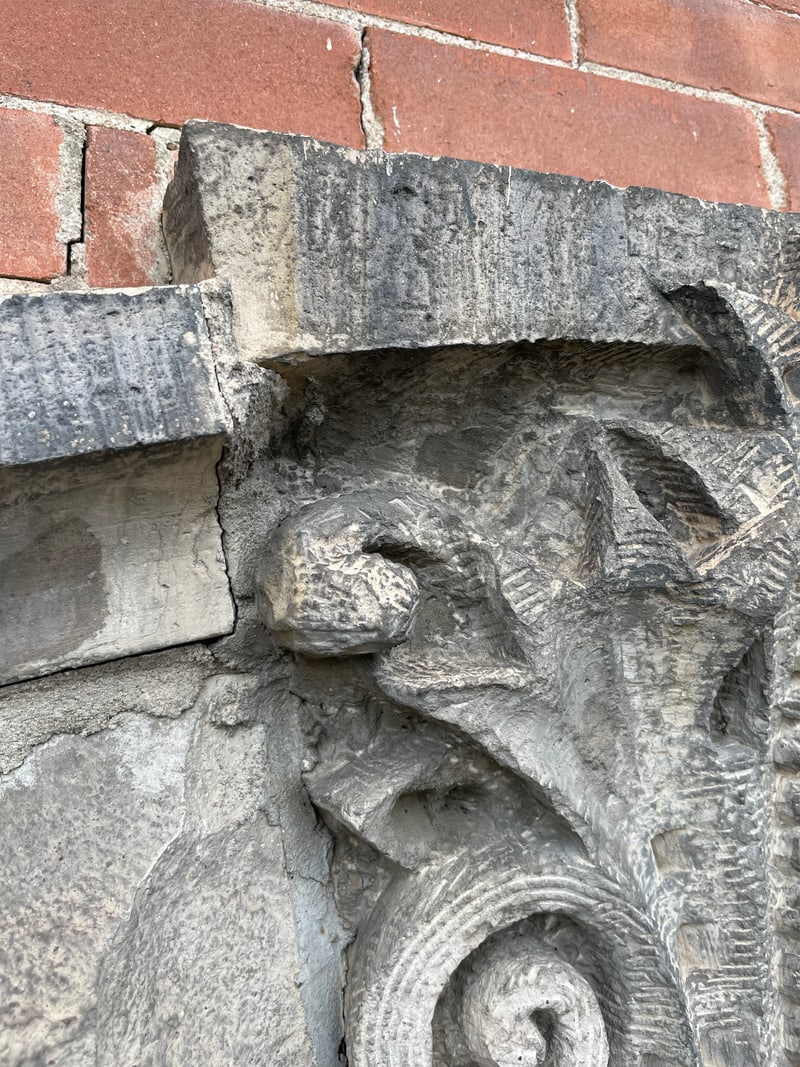
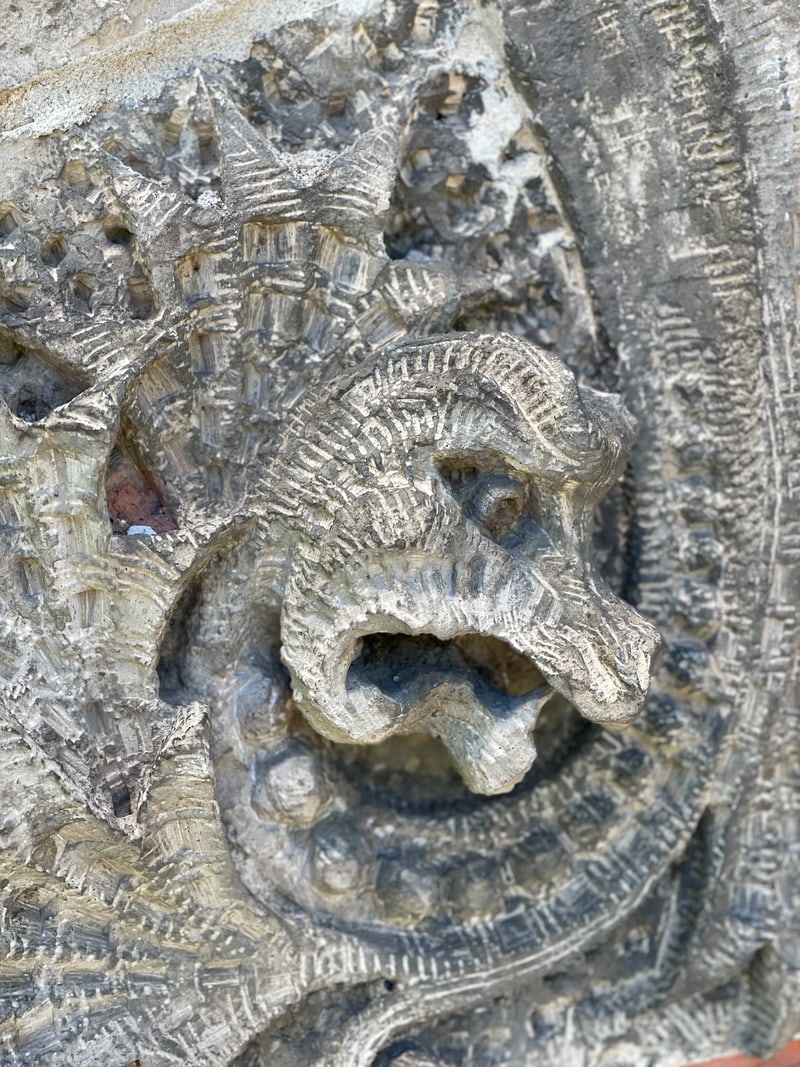
The carved stones themselves showed their age: a full crack through the dragon-face stone, weathered faces, and a second stone with an old break that had been patched with a visible mortar joint.
03 · Scope
Scope of Repairs
The plan: take it down systematically, put it back exactly
Resetting the stone alone would not have lasted while the wall behind it was moving, so the approach was systematic:
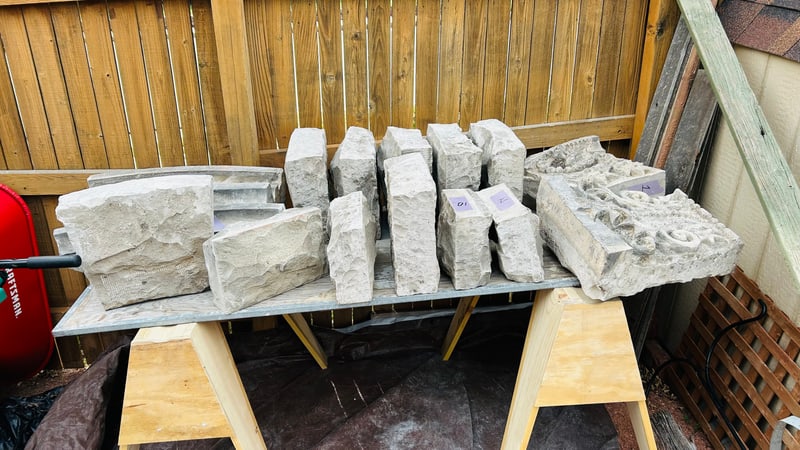
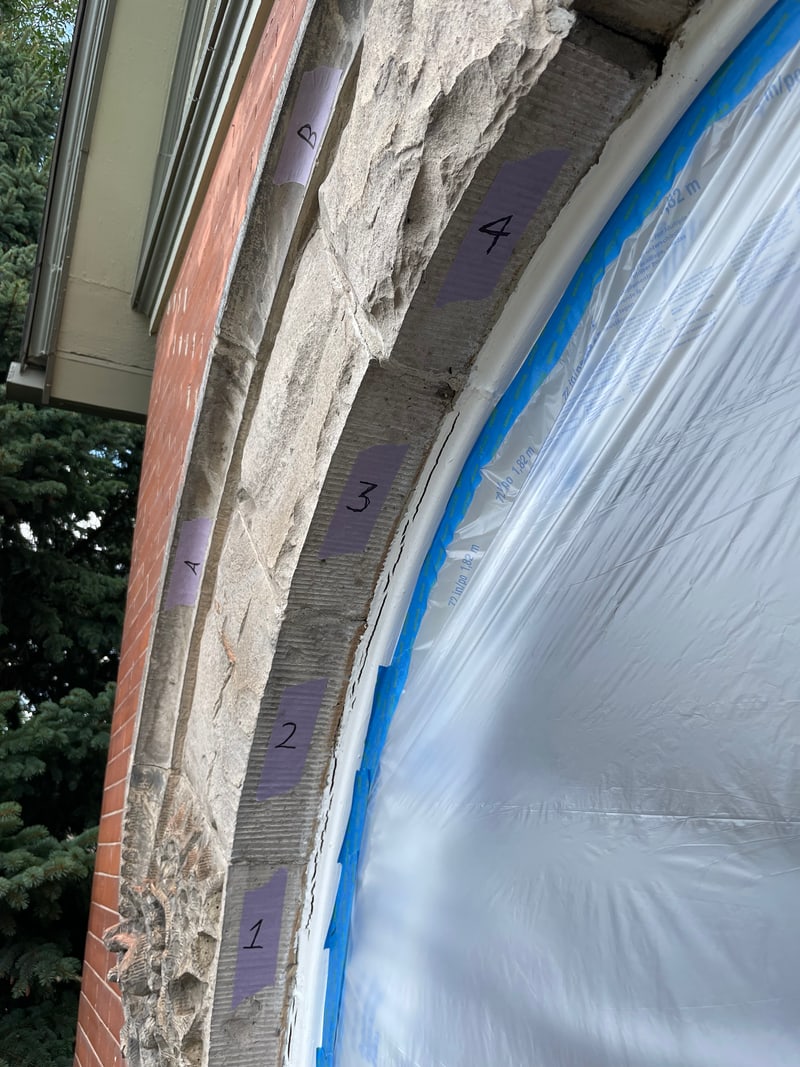
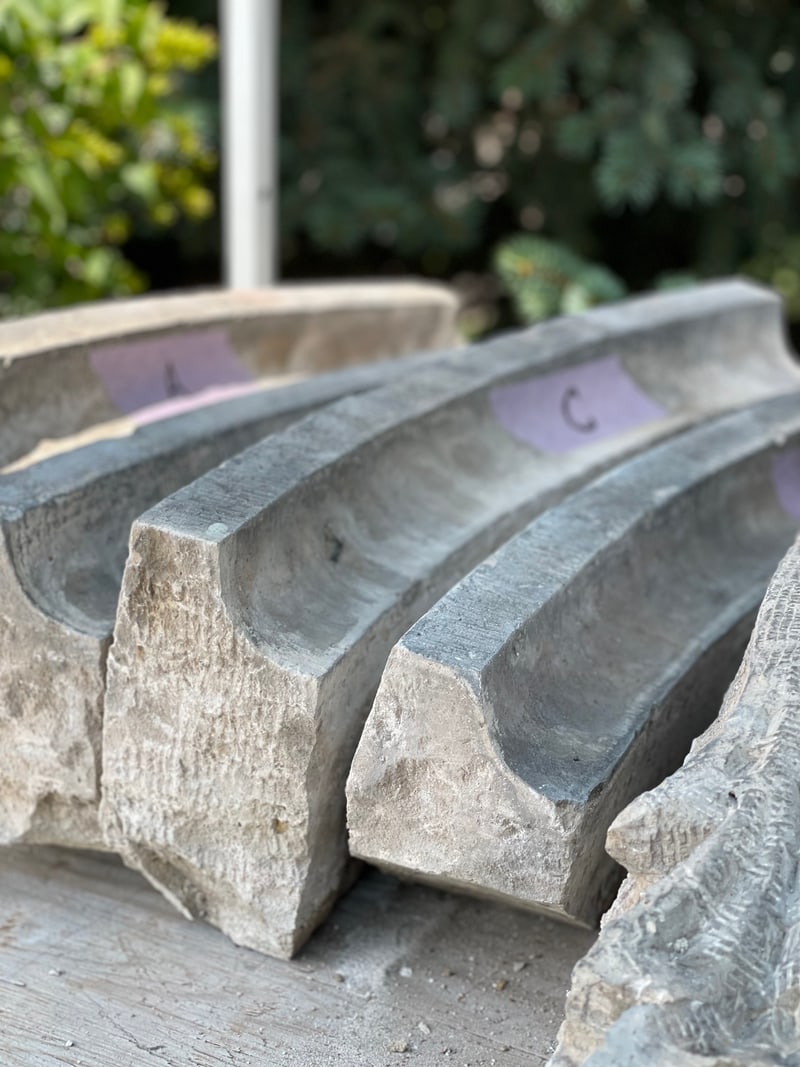
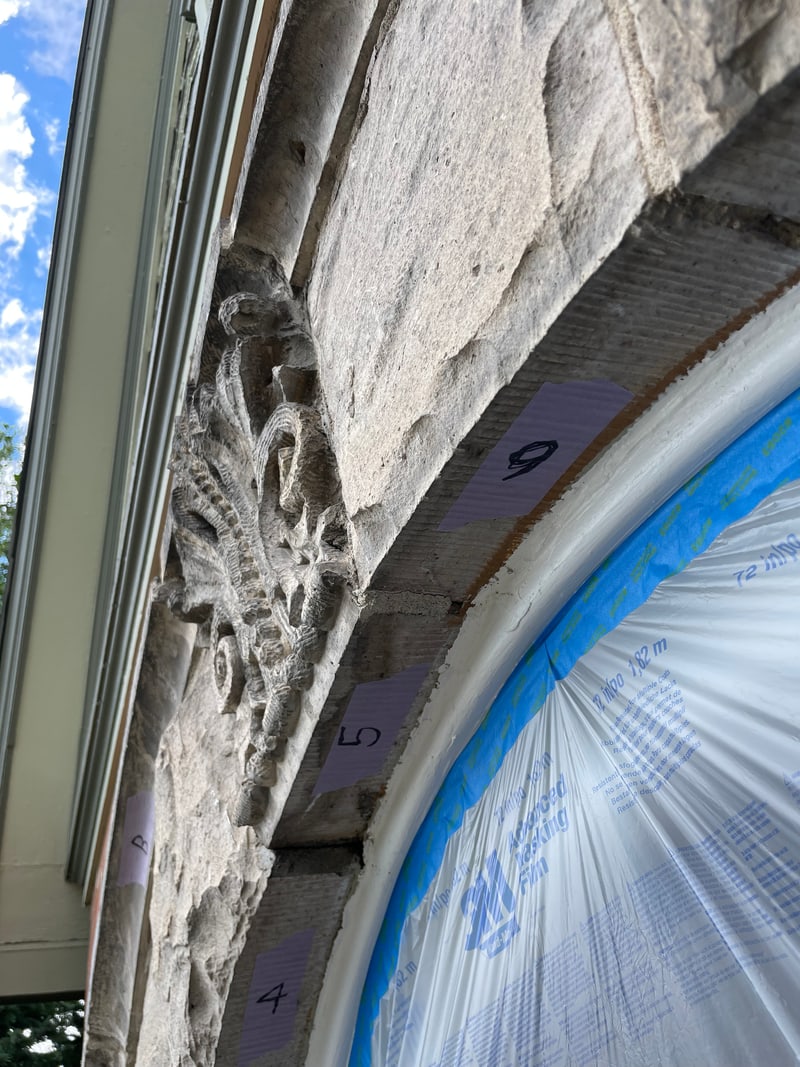
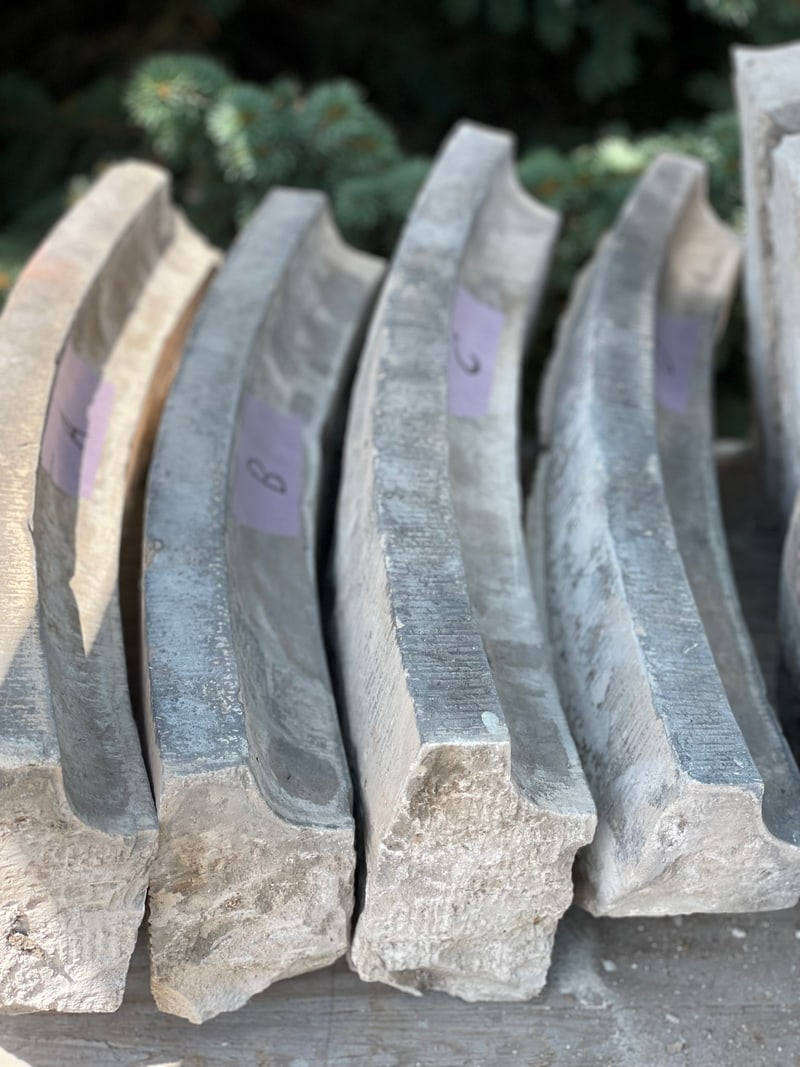
- Catalog every stone. Each stone in the arch was identified and its position recorded before it moved.
- Remove the arch and much of the outer brick on that front wall, so the stone and brick would not conflict.
- Repair the damaged stones in our shop.
- Reset the brick in lime mortar with no Portland cement, reusing the original brick.
- Reinstall the arch, each stone in its exact original placement.
04 · Methods
Cataloging, Conservation and Lime Mortar
Cataloging every stone
Before anything came out, each stone in the arch was identified and its position cataloged. In conservation that step matters as much as any repair: an original carved stone belongs in the exact place it was made for, and every stone on this arch went back there.
Stone conservation
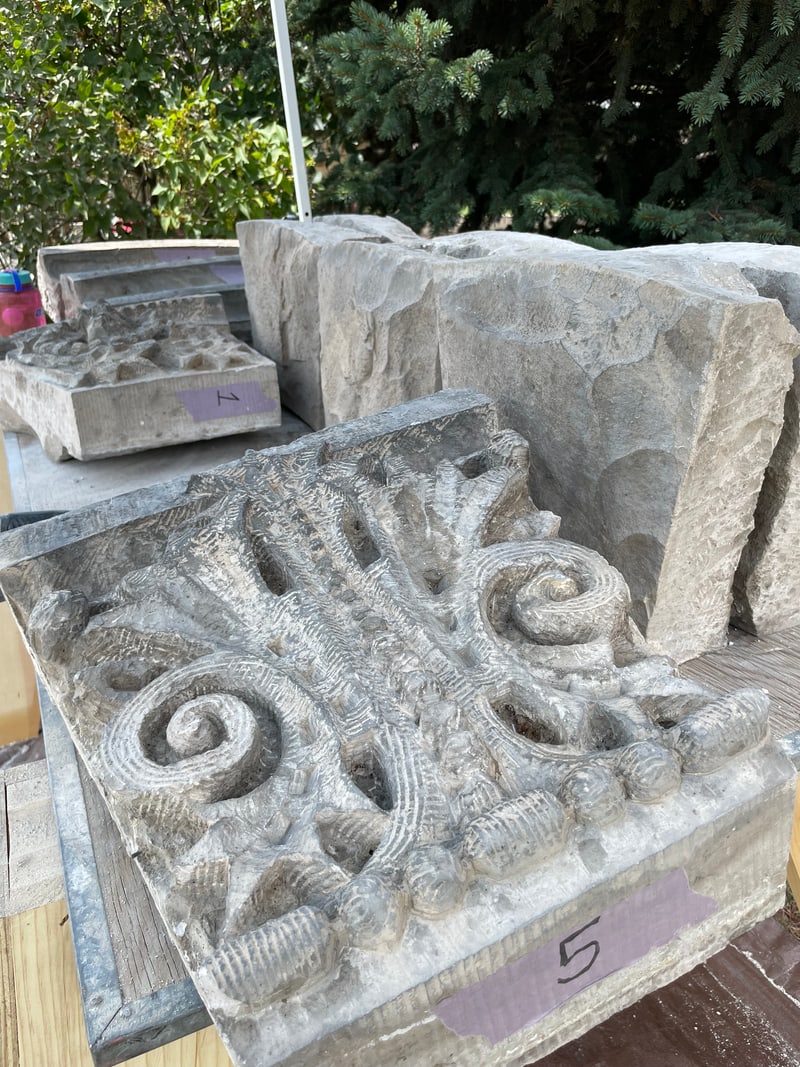
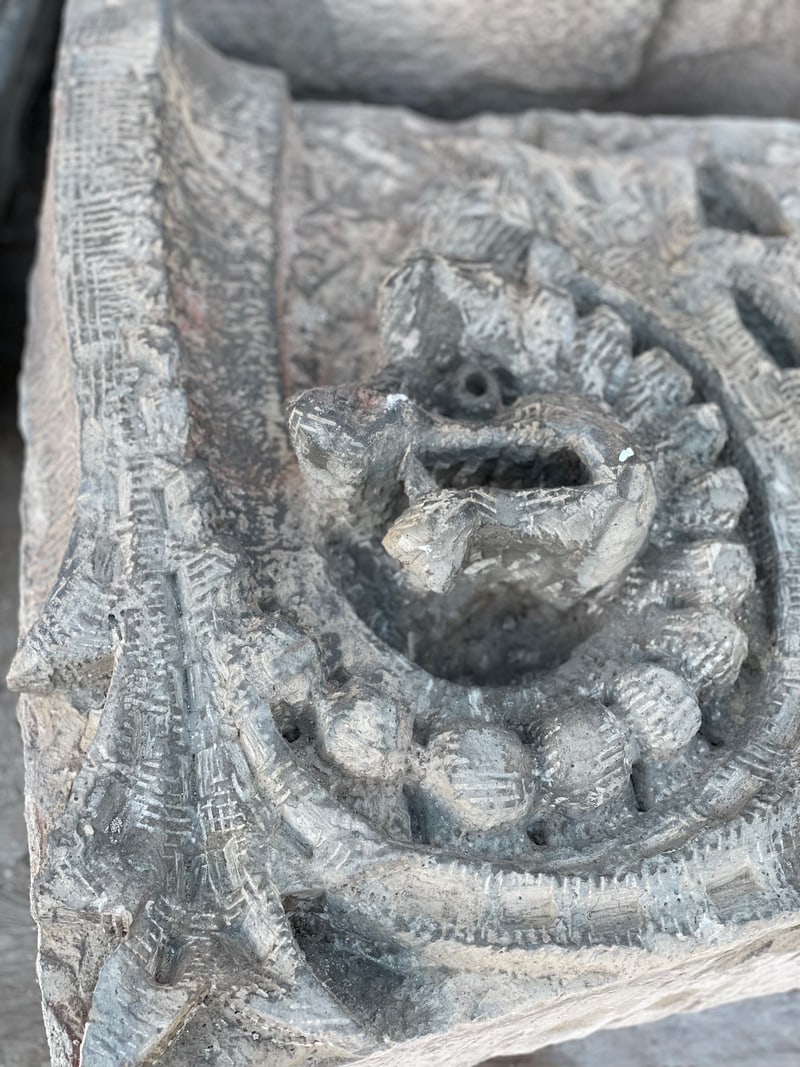
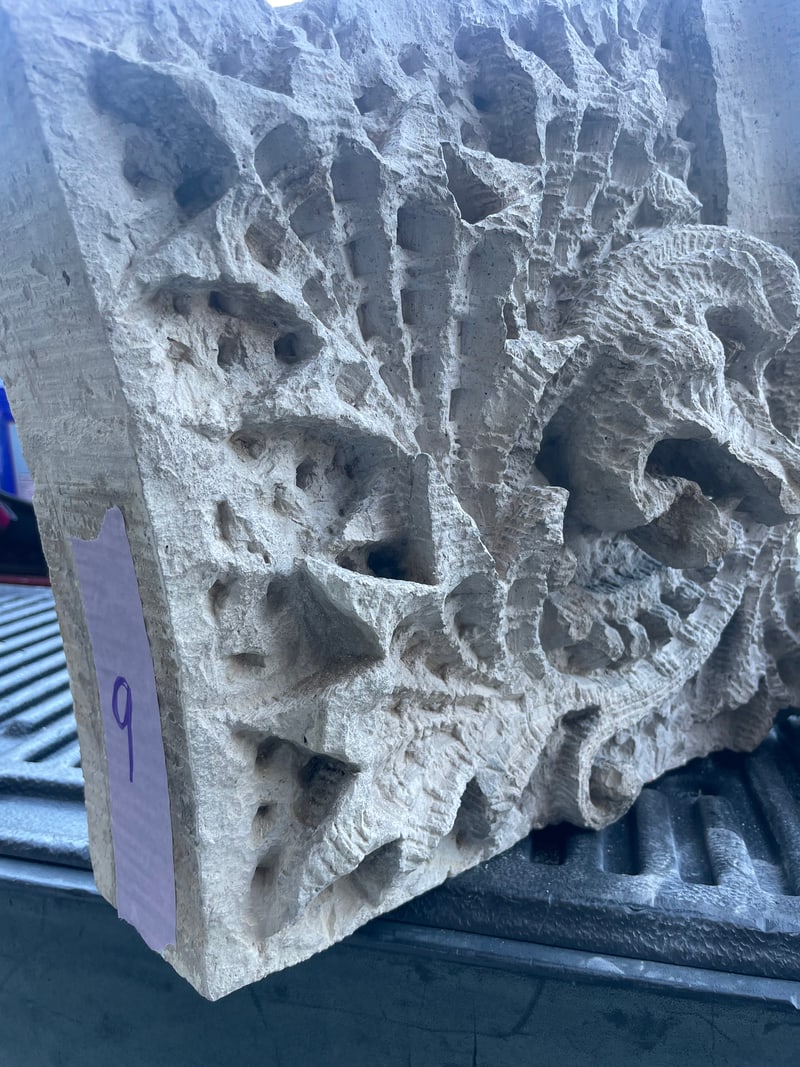
The two damaged stones were repaired in our shop rather than replaced. Original pieces were reattached using historic injection methods, and fine carved details were finished with matching stone patching mortars. The dragon-face stone repair is shown step by step below.
Brick and mortar
Much of the exterior brick wythe on the front wall was taken down. The original brick was salvaged, cleaned, prepped and reinstalled, and any damaged units were replaced in kind. The brick was reset in lime mortar with no Portland cement.
05 · Featured repair
The Dragon-Face Stone: Cracked, Removed, Reassembled and Back in Place
The historic carved dragon-face stone was the most damaged piece in the arch. Here is its repair in order.
1Cracked in place
The dragon-face stone had a full crack through it while it was still on the arch.
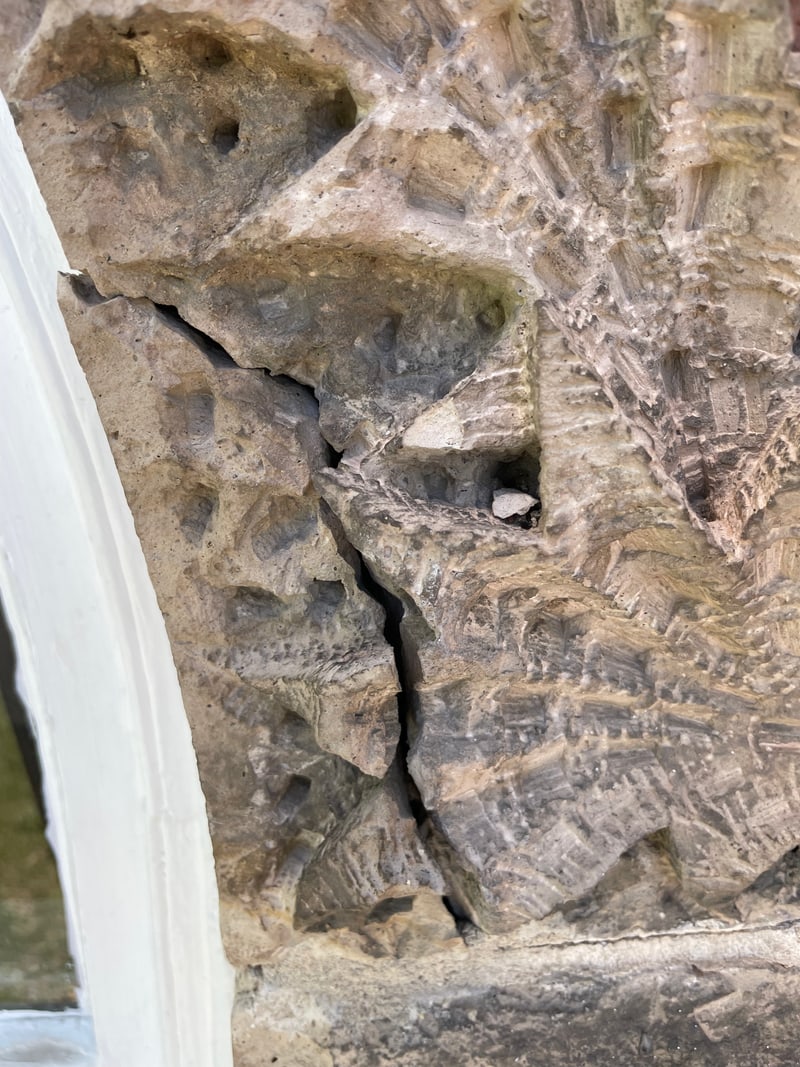
A crack running through the dragon-face stone beside the window. 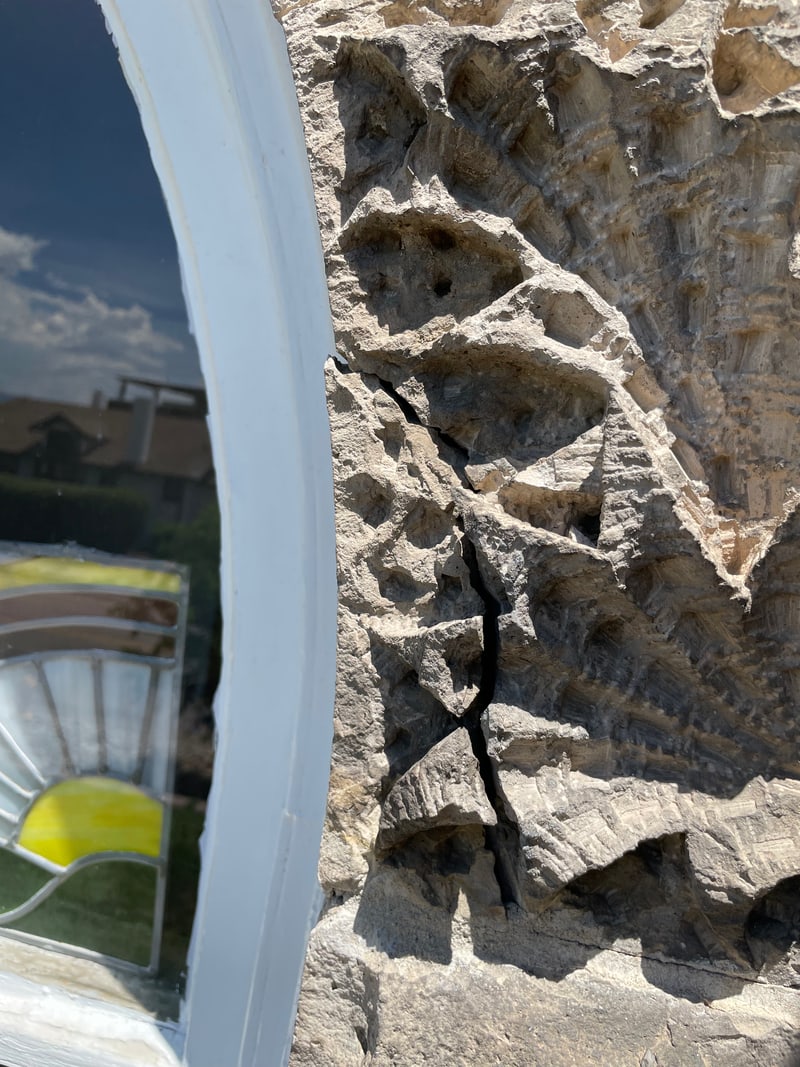
The open crack through its carved leaf ornament. 2Removed, and came apart
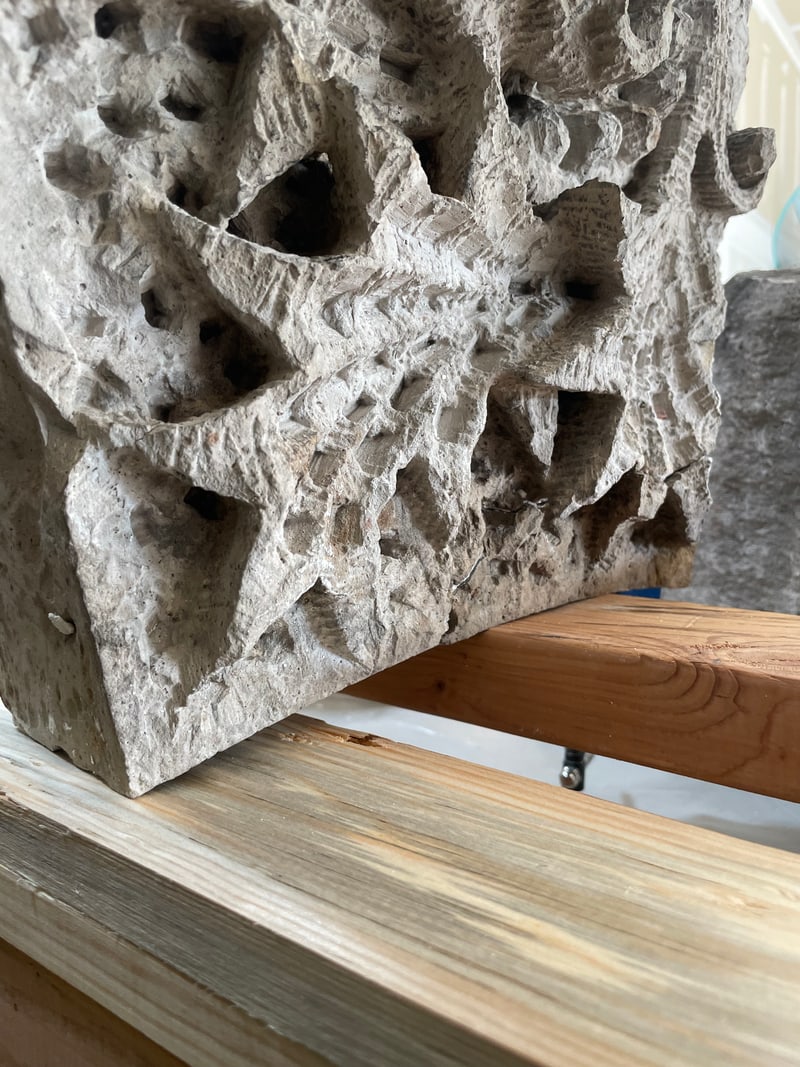
When it was removed, the stone fell apart. We kept the pieces intact and brought them to our shop.
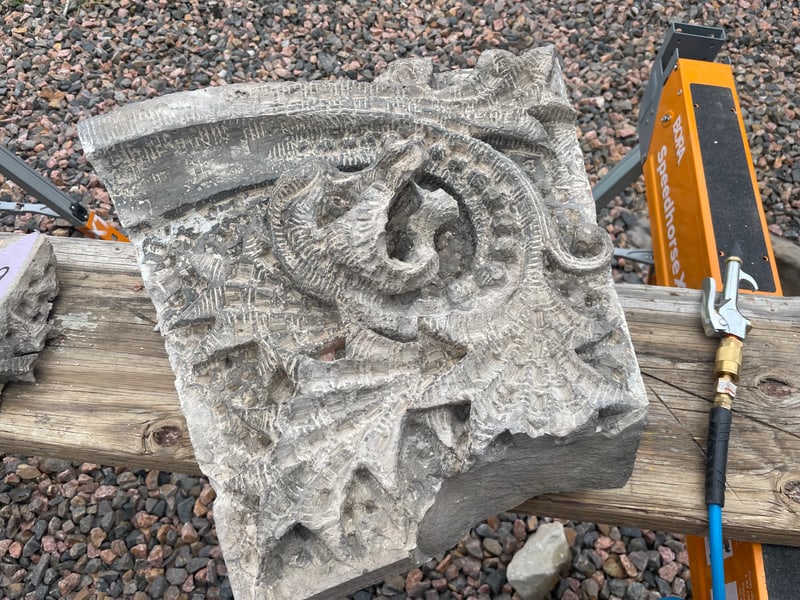
The dragon-face stone after removal, on sawhorses. 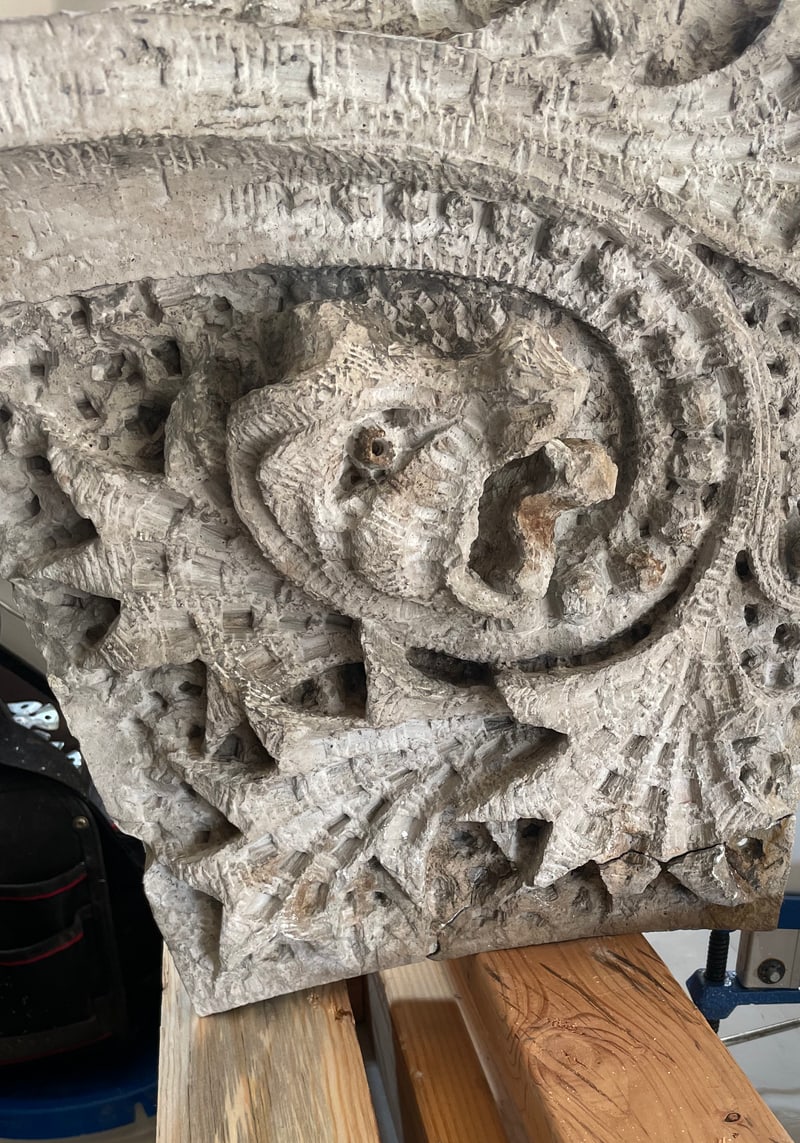
The dragon-face stone on timber blocks in the shop. 3Reattached and patched in the shop
We reattached the original pieces using historic injection methods, then finished the fine details with matching stone patching mortars.
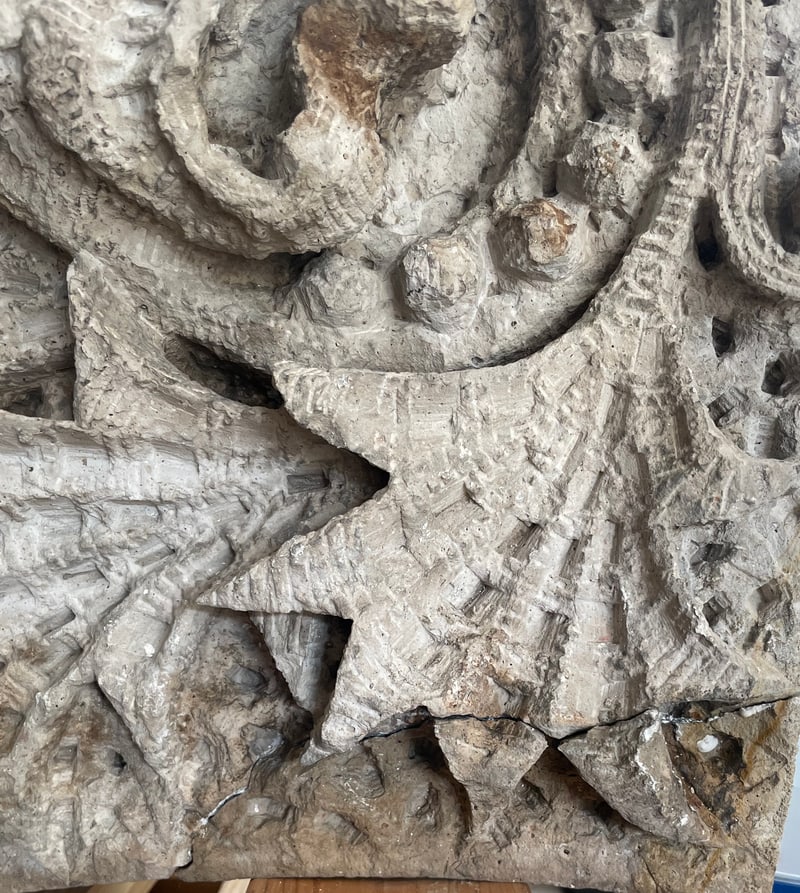
In the shop, the crack line visible along the carved edge. 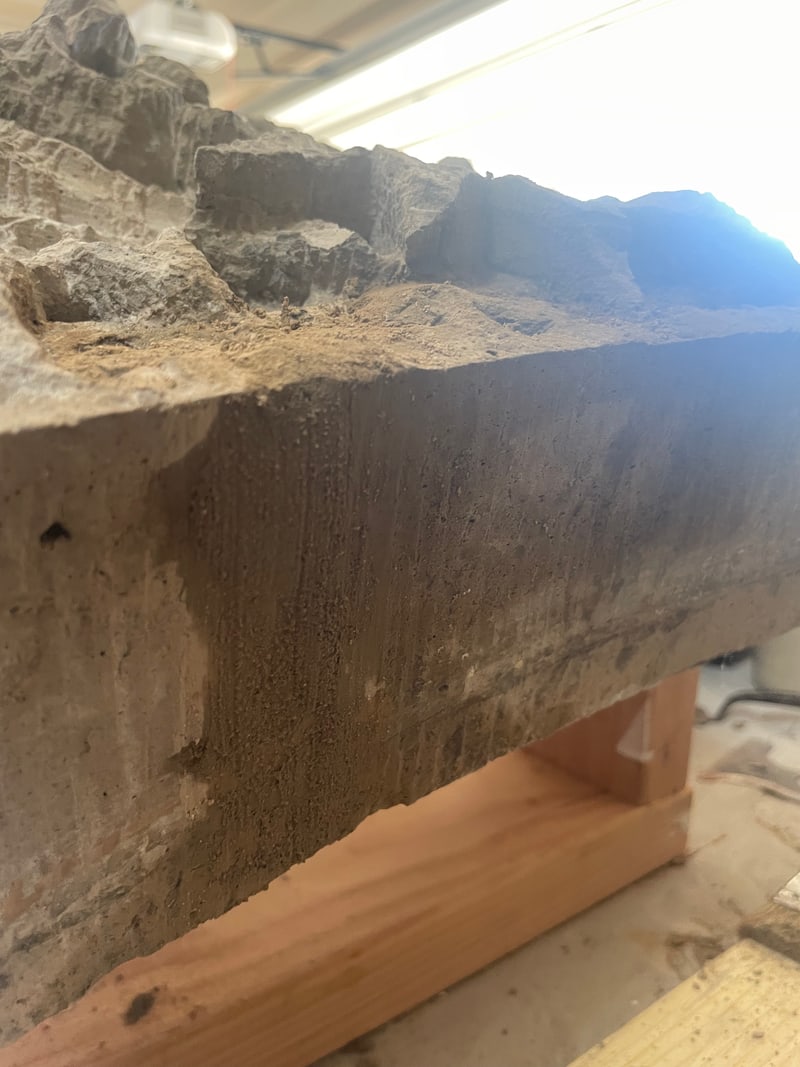
The underside of the stone on its timber stand. 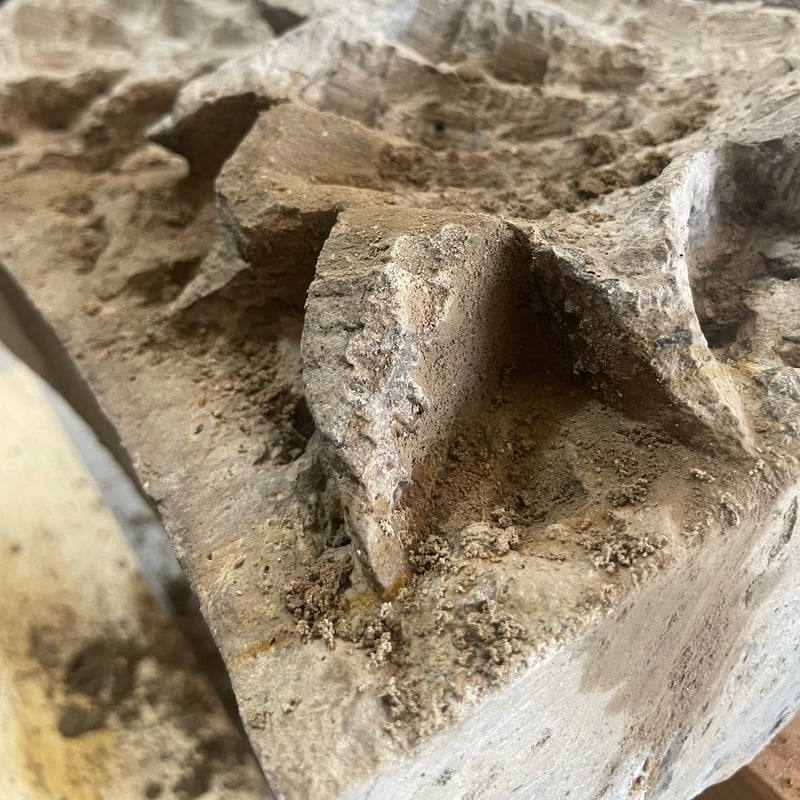
Fresh matching stone patching mortar on the carved leaf points. 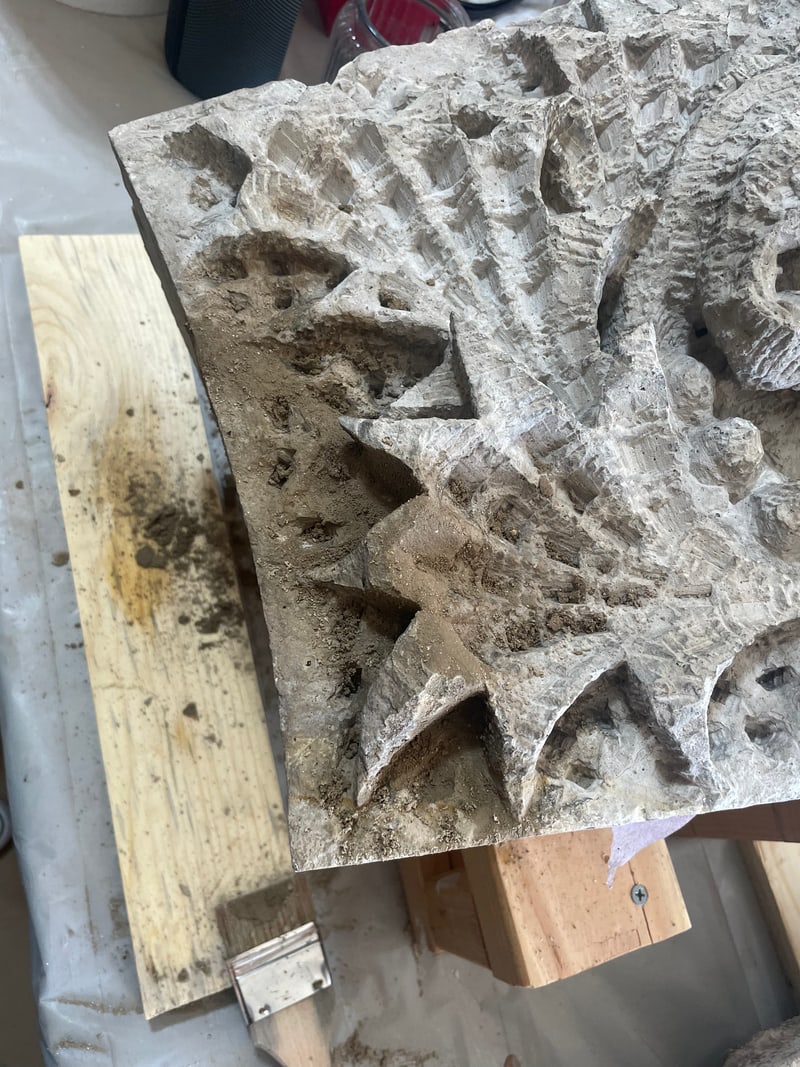
The stone after patching. 4The finished repair
The repaired dragon-face stone, with its carved detail intact and the crack no longer visible. It went back in its original place in the arch.
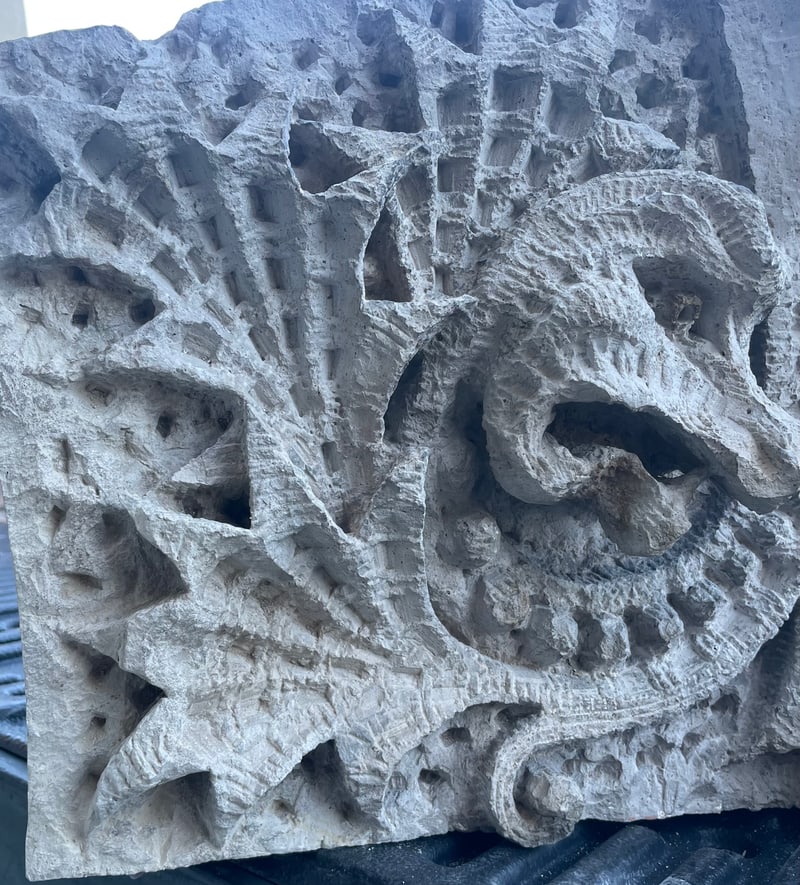
After The finished dragon-face stone repair.
The Second Stone: A Hidden Old Break
A second stone had a clean break on its side that someone had repaired earlier with a visible mortar joint. We removed that mortar joint and fused the piece back to the original stone so the break cannot be seen. It also went back in its original place.
06 · Conservation record
What We Kept and What We Replaced
Every original stone in the arch was kept and reinstalled in its original position. The brick was reset, reusing the original brick.
AllOriginal arch stones kept and reinstalled in place
- Every carved rhyolite stone in the arch, including the historic dragon faces
- The cracked dragon-face stone, reassembled from its original pieces
- The stone with the old side break, fused back to the original
- The original exterior brick, salvaged, cleaned and reinstalled
In kindReplaced only where damaged
- No stones were replaced.
- Any damaged brick units were replaced in kind.
07 · Results
Before and After: The Front Window Arch
The same view of the front window arch, before the work and after every stone was back in place.
Front window arch
08 · Neighborhood
Masonry Restoration in the Highlands
Highlands neighborhood
The Highlands, on the hill northwest of downtown Denver and including West Highland, are full of older brick homes with stone foundations and carved stone trim. We bring the same assessment, careful cataloging, stone conservation and lime mortar from this project to homes across the Highlands.
See Highlands masonry repair →
Services in the Highlands: stone repair · brick restoration · tuckpointing and repointing · brick cleaning · chimney repair · historic masonry restoration
09 · Questions
Highlands Brick and Stone Restoration Questions
How long did the Highlands brick and stone restoration take?
The project ran from the initial assessment in June 2023 to completion in late August 2023.
Why had the stone arch slipped?
The slipped arch was a symptom. Our assessment found stair-step cracking in the front brick tapering down into the stone, failed earlier repairs with mismatched mortar, and the outer layer of brick pulling away from the inner layer, with disruption visible even at the corner of the home.
Why take the arch and the brick down instead of patching?
Because the cause was in the wall. We removed the stone arch and much of the outer brick layer on the front wall so the two would not conflict, reset the brick and then reinstalled the stone.
Why does it matter that each stone went back in its original position?
In conservation, an original carved stone belongs in the exact place it was made for. We identified and cataloged every stone in the arch before it came out and reinstalled each one in its exact original placement.
Could the cracked dragon-face stone be saved?
Yes. It had a full crack through it and came apart when it was removed. We kept the pieces intact, reattached the original pieces in our shop using historic injection methods and finished the fine details with matching stone patching mortars so the crack cannot be seen.
Was any brick or stone replaced?
No stones were replaced. The original exterior brick was salvaged, cleaned and reinstalled; any damaged units were replaced in kind.
What mortar did you use?
Lime mortar, with no Portland cement.
Why did the earlier repairs fail?
During the assessment we saw mismatched mortar and a poor earlier repair. Repairs like these fail when the root cause is not properly assessed and found first; patching the symptom leaves the movement behind it in place.
Related Denver Masonry Restoration Projects


Tell us about your brick. We will take it from there.
Start Your Project Request
- Tell us what you're seeing on the brick or stone
- Send photographs of the brick or stone and areas of concern
- We review and qualify the inquiry, then recommend the appropriate next step